Last updated: September 20, 2026
Why add time zones to sites?
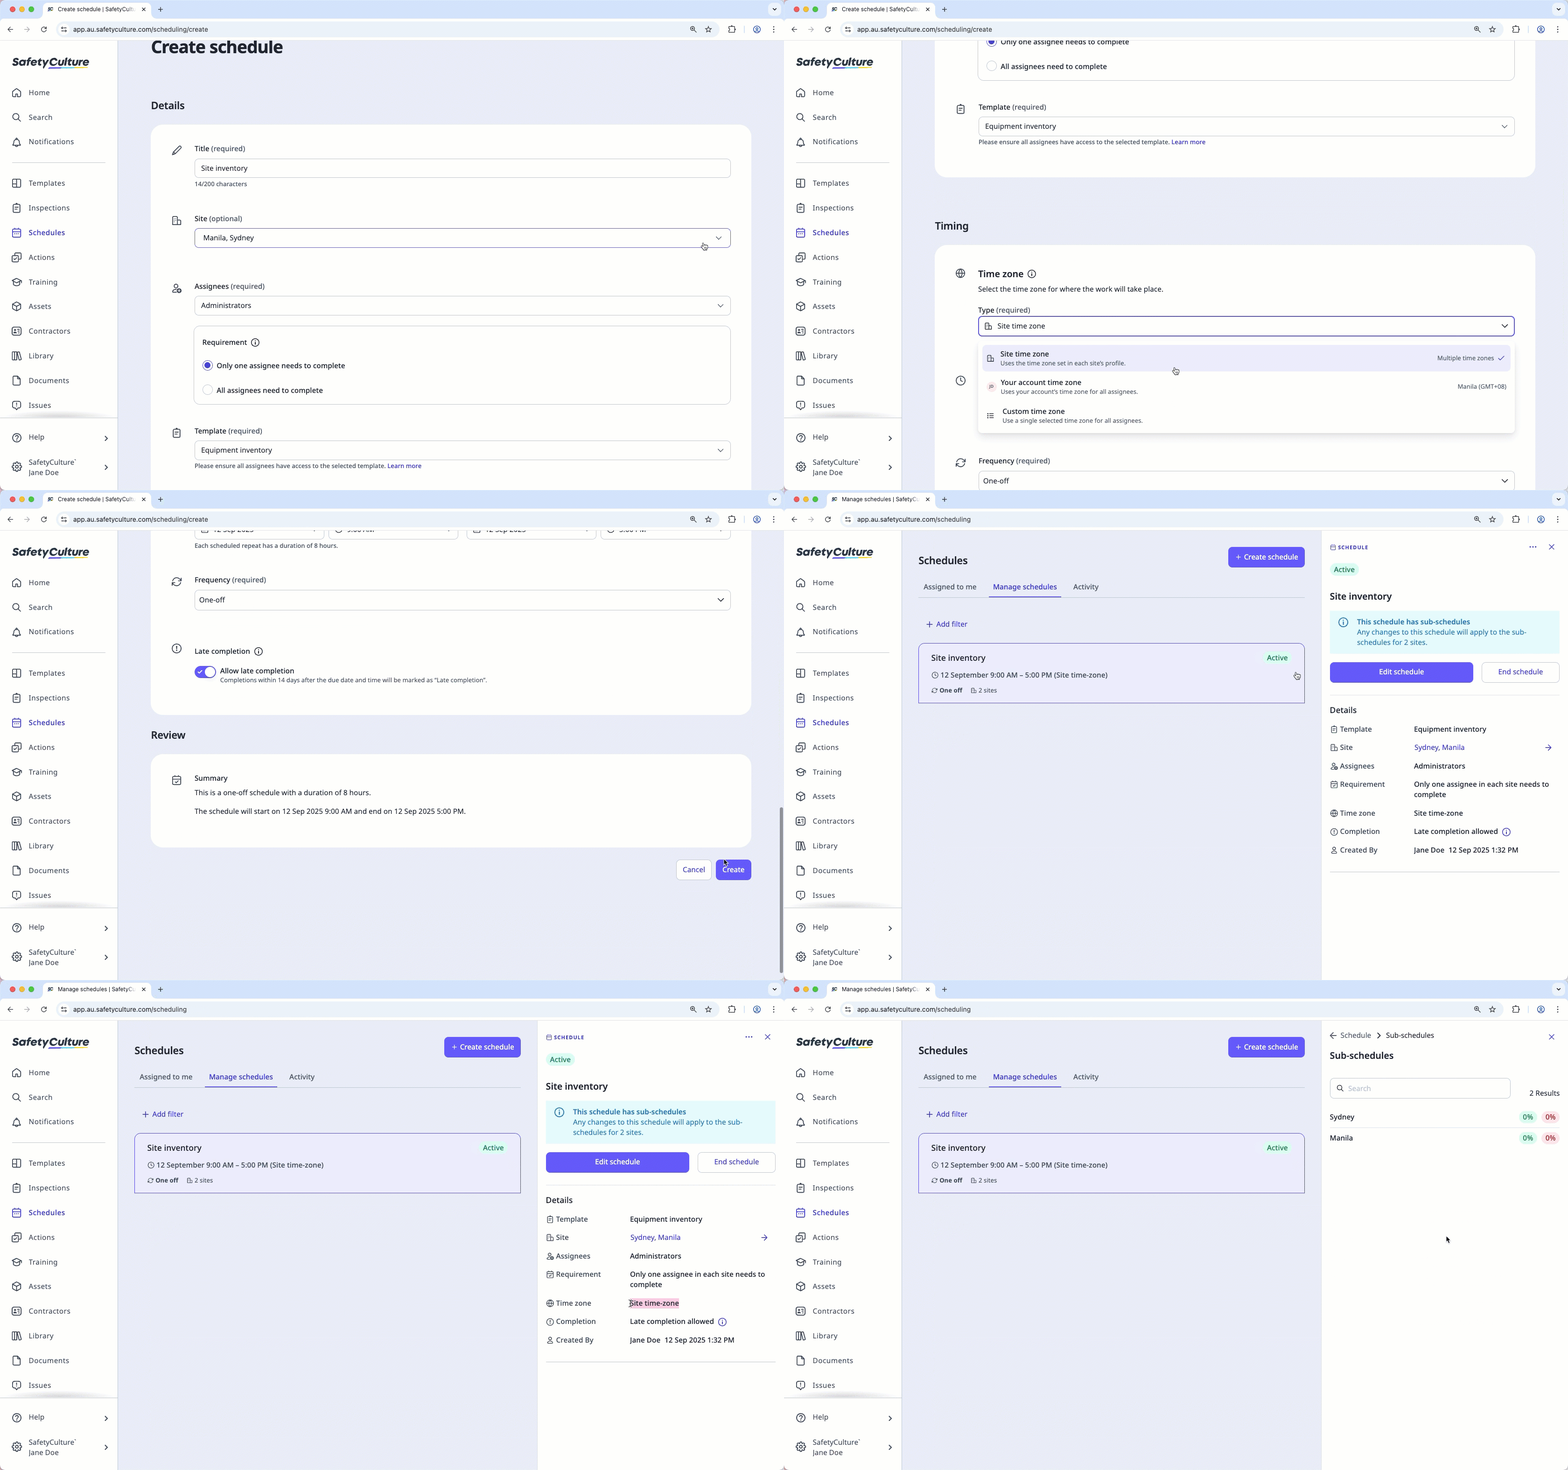
Site time zones let you set a specific time zone in each site’s profile so schedules created in the new Schedules experience aligns with that site’s time zone. This ensures consistent timing for all assignees, regardless of their account settings, so everyone knows exactly when schedules start and end. It’s especially useful for organizations managing multiple sites, where using a single fixed time zone can cause confusion or mismatched schedules.
For example, a schedule can be set for both the Sydney and Manila sites, and assignees will see it according to the time zone of the site they are a member of. By keeping schedules clear and consistent, site time zones cut down on errors and make it easier to manage operations across different locations.
What you'll need
Before you can add a time zone to a site or level, make sure the Time zone field is set to apply to sites.
Add or edit a site time zone
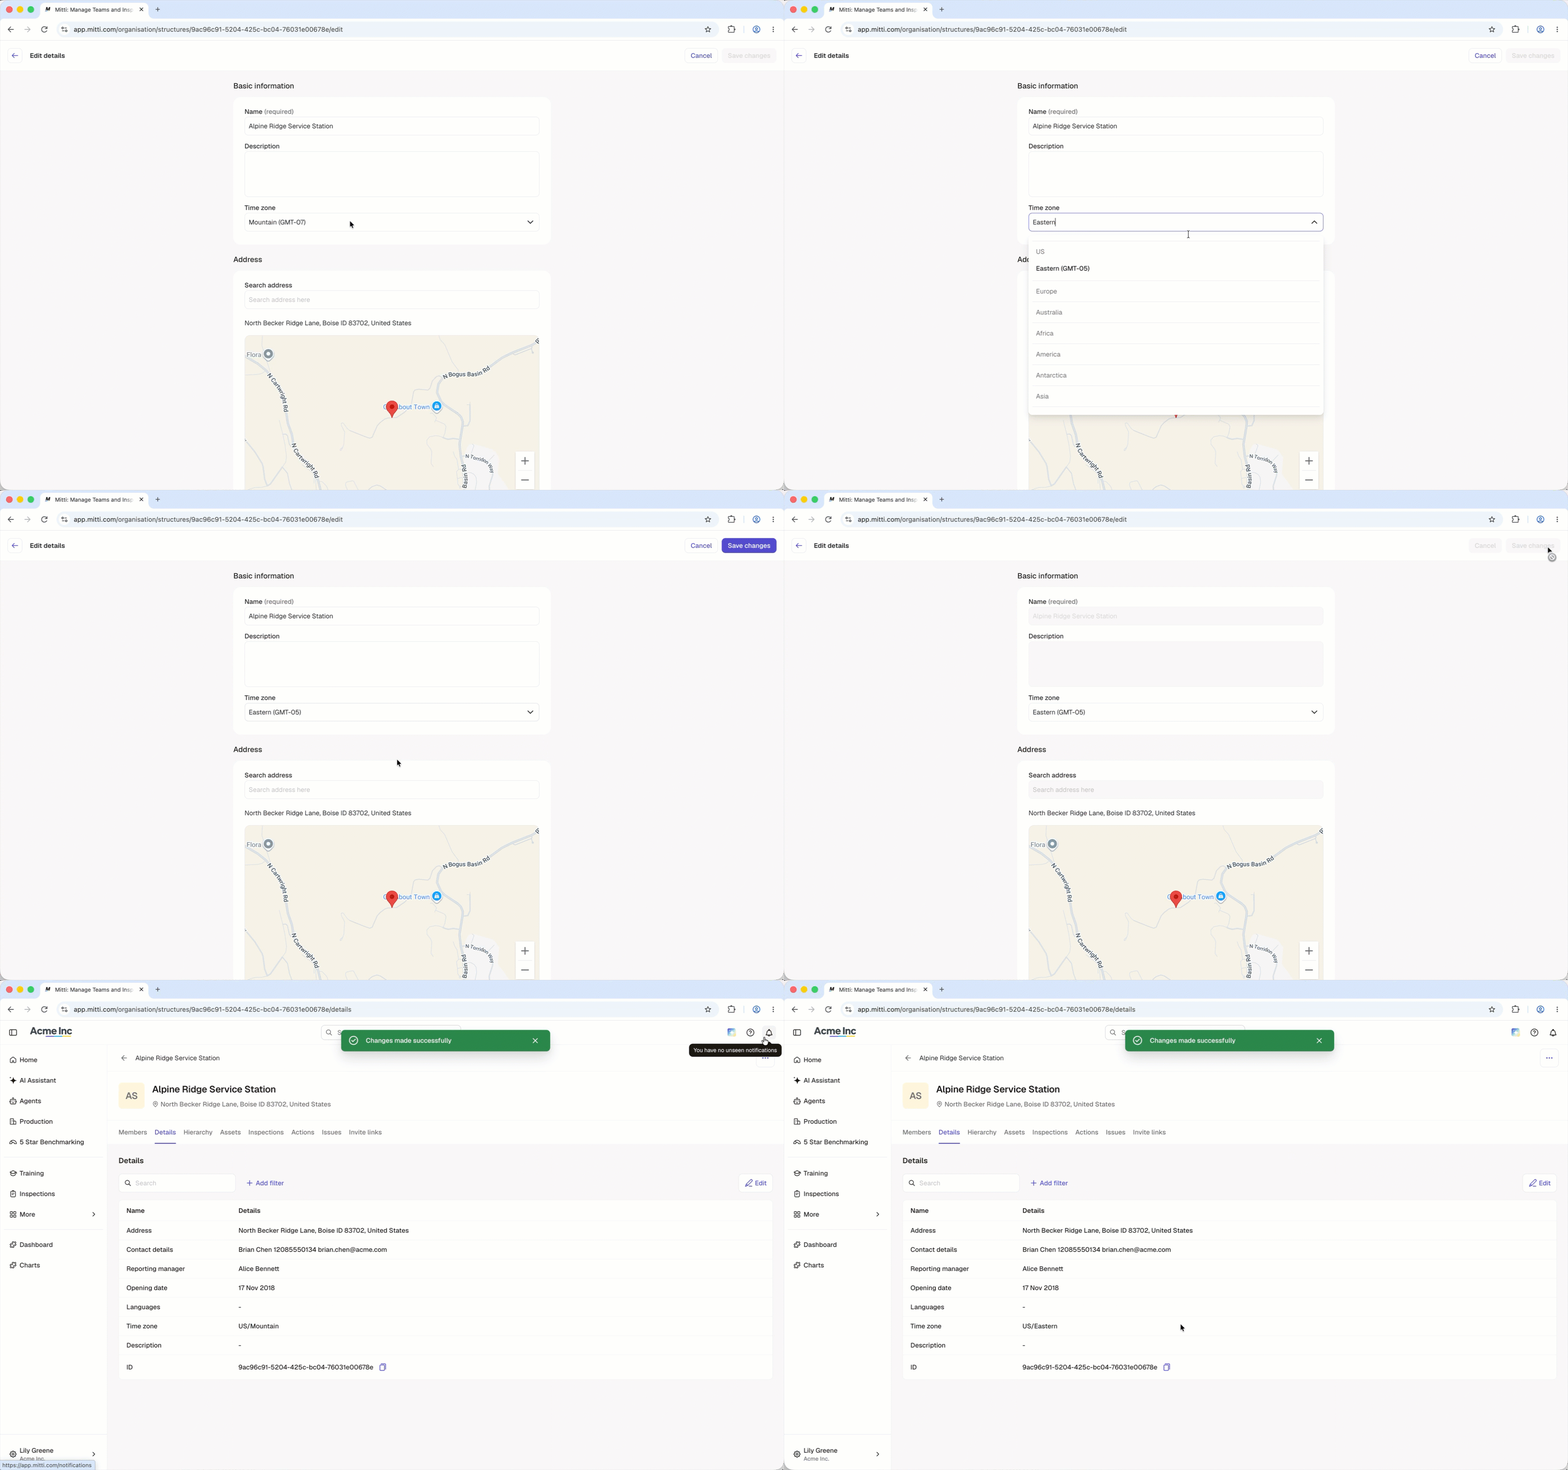
Click your organization name on the lower-left corner of the page and select Sites.
Click the name of the site, indicated by on its left-hand side.
Select the Details tab.
Click Edit on the upper-right of the page.
In the Time zone section, click the dropdown menu to search and select the time zone.
Click Save changes on the upper-right of the page.
Bulk add site time zones
Click your organization name on the lower-left corner of the page and select Sites.
Check the sites' or levels' boxes and click Apply time zone on the lower-right corner of the page.
In the side panel, click the dropdown menu and select the time zone.
Click Save and apply.
If the sites you selected have bottom-level sites, click Save and apply in the pop-up window.
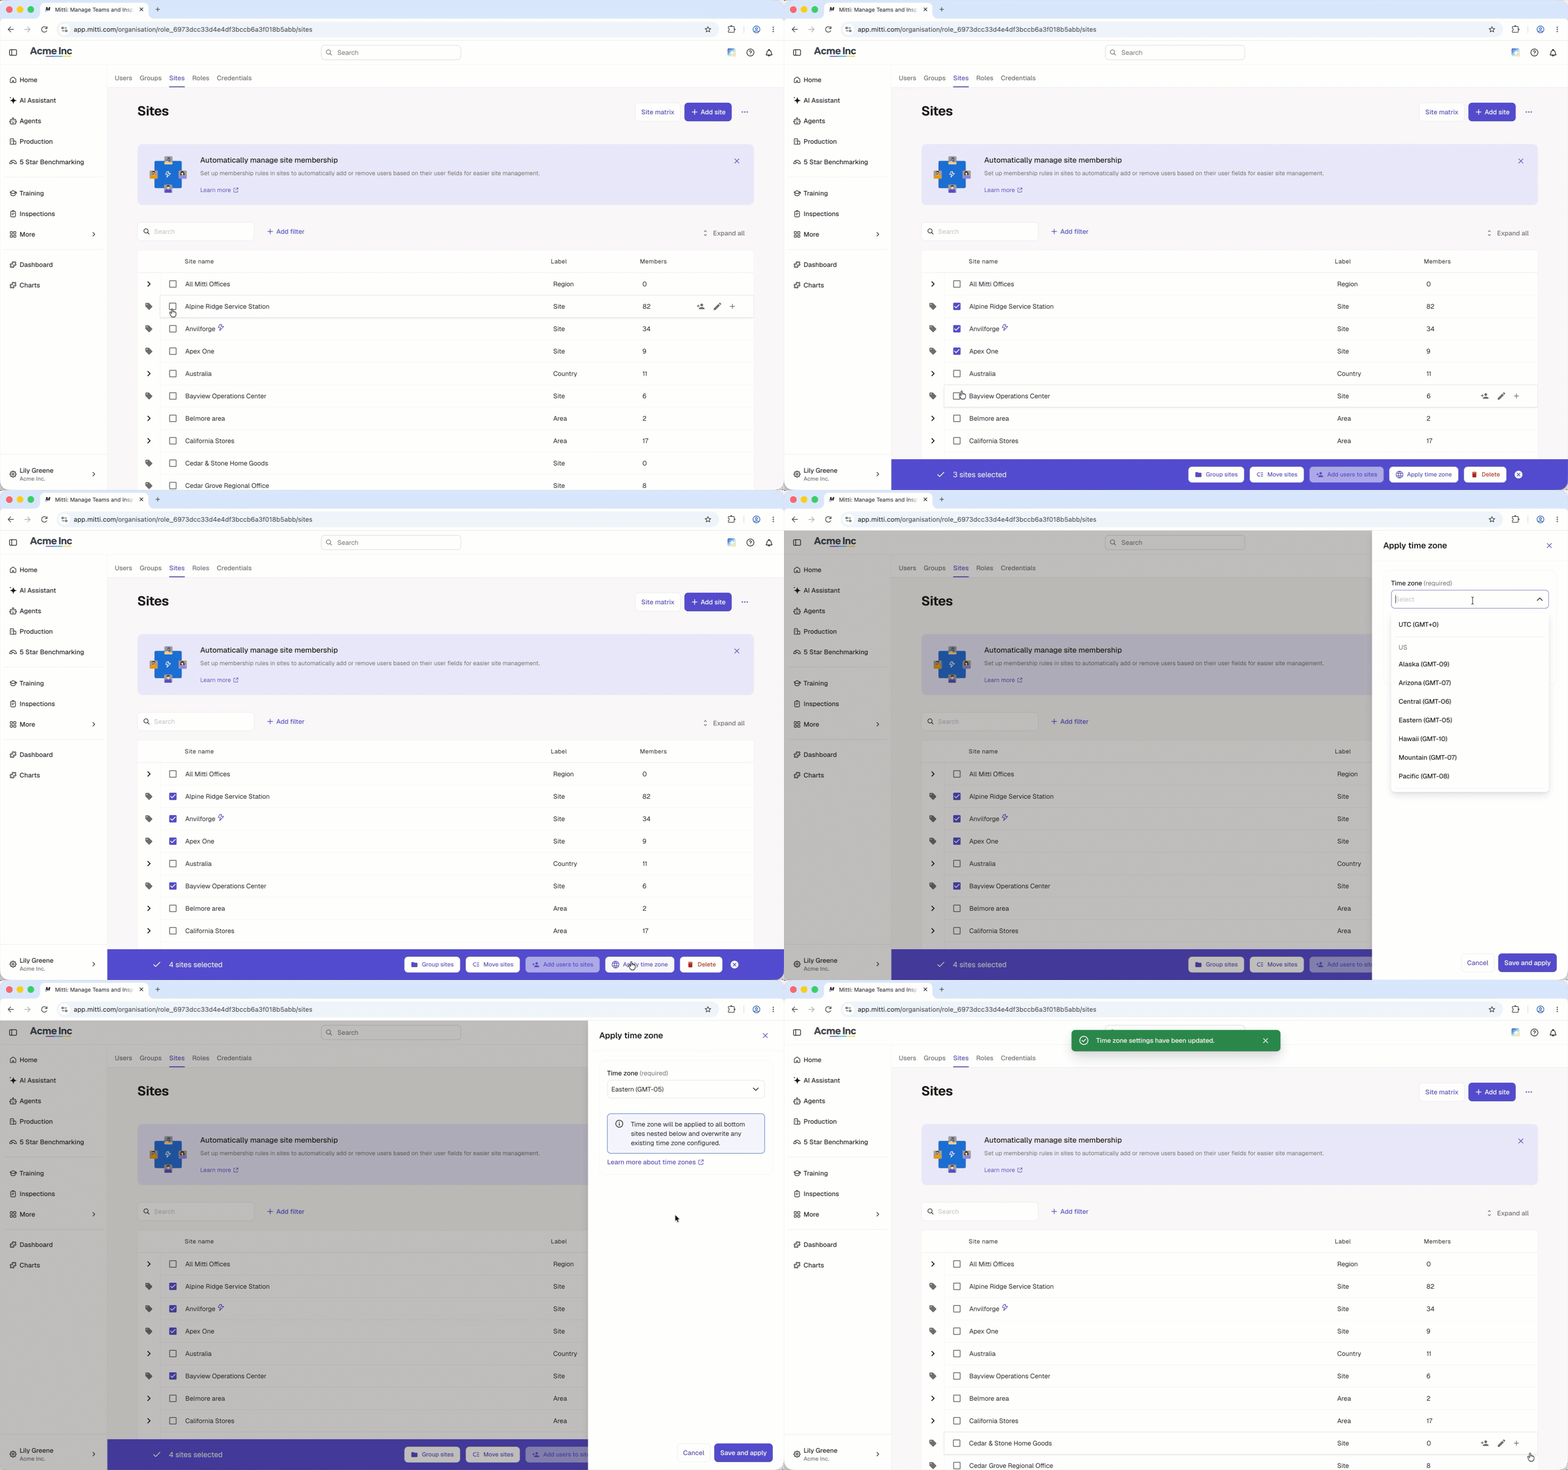
When you bulk add a time zone to higher levels, all site nested below it will automatically follow the new time zone, overriding any existing ones applied.
Frequently asked questions
Need more help?
Was this page helpful?