Last updated: September 18, 2026
This feature is currently in Early Access. If you're interested, please contact our customer support team or your customer success manager to check if your organization is eligible.
What is Construction?
You already run your work in Mitti, but the inspections, actions, issues, and assets on a site are not tied to the project they belong to. There is also no live view of who is on site doing that work. The Construction module ties both the records and the people to the project. It appears in the sidebar for construction organizations so you can work across every project you run or narrow down to one.
There are two parts to it. Both are built on what your organization already has in Mitti, which is worth understanding before you set anything up.
Project Overview lists every project you have access to, and you can view your projects as a grid, as a hierarchy, or on a map. Open a project and you get its summary, its location, the features connected to it, and who is currently signed on.
Sign On handles the gate, so workers and visitors sign themselves on at a shared kiosk or from a QR code. Every entry is kept in an attendance register you can correct later. A visitor does not need a Mitti account to sign on. They are created as a user on a guest seat, so their visits are recorded.
A project in Construction is a site in Mitti, so its members, permissions, and data carry straight across. Items linked to a site are tied to your projects, too.
Setting up a project is setting up a site, and editing one changes the site everywhere it appears in Mitti. Projects sit at the lowest level of your site structure.
Get started as an admin
You set up Construction once for your organization, then once for each project to allow your team or anyone to sign on to your sites.
Access Construction
Everyone in your organization can open the Construction module, and what you can do in it depends on your permissions. Your organization needs to be on Premium Plan or Enterprise Plan. To manage projects and to set up Sign On, you need the "Platform management: Sites" permission.
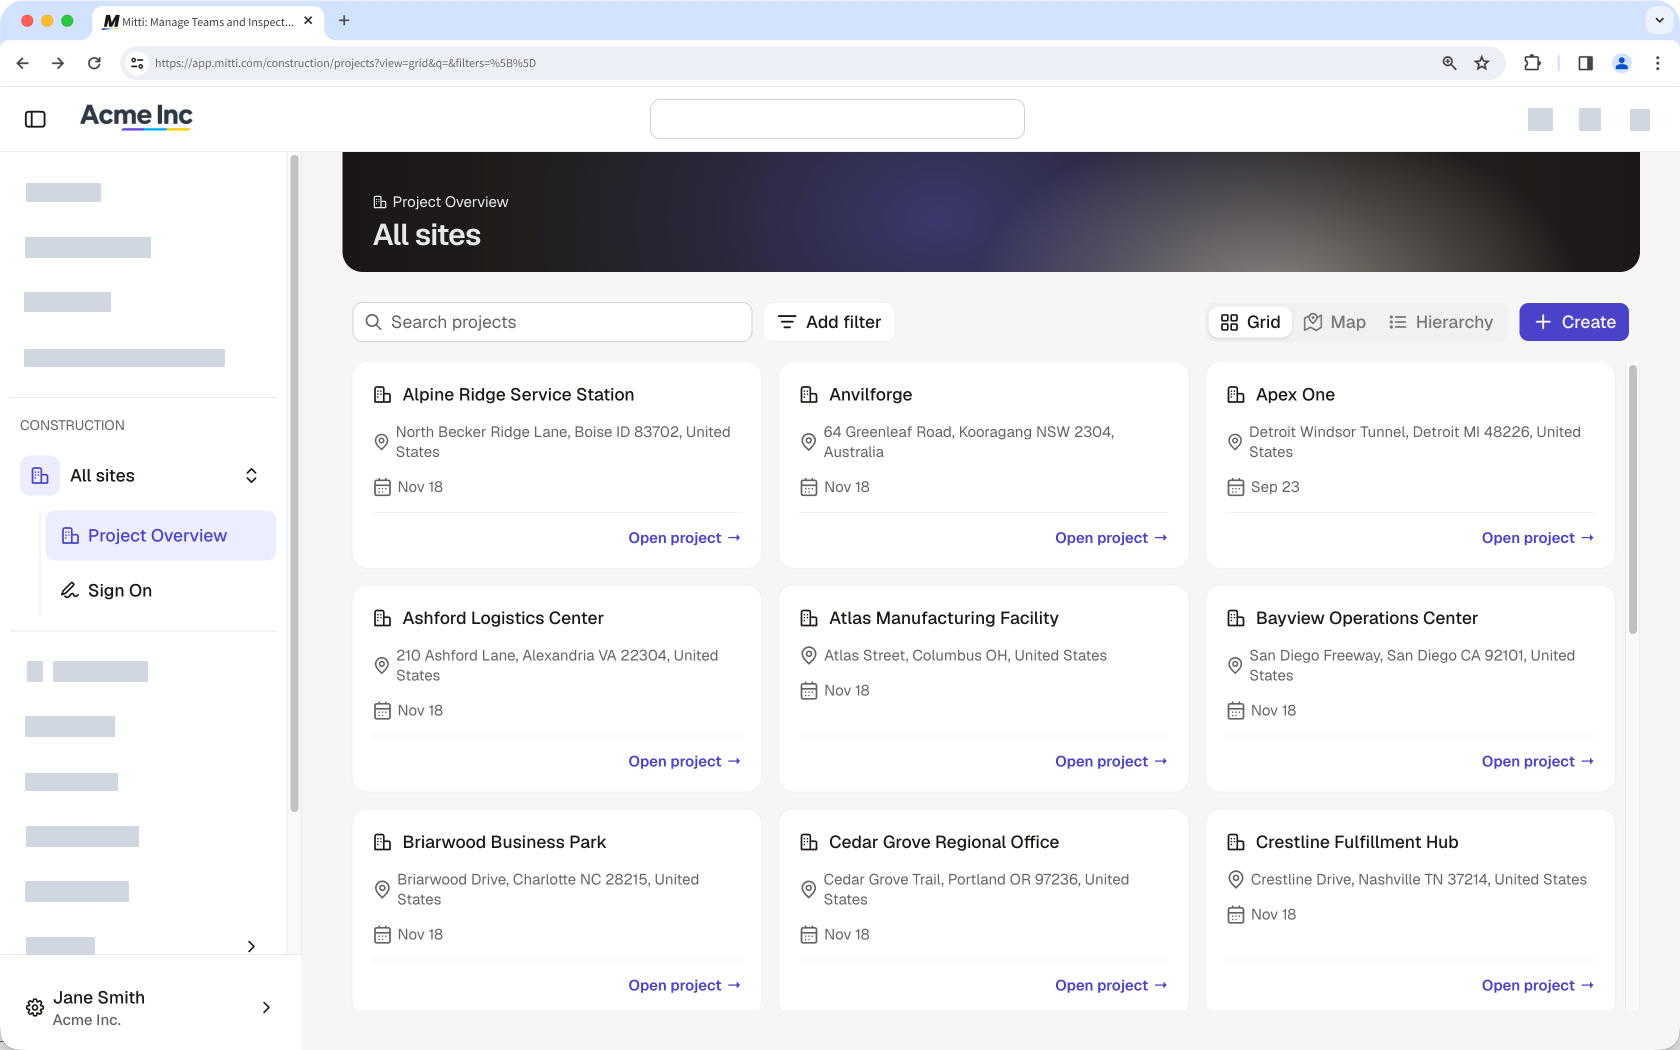
Construction is available via the web app. Kiosk mode and QR code sign on both run in a browser on a shared device.
Create your projects
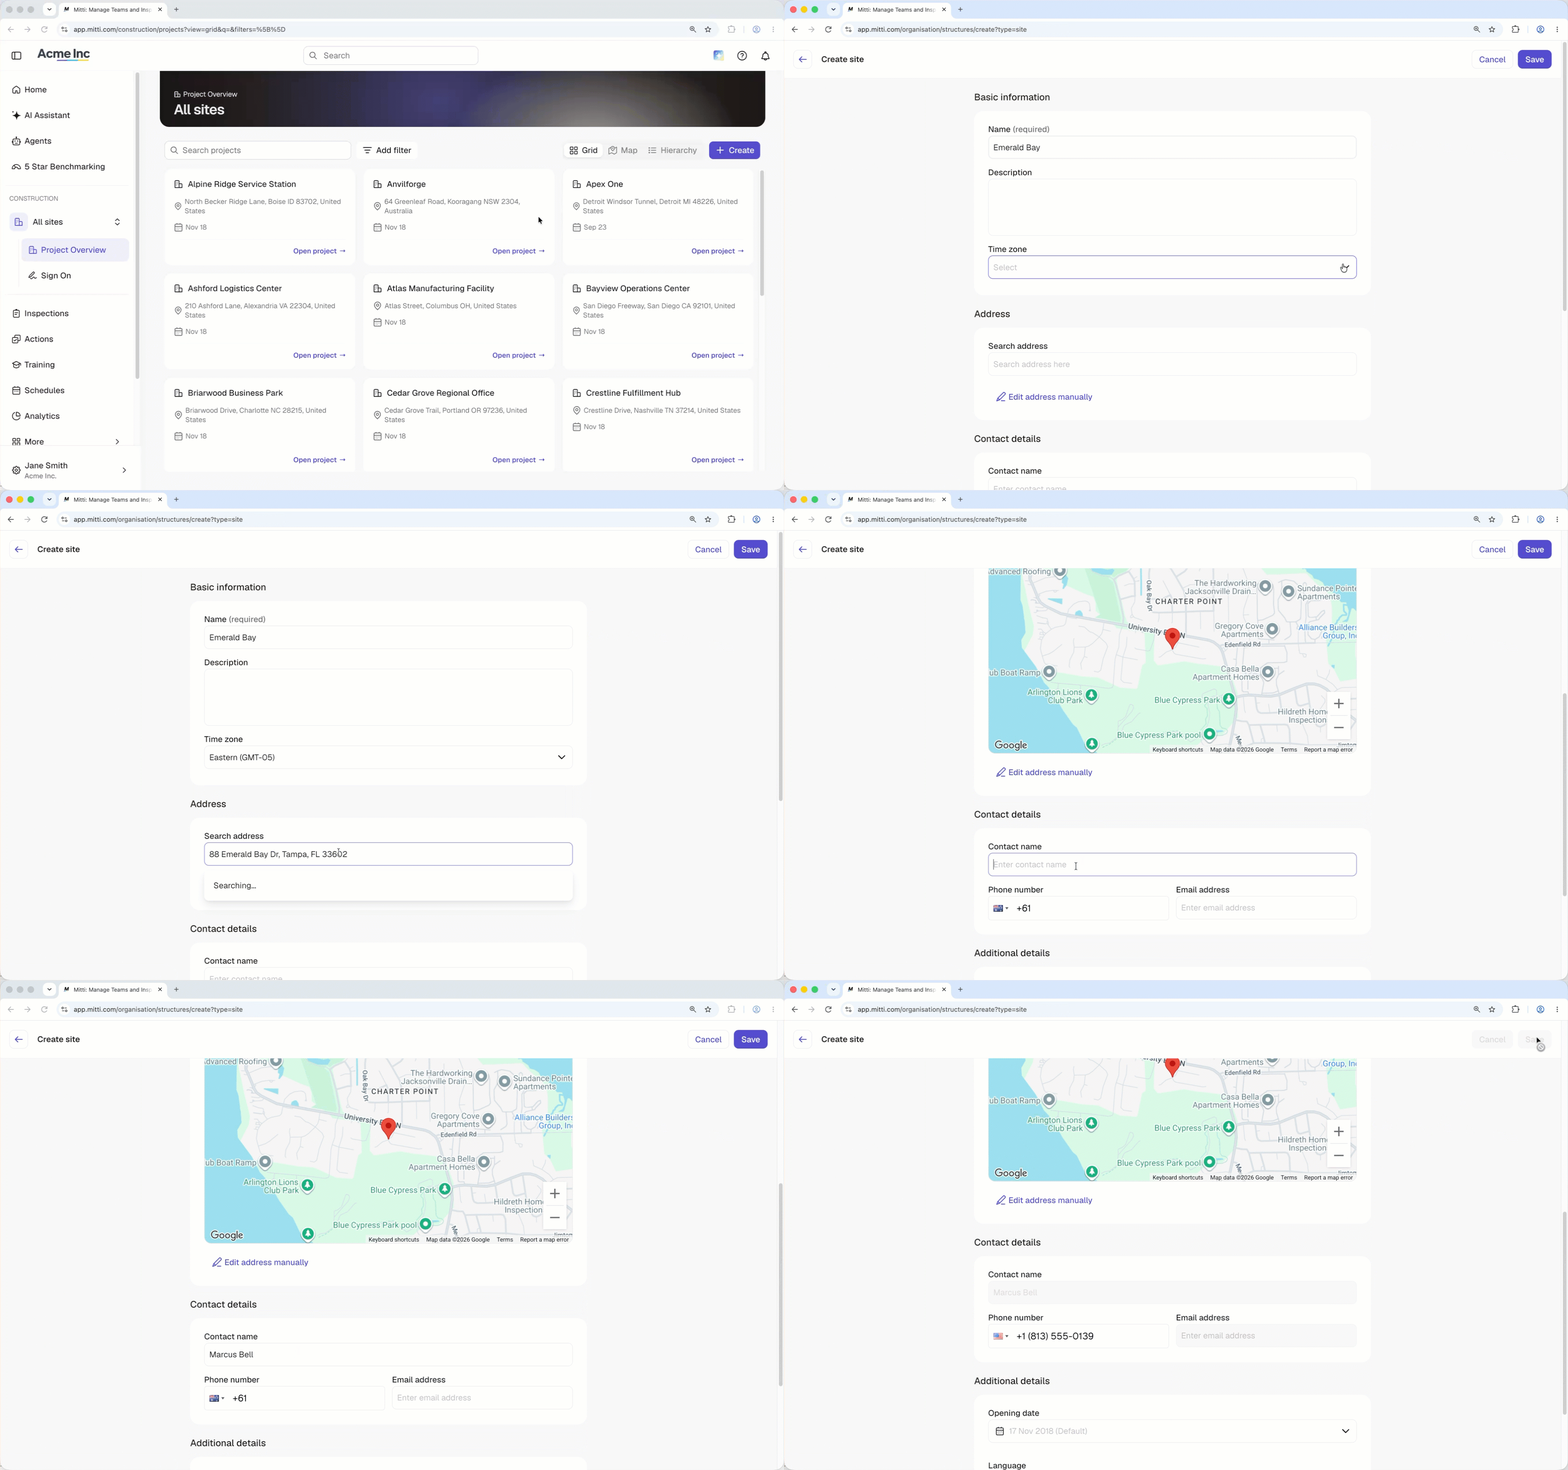
Creating a project creates a site. Fill in the name, description, timezone, and address. The address is what places the project on the map, so a project without one still appears in your list but not on the map.
Review visitor permissions and access
A visitor who signs on to a site becomes a user in your organization and assigned with a guest seat. Always review your organization's default permission set for visitors and remove access to anything they should not see before turning anything on. For example, check your template and inspection access rules, because a user with a guest seat can access a template available to all users.
Turn Sign On feature on for projects
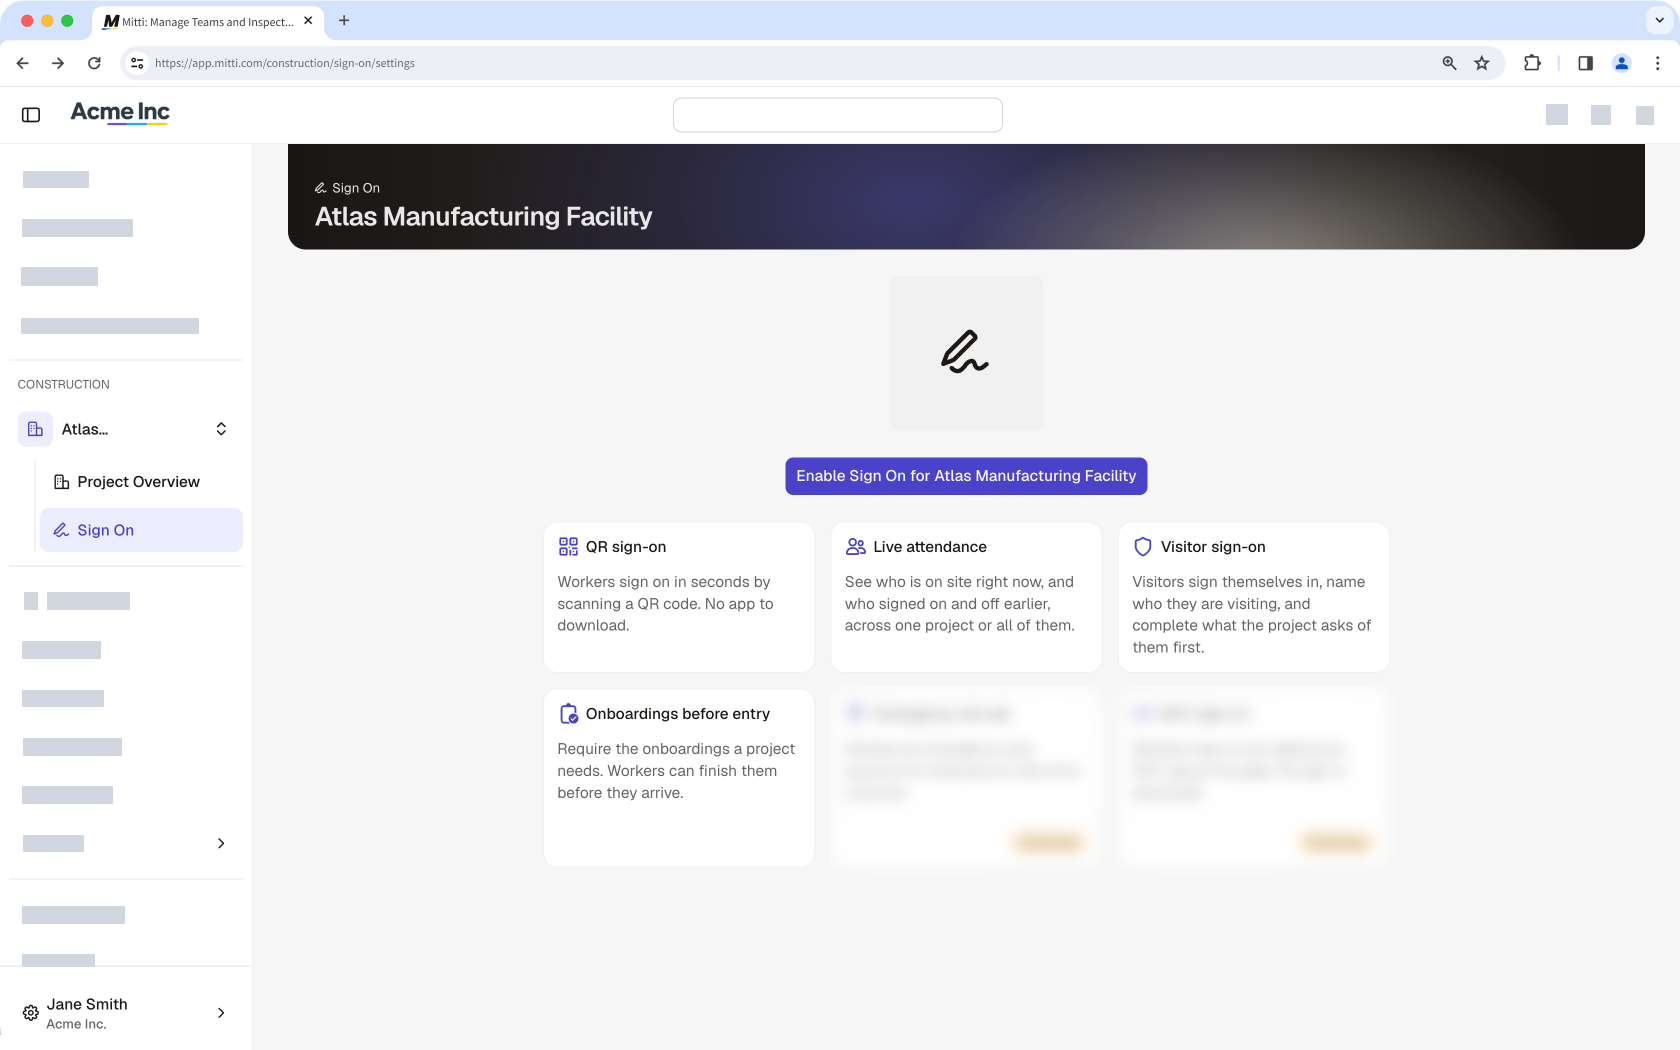
You have to turn on the Sign On feature for every project you want to track. The project starts on your organization's default settings.
Set your Sign On defaults
Sign On settings sit in two layers. What you set in your organization settings becomes the starting point for every project, and each project can change what it needs and be reset back to those defaults at any time. Setting the organization layer first saves you repeating the same choices on every site.
Three decisions make up the organization layer.
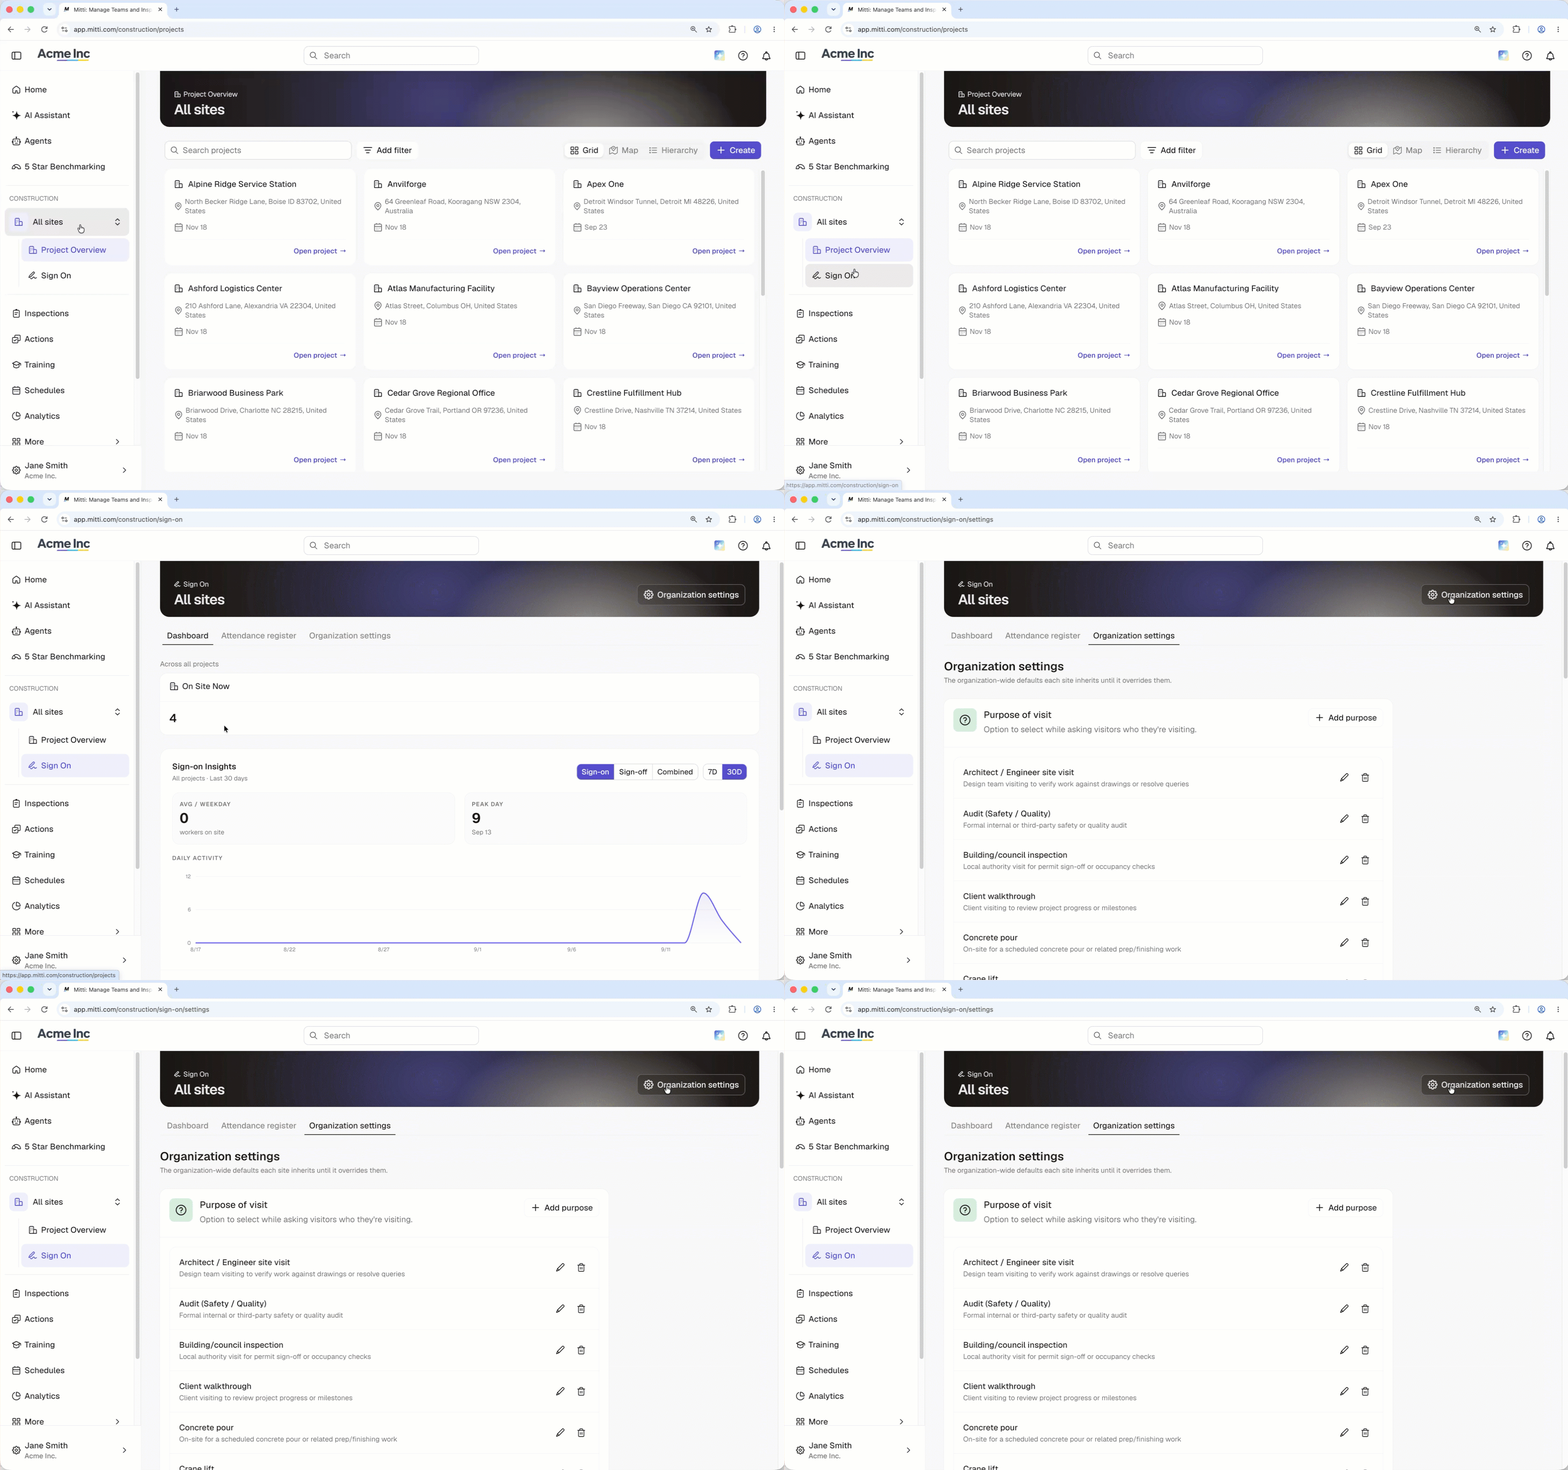
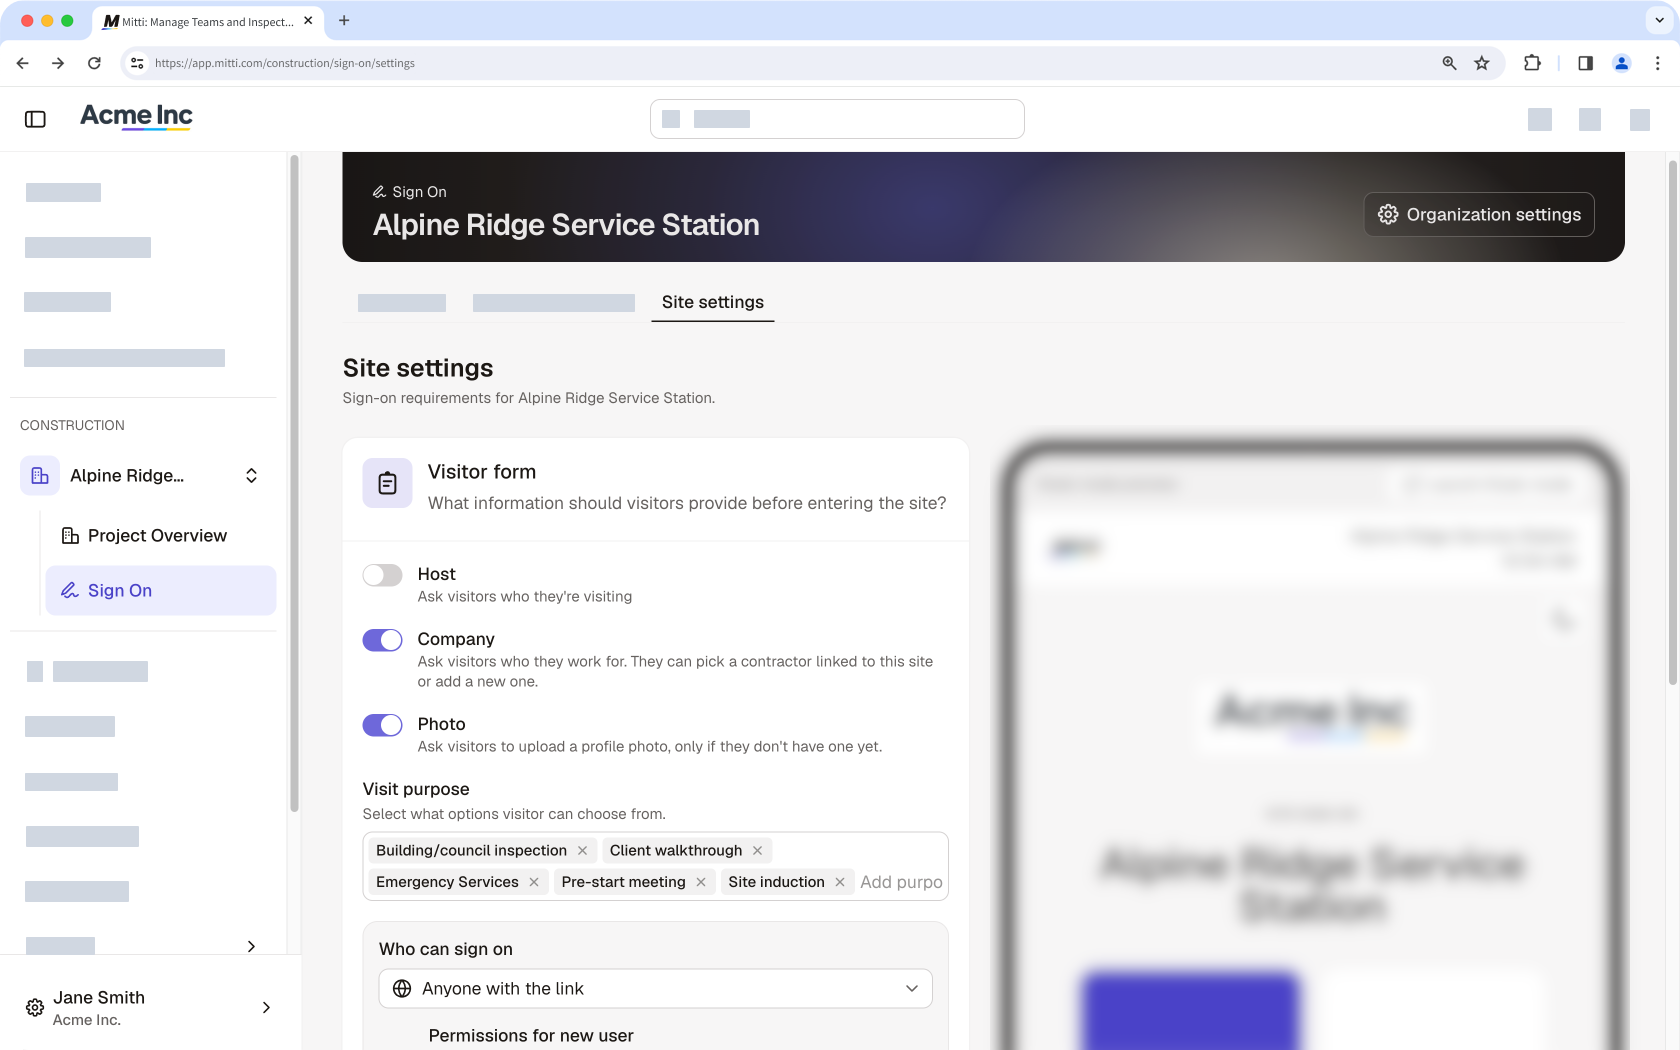
Visit purposes are the reasons a person can give for being on site, and each project picks what it offers from the list you build here. Add at least one, because a project with no purpose cannot take a visitor sign on.
The visitor form is what a visitor is asked for before they enter. You can ask for the host they are visiting, which is saved to the Signed-on site host field on their profile, the company they represent, and a photo. All three are off by default.
Permissions for new user sets what a visitor can reach in your organization once their account exists. You can choose any permission set (opens in new tab) your organization already has, and changing it needs the "Platform management: Permissions" permission.
After that you only open a site's settings when it needs something different. A site inherits all the organization-level settings, and adds one decision of its own, which is who is allowed to sign on. Existing site members is the default, and the wider options let anyone in your organization sign on, which adds them to the site, or let anyone with the link sign themselves on for the first time.
Require site entry onboarding
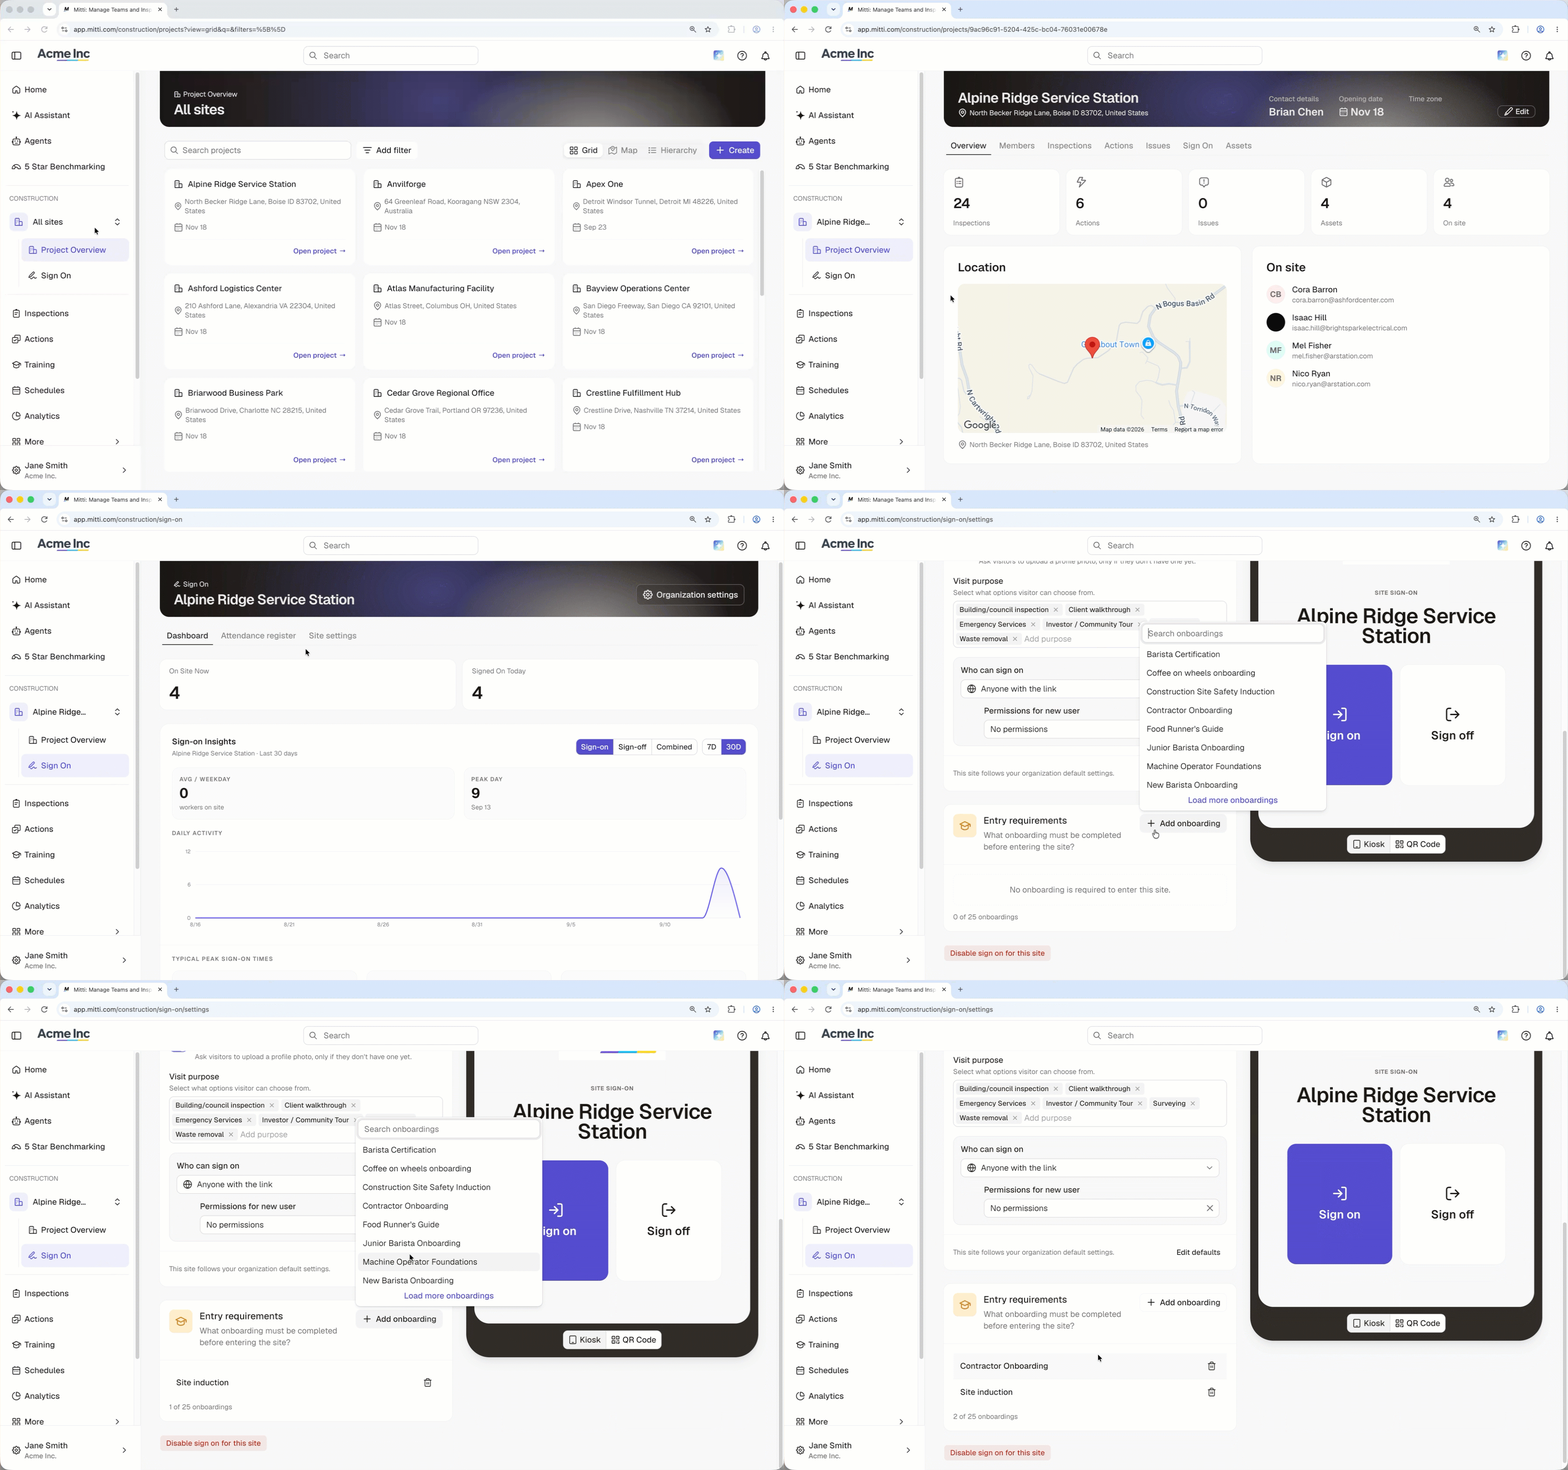
An entry requirement is an onboarding workflow that somebody has to finish before they can sign on to a site. A good example is requiring site induction for anyone who enters your high traffic site for the first time. If you have the "Training: Manage content (all)" permission, you can create the content in Training. For each project, you can then add up to 25 onboarding workflows.
Put a kiosk or a QR code at the entrance
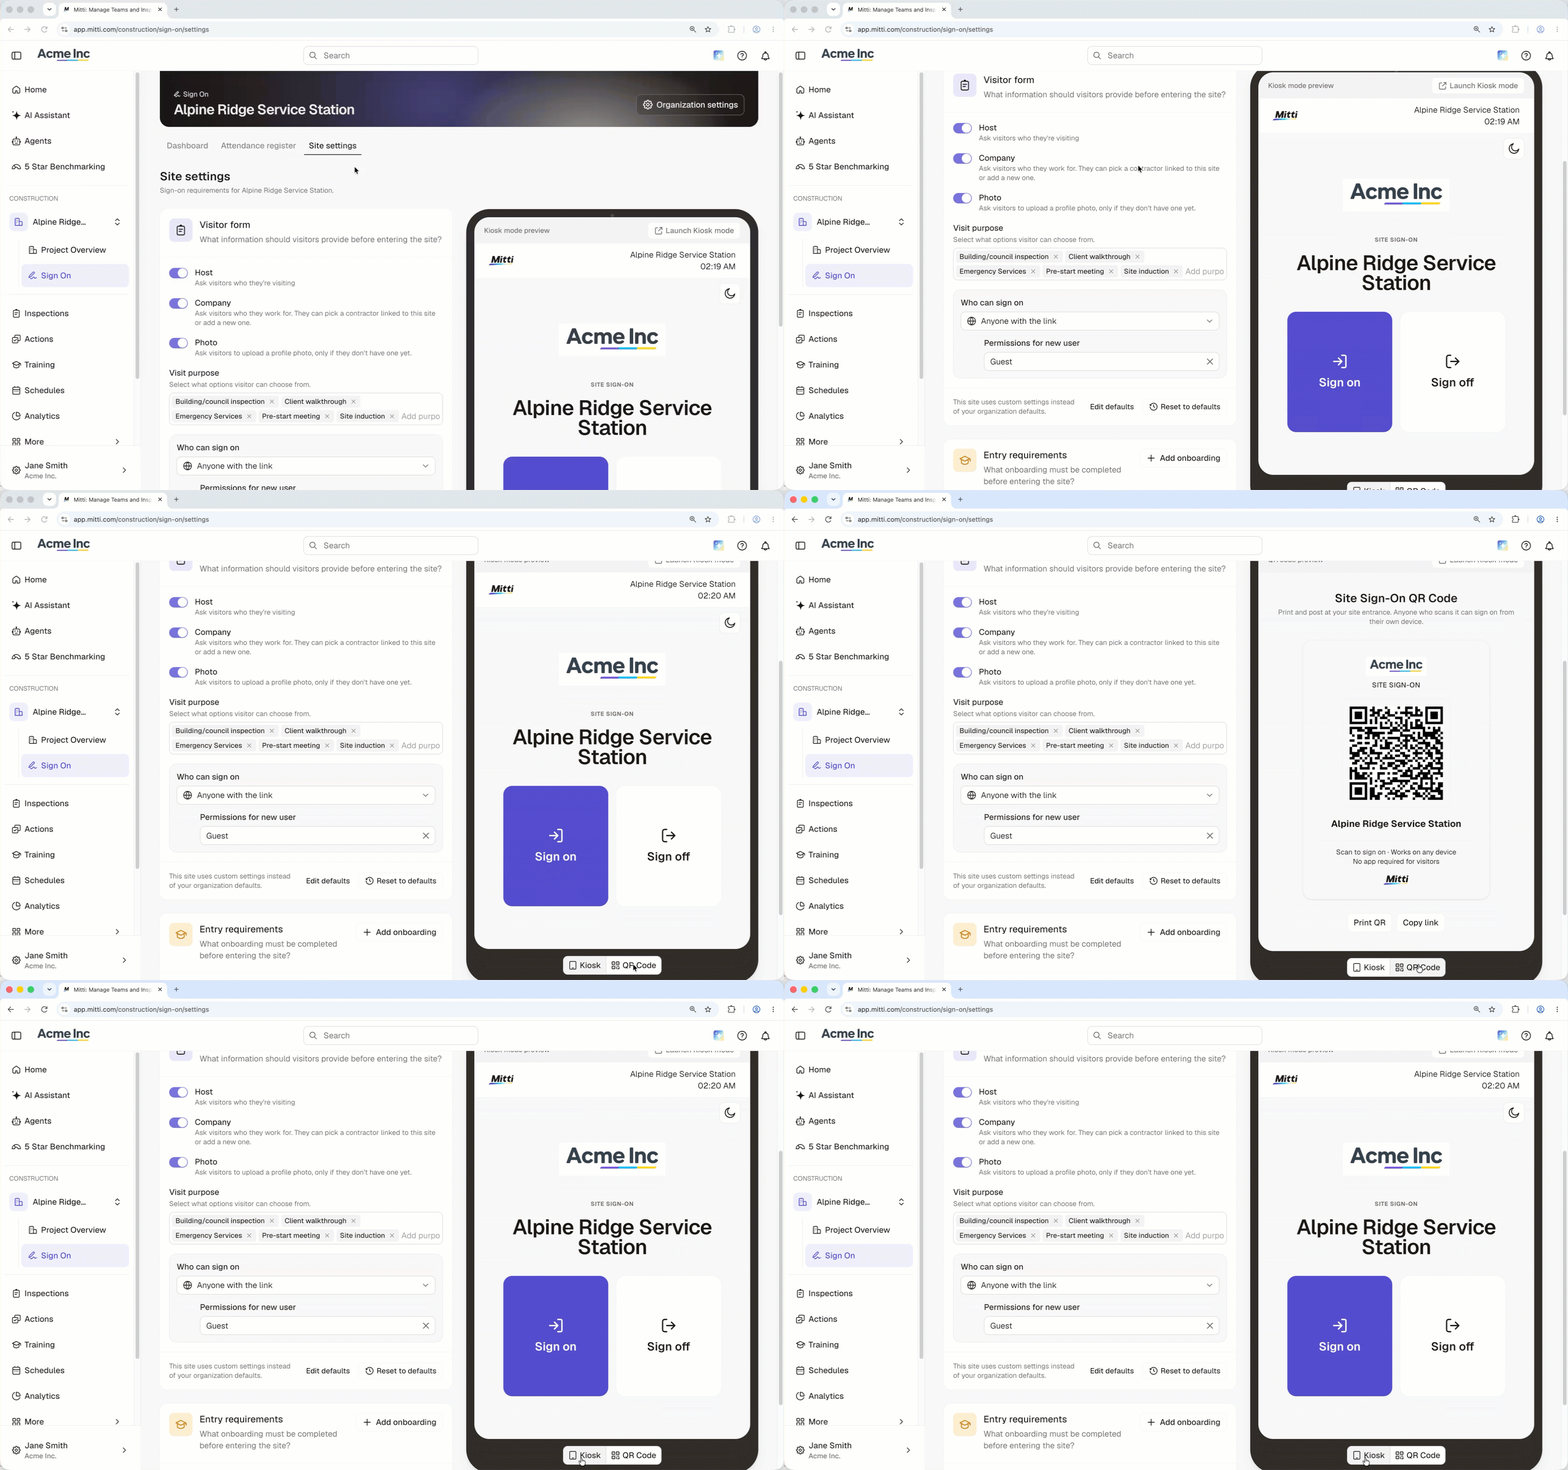
A kiosk is a shared device at the entrance that shows the Sign On page. Set a four-digit exit PIN so it stays locked when nobody is watching it. Kiosk mode is held in memory only, so reloading the page or restarting the device ends it, and whoever set it up has to launch it again and set a new PIN.
A QR code covers everyone who would rather use their own phone. Print it and display it at the entrance, or copy the link and send it ahead to people who are expected to enter the site. Most sites run both, with the kiosk for the crew and the code for visitors and deliveries.
Get attendance insights
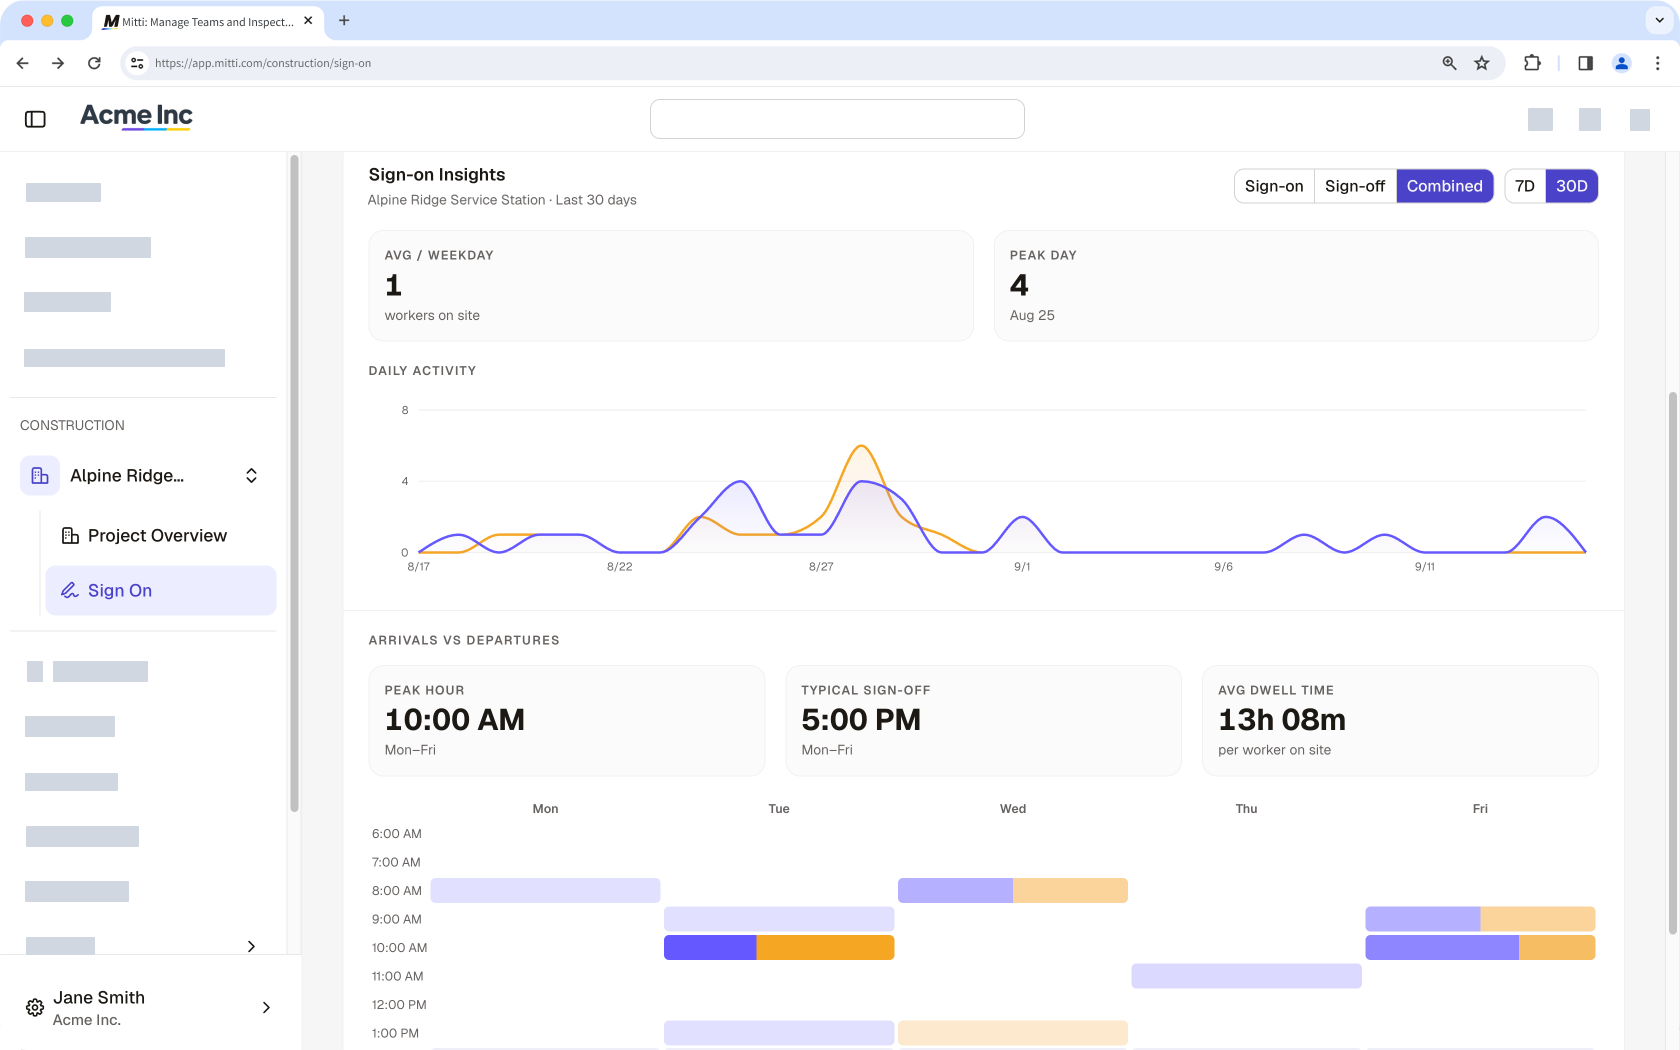
The Sign On Dashboard is the day to day view. It shows how many people are on site now and how activity has moved over the last 7 or 30 days, including the average number of people on site, the busiest day, and the hours when people arrive and leave. You can read it across every project at once or one project at a time.
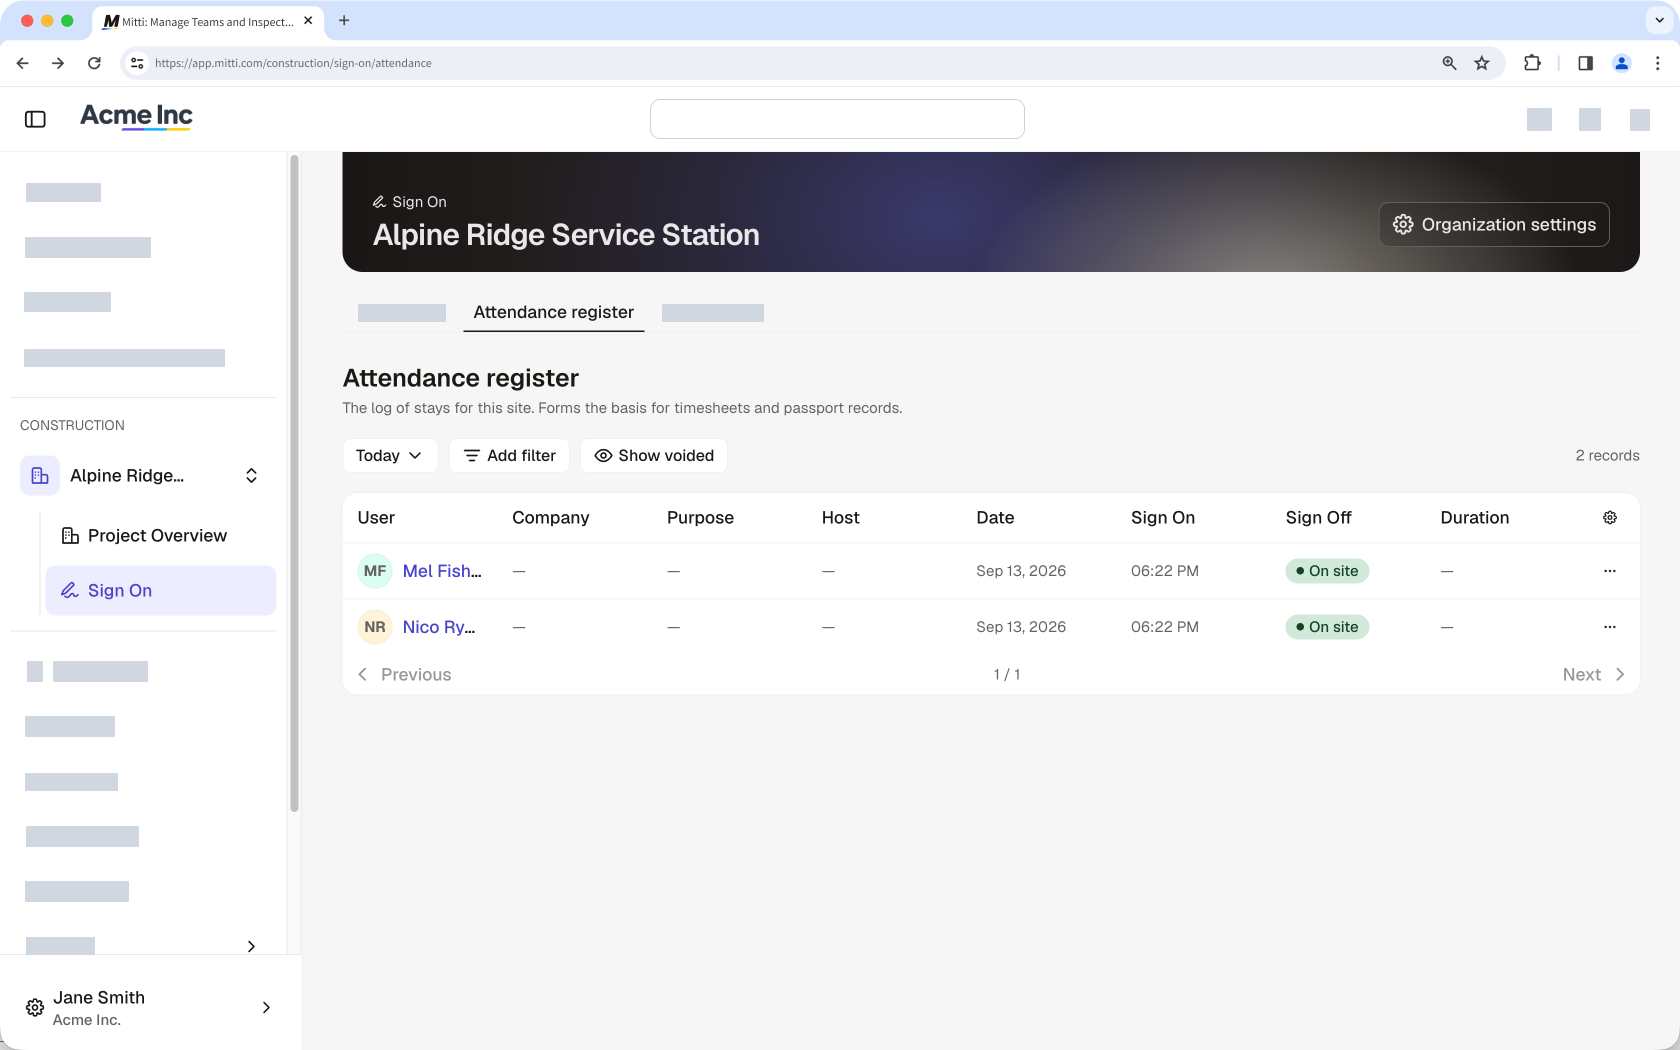
The Attendance register is the record underneath your dashboard. You can filter your records by date, company, purpose, host, seat type, or activity. Open any record to void it, correct a sign on or sign off time, or sign off somebody who has already gone home.
Get started as a worker or visitor
You sign on when you arrive and sign off when you leave, either at the kiosk by the gate or from your own phone, and the site takes care of the rest.
Sign on when you arrive
At the kiosk, select Sign on, enter your name, pick yourself from the list, and confirm. If you would rather use your own phone, scan the QR code at the entrance or open the link the site administrator sent you. Both takes you to the Sign On page for that site and works the same way from there.
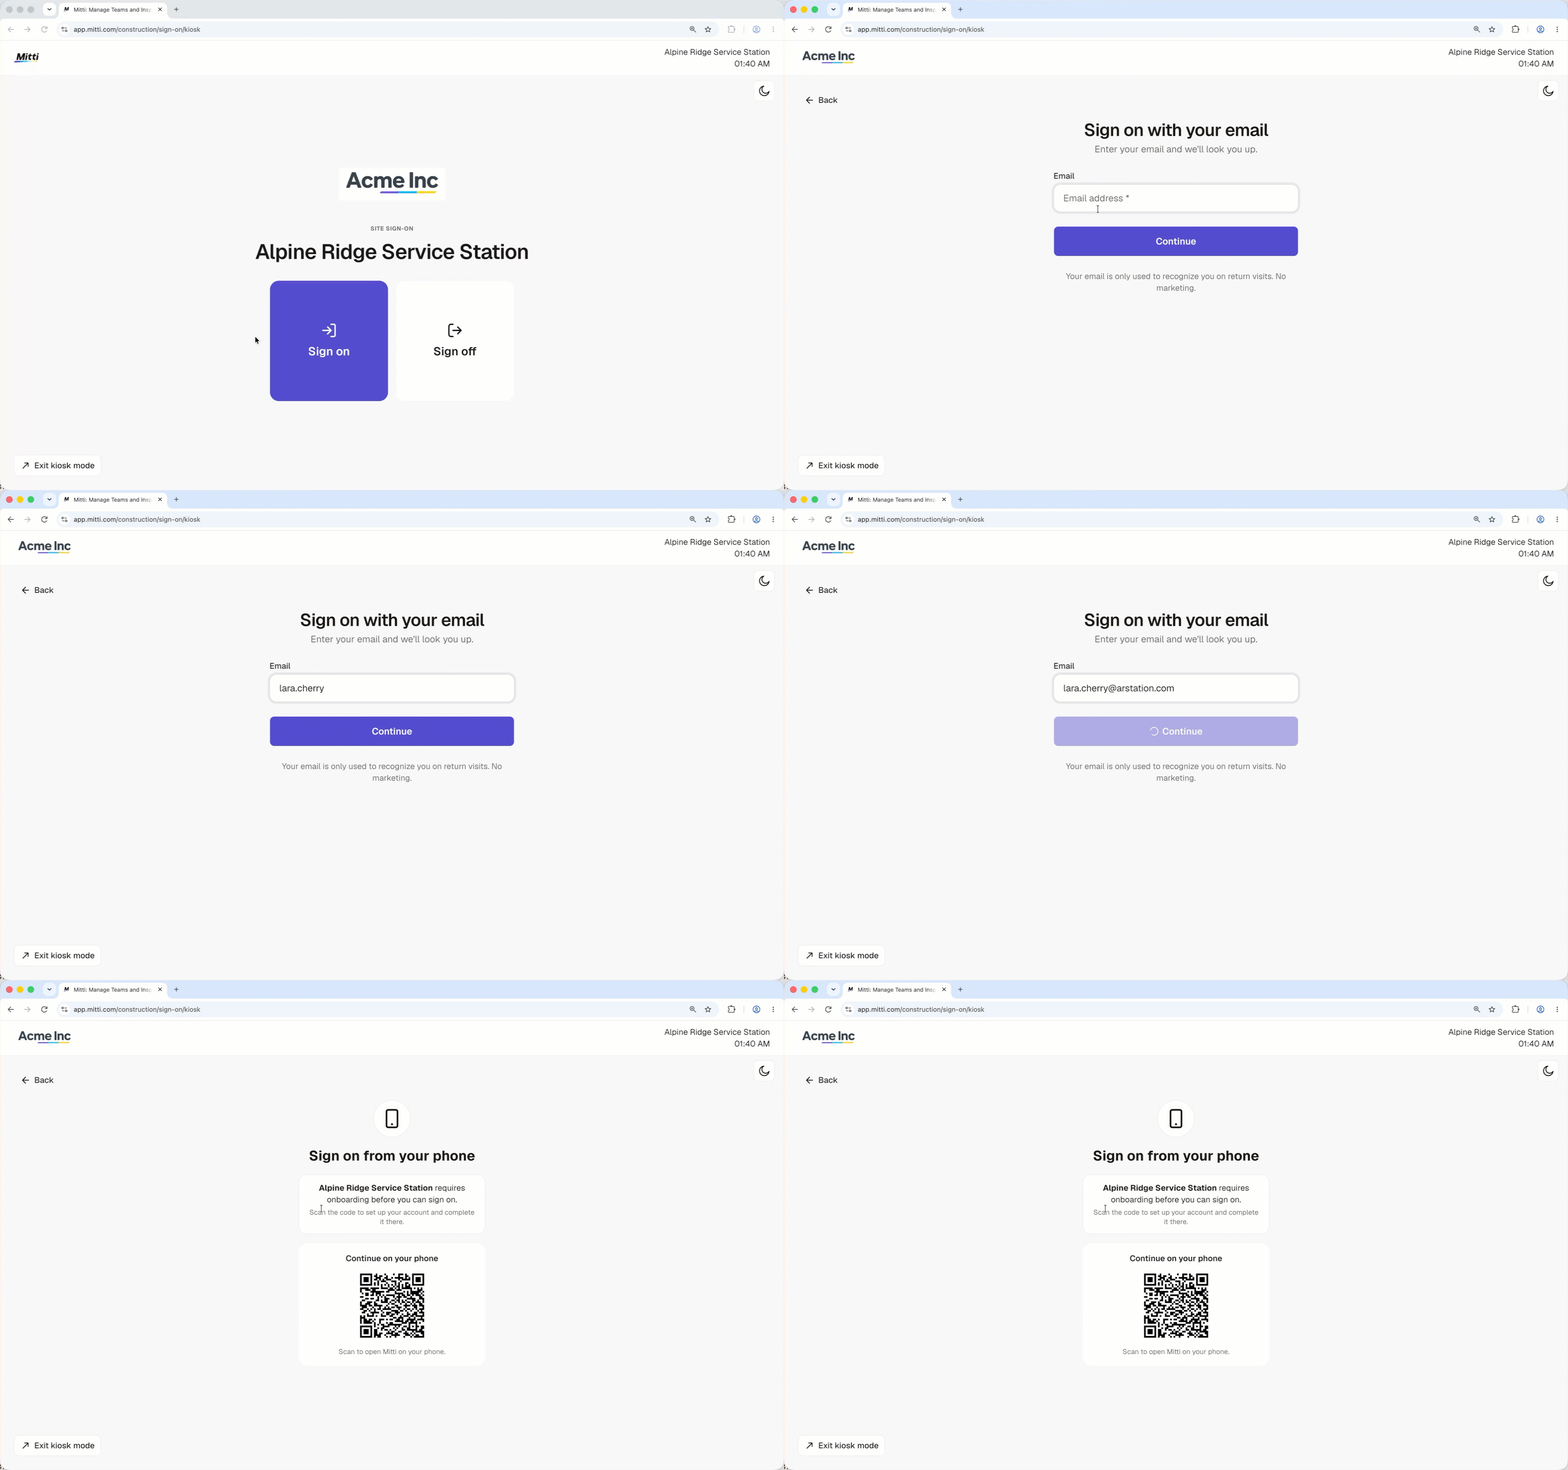
If you do not have a Mitti account, select Sign on as a guest and enter your email address, which fills in your name. Depending on the site you may also be asked for your company, your reason for visiting, who you are here to see, and a photo. Your company comes from the list of companies set up in Contractors, and who you are here to see is a lookup of everyone on a full seat in the organization you are visiting
Signing on creates an account for you, so the site has a record of your visits and you are quicker to sign on the next time. You may also need to complete an onboarding workflow for some sites before you are allowed on. Simply scan the onboarding QR code and work through it before you enter the site.
Sign off when you leave
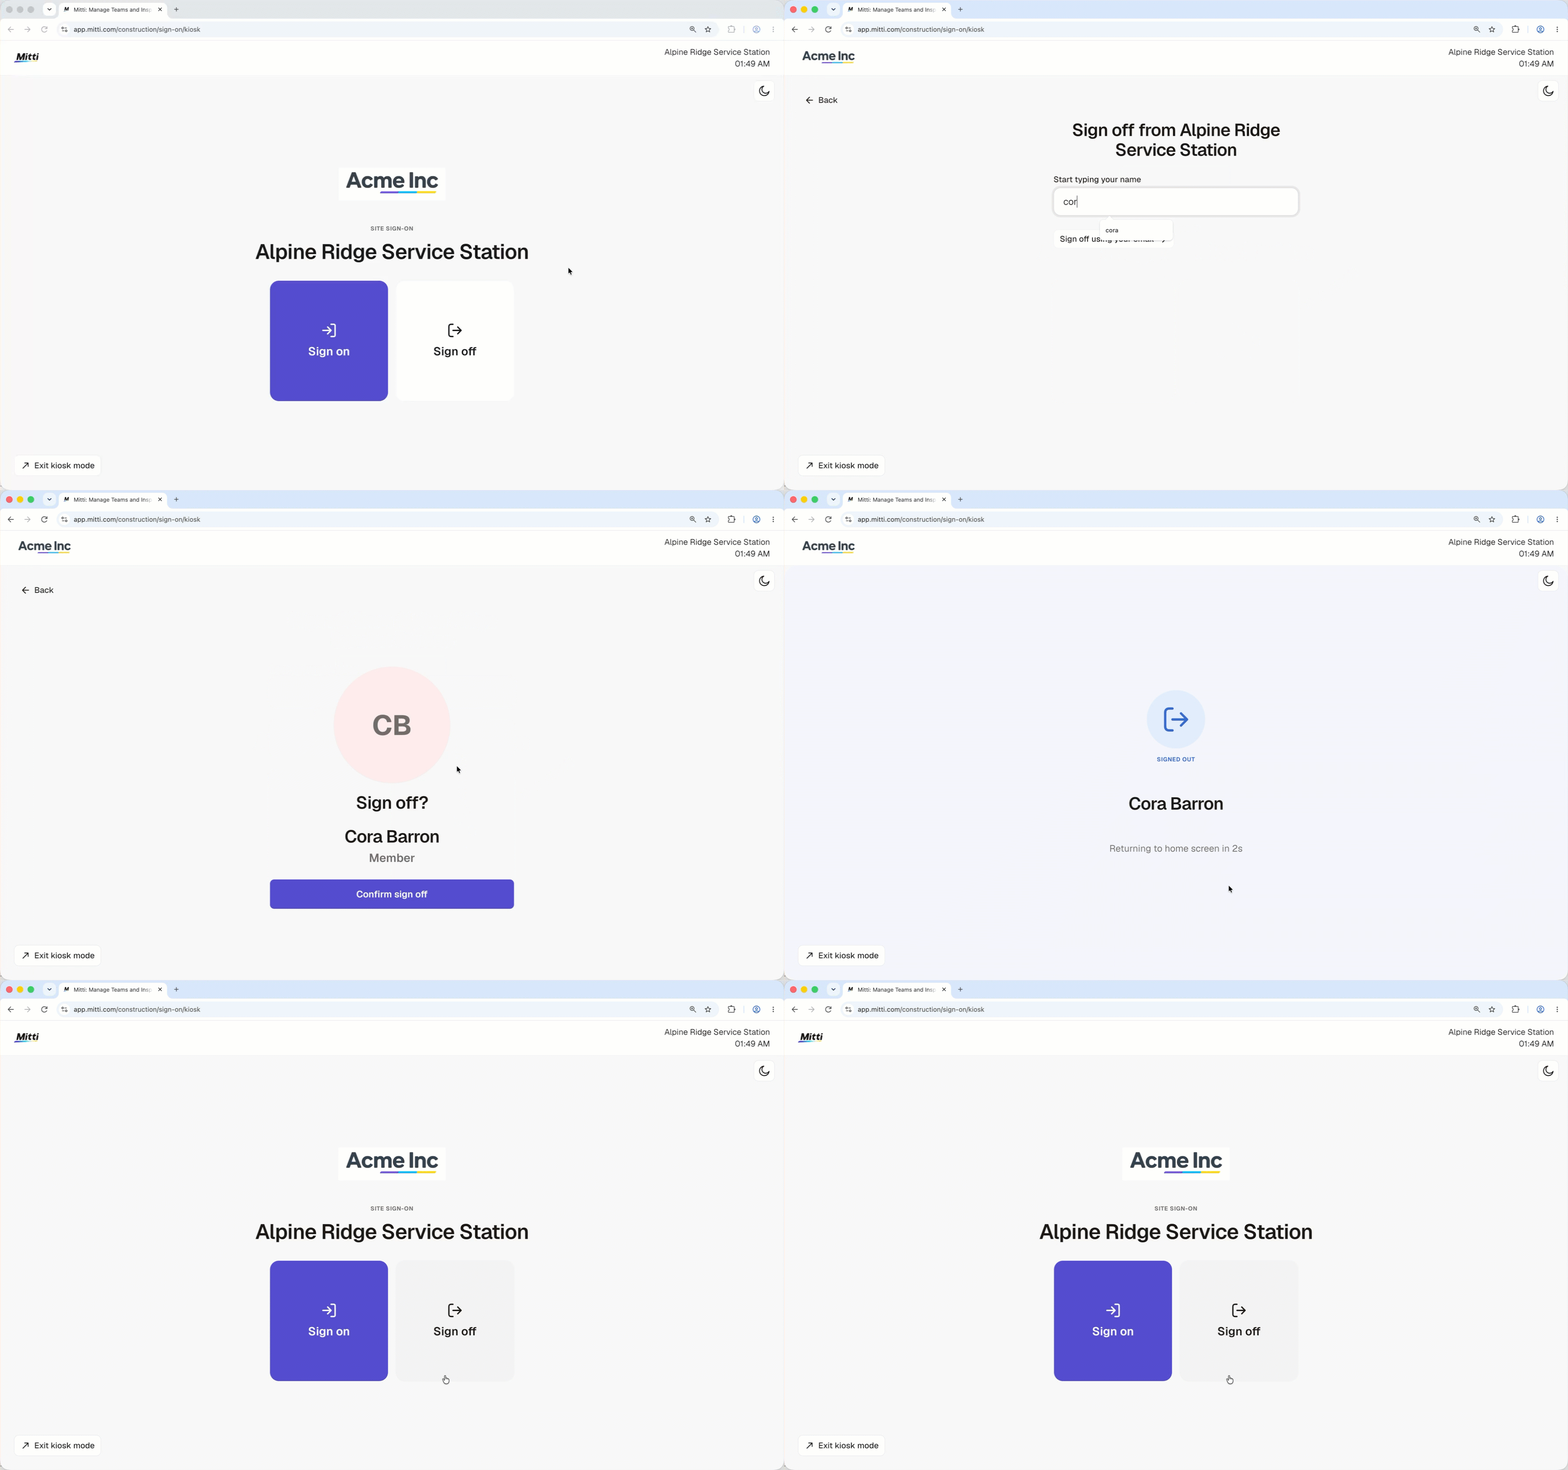
Signing off works the same way. Select Sign off, enter your name, pick yourself from the list, and confirm. It matters more than it looks, because the people running the site use the count to know who is still on it, and a name left on the list is a person they believe is still there.
If you forget to sign off, ask the site administrator. They can sign you off and correct the time on the record.
Frequently asked questions
Need more help?
Was this page helpful?