Zuletzt aktualisiert: 25. August 2026
What is a scenario?
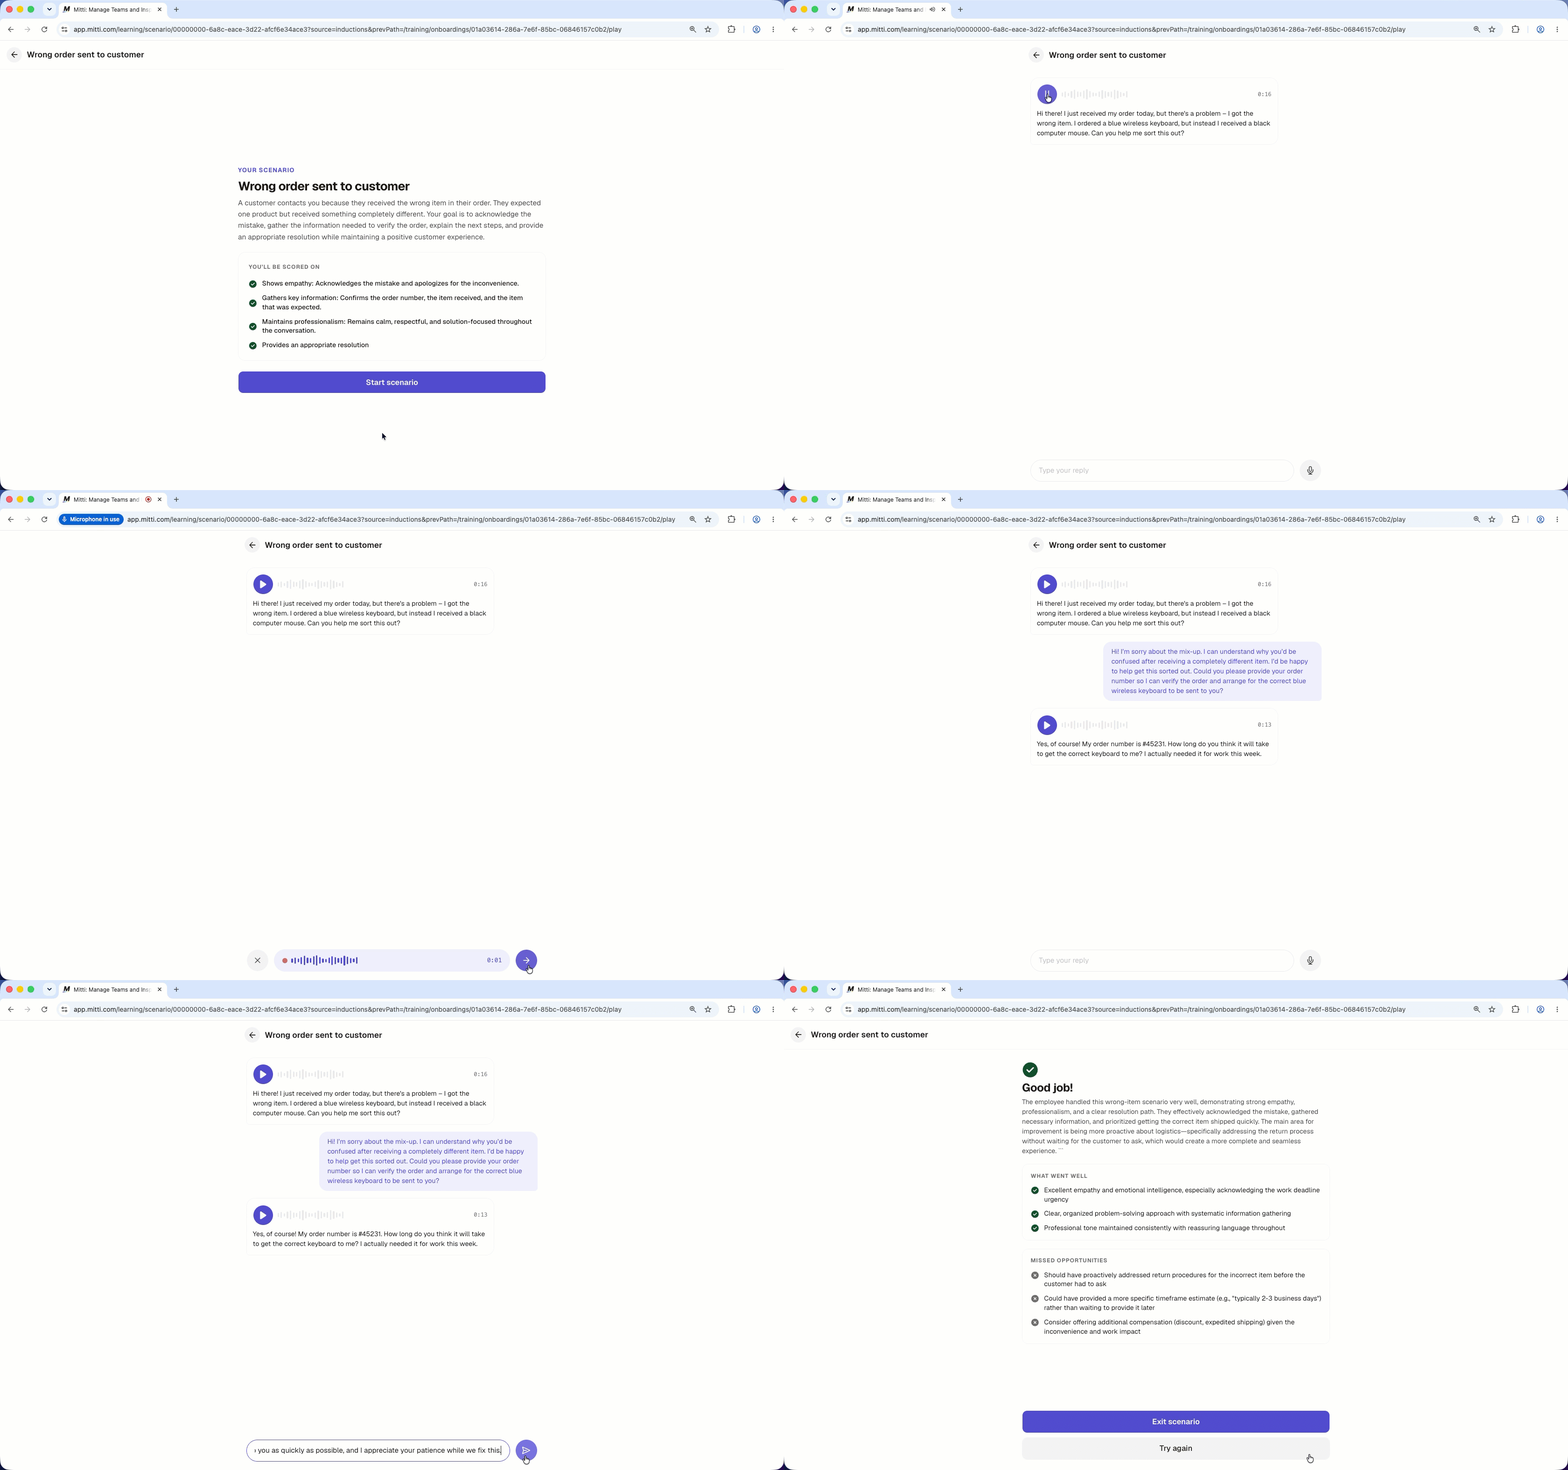
A scenario is a practice conversation between a worker and an AI character, built to help workers feel more prepared for situations they might encounter in their role. That could mean dealing with an unhappy customer, handling a workplace incident, sorting out a disagreement with a colleague, or noticing a chance to offer an extra service.
During the conversation, the AI character reacts based on the scenario and personality the admin has configured. This gives workers a realistic way to practice how they'd handle the situation. Once it ends, the AI checks their performance against the team's evaluation criteria and gives feedback on what they did well and where they can improve.
Was Sie brauchen
Ein Szenario erstellen
Click Schulungen from the sidebar or in Mehr.
Click Inhalt at the top of the page and select Szenario.
Click Erstellen on the upper-right corner of the page.
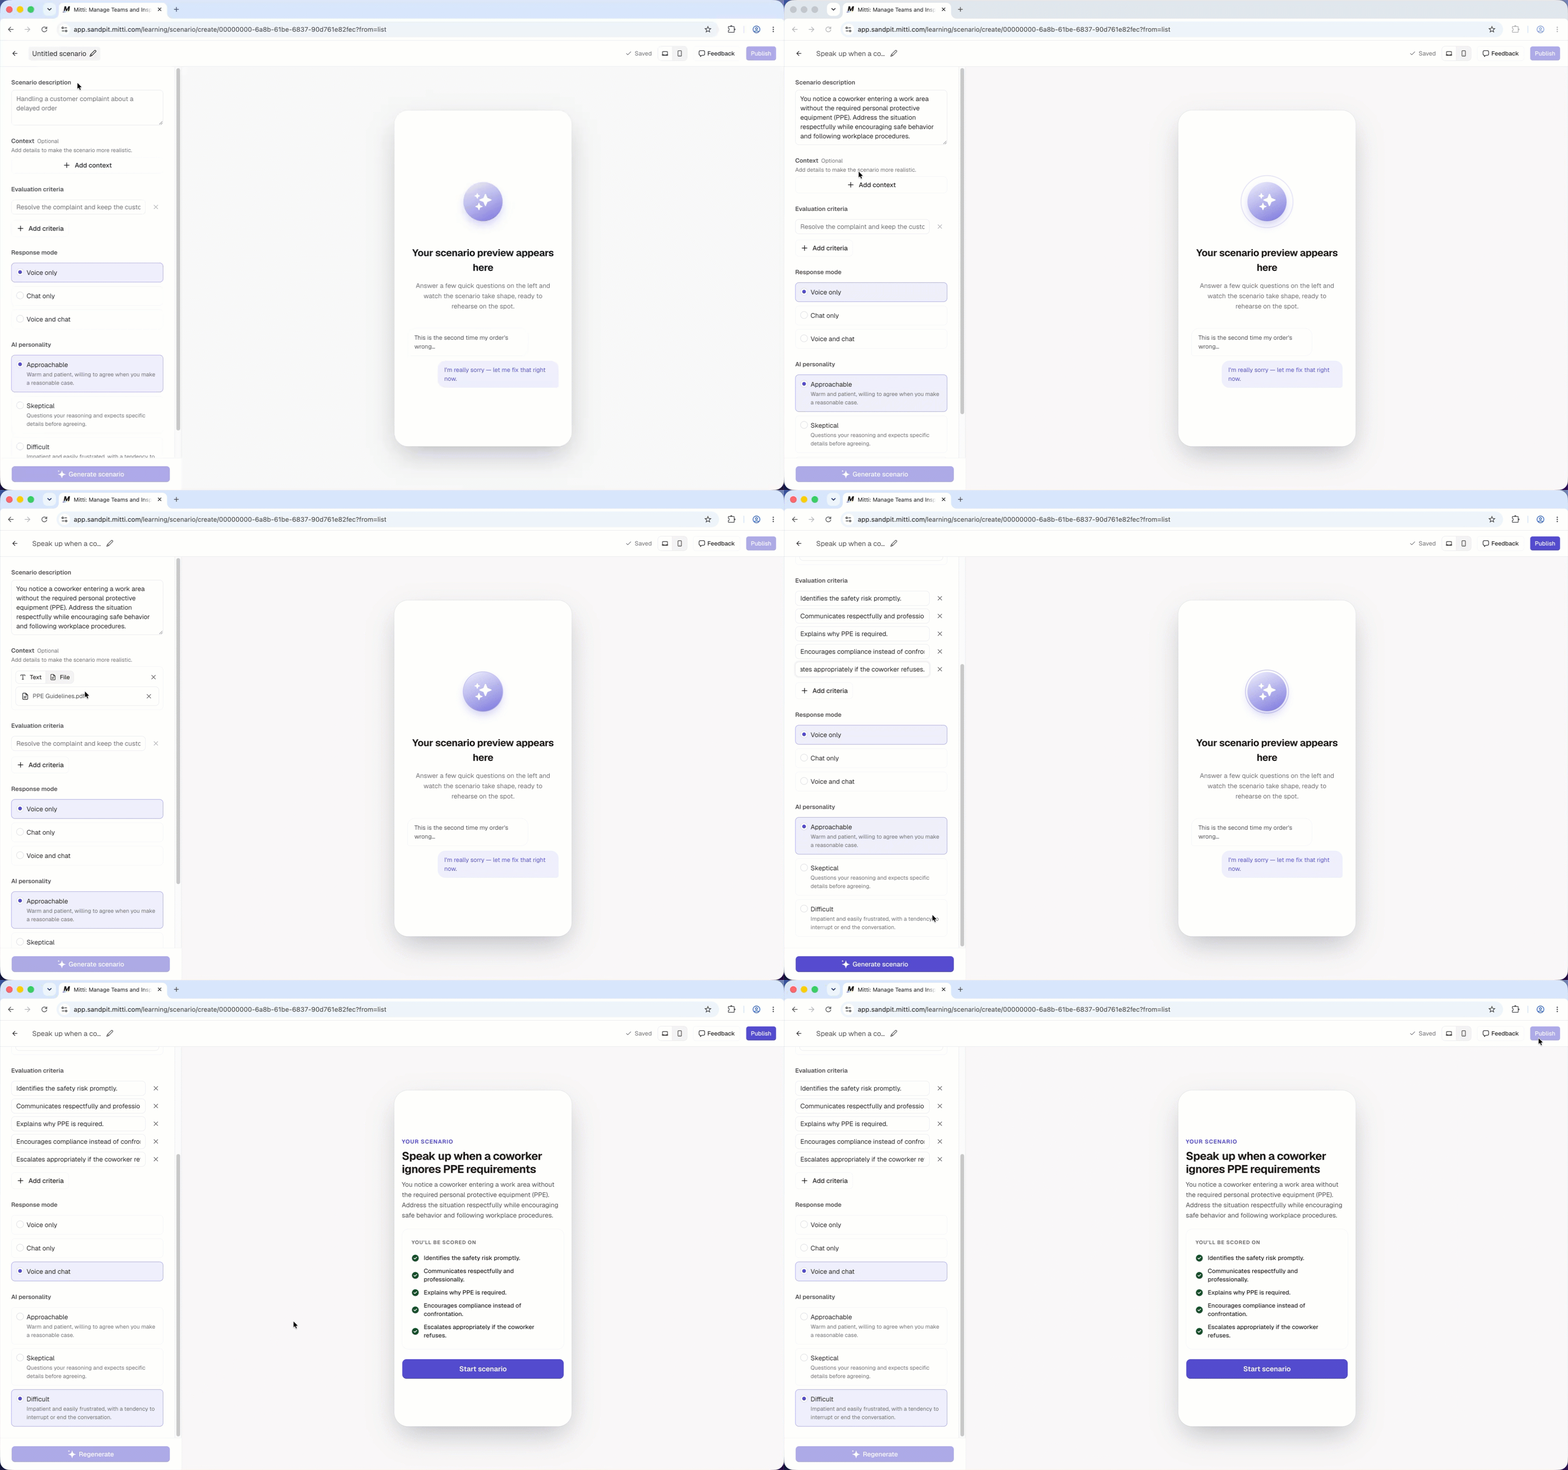
Click Untitled scenario at the top of the page and enter the scenario's title.
In the side panel, enter the scenario details:
Scenario description: A short description of the situation that workers will practice.
Context: Type in or upload files for additional background information, company policies, or other details to make the conversation more realistic and guide the AI's responses.
Evaluation criteria: What a successful outcome looks like. Workers are scored against these criteria after completing the scenario.
Response mode: How workers can interact with the AI, whether by talking or by typing.
AI personality: How the AI behaves during the conversation.
Click Ein Szenario erstellen. After the scenario is generated, interact with the preview to test the scenario before finalizing it.
Use the toggle on the upper-right of the page to preview the scenario in desktop or mobile view.
Once you're ready, click Veröffentlichen.
Benutzer können nur über Onboarding-Workflows auf Szenarien zugreifen und diese starten. Um ein Szenario verfügbar zu machen, fügen Sie es als Schritt in einen Onboarding-Workflow ein.
Ein Szenario bearbeiten
Klicken Sie in der Seitenleiste auf Schulungen oder unter Mehr.
Klicken Sie auf die Registerkarte Inhalt und wählen Sie anschließend Szenario aus.
Wählen Sie das Szenario aus, das Sie bearbeiten möchten.
Aktualisieren Sie die Szenariodetails. Ihre Änderungen werden automatisch als Entwurf gespeichert.
Wenn Sie bereit sind, klicken Sie auf Veröffentlichen.
Ein Szenario archivieren
Klicken Sie in der Seitenleiste auf Schulungen oder unter Mehr.
Klicken Sie auf die Registerkarte Inhalt und wählen Sie anschließend Szenario aus.
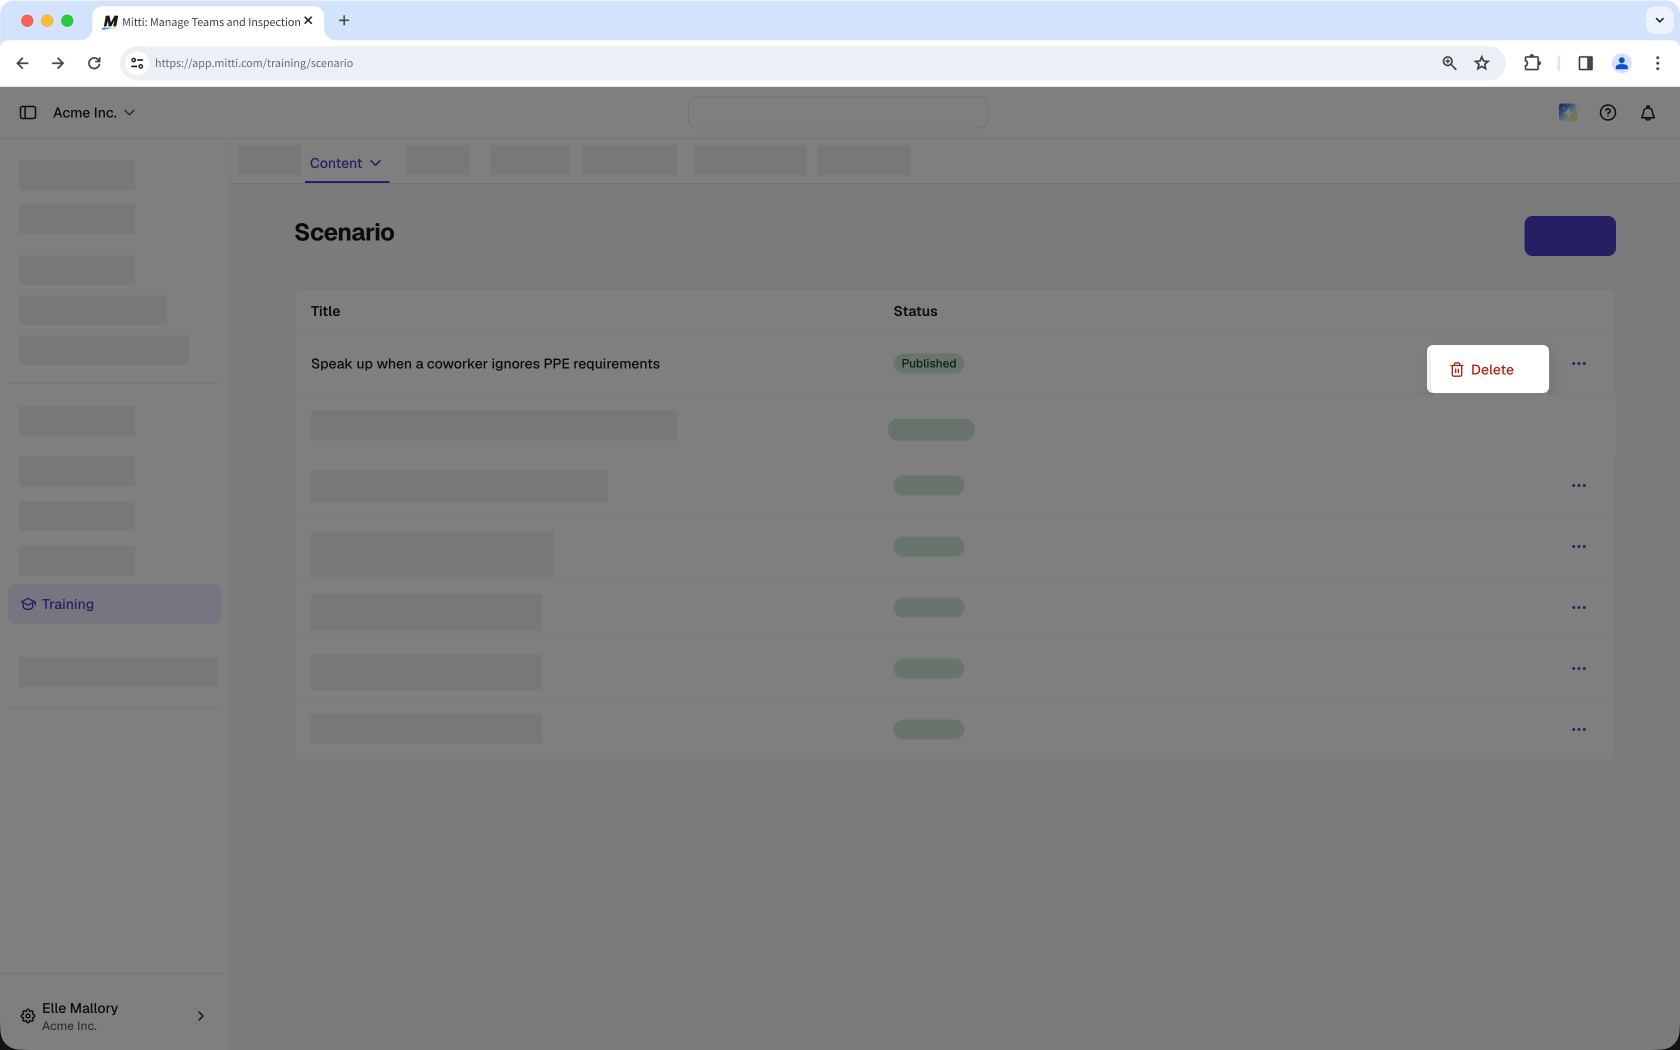
Klicken Sie neben dem Szenario auf und wählen Sie anschließend Löschen aus.
Sie können ein Szenario nicht löschen, solange es in einem veröffentlichten Onboarding-Workflow enthalten ist. Entfernen Sie das Szenario zunächst aus allen veröffentlichten Onboarding-Workflows, bevor Sie es löschen.
Häufig gestellte Fragen
Brauchen Sie weitere Hilfe?
War diese Seite hilfreich?