Last updated: August 25, 2026
What are onboarding workflows in Mitti?
Onboarding workflows is a feature within Mitti that helps you guide your workers through the steps they need to complete before starting their roles. These often include completing required training courses, submitting credentials, and practicing scenarios to help workers build and demonstrate the skills they need for their role.
For example, you can use onboarding workflows to help contractor workers from companies meet all requirements before starting work. By sharing onboarding workflows using enrollment links, workers can easily complete their onboarding without delays. As they progress, you can track their completion status and confirm that all requirements are met, giving you confidence that your team has the right skills, knowledge, and qualifications to work safely and stay compliant.
What you'll need
Share enrollment links when creating an onboarding workflow to kick off your team’s onboarding journey right away.
You can add draft courses to your onboarding worklow. When the onboarding worklow is published, any draft courses included will be published automatically.
Create an onboarding workflow
Select Training in the sidebar or in More.
Click Onboard at the top of the page.
Click Create on the upper-right of the page.
Click on the upper-left of the page and enter the name of the onboarding workflow.
To add training steps, click Training on the side panel and select any of the following:
To add training courses: Click next to a course. Alternatively, click to drag and drop the course into the workflow list.
To browse Library: Click Open library at the bottom of the page to browse the Library and add courses.
To manage courses: Click Manage courses at the bottom of the page to update your training courses.
To add credential steps, click Credentials on the side panel and select any of the following:
To add credential types: Click next to a credential type. Alternatively, click to drag and drop the credential type into the workflow list.
To create credential types: Click Create type at the bottom of the page to create a new credential type.
To manage credentials: Click Manage credentials at the bottom of the page to update your credentials.
To add scenario steps, click Scenario on the side panel and select any of the following:
To add scenarios: Click next to a scenario. Alternatively, click to drag and drop the scenario into the workflow list.
To manage scenarios: Click Manage scenarios at the bottom of the page to update your scenarios.
Click to drag and reorder the workflow steps.
To remove a step, hover over a step and click .
To require users to complete steps in order, turn “Lock order” on in the side panel.
Click Next: Publish on the upper-right corner of the page.
In the "Publish" page, click from the dropdown menu and select the users, groups, or sites you want to assign.
Once you're ready, click Publish now.
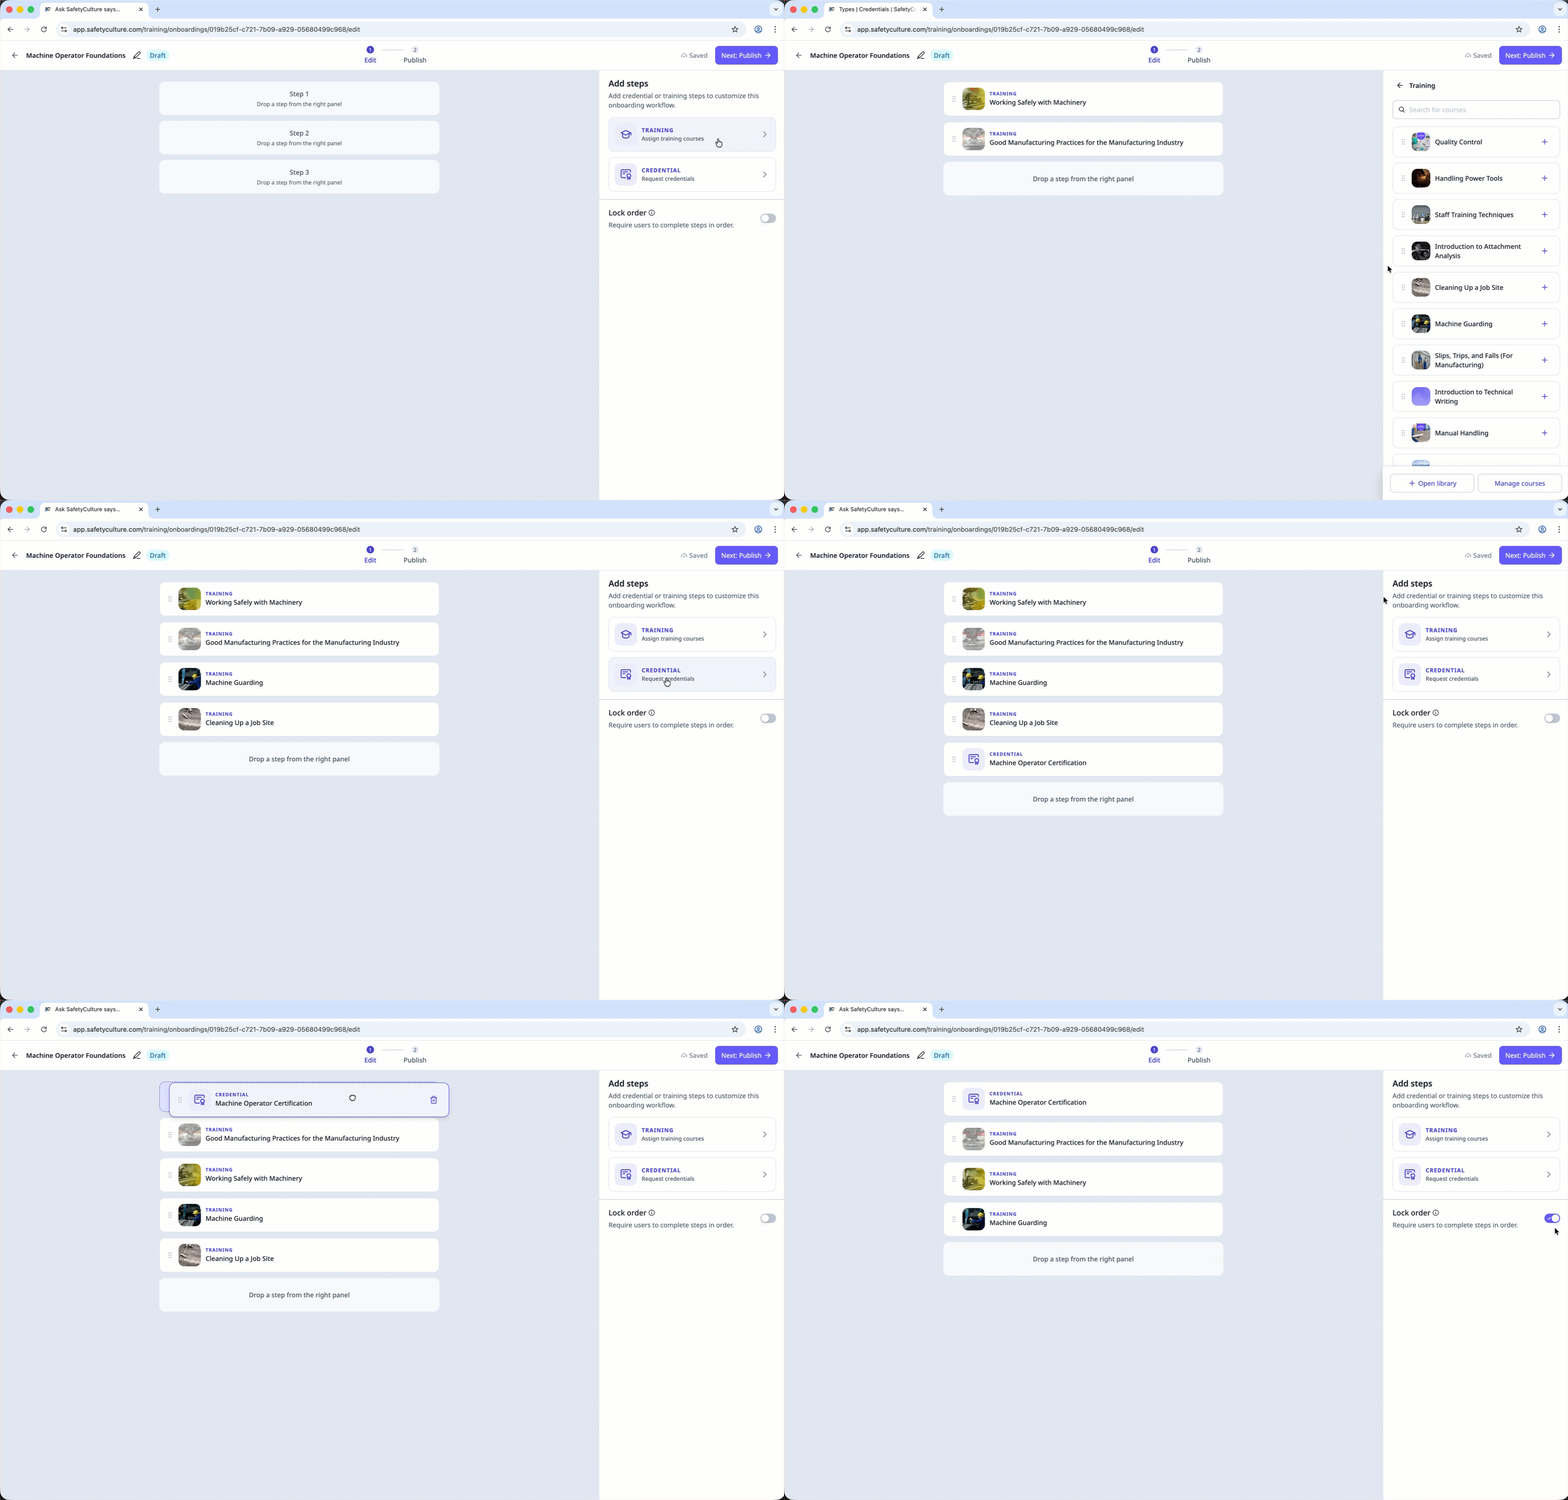
You can add up to 30 steps to your onboarding worklow.
View an onboarding workflow's progress
Select Training in the sidebar or in More.
Click Onboard at the top of the page.
Select an onboarding workflow.
Click on the right-hand side of the user and select View progress.
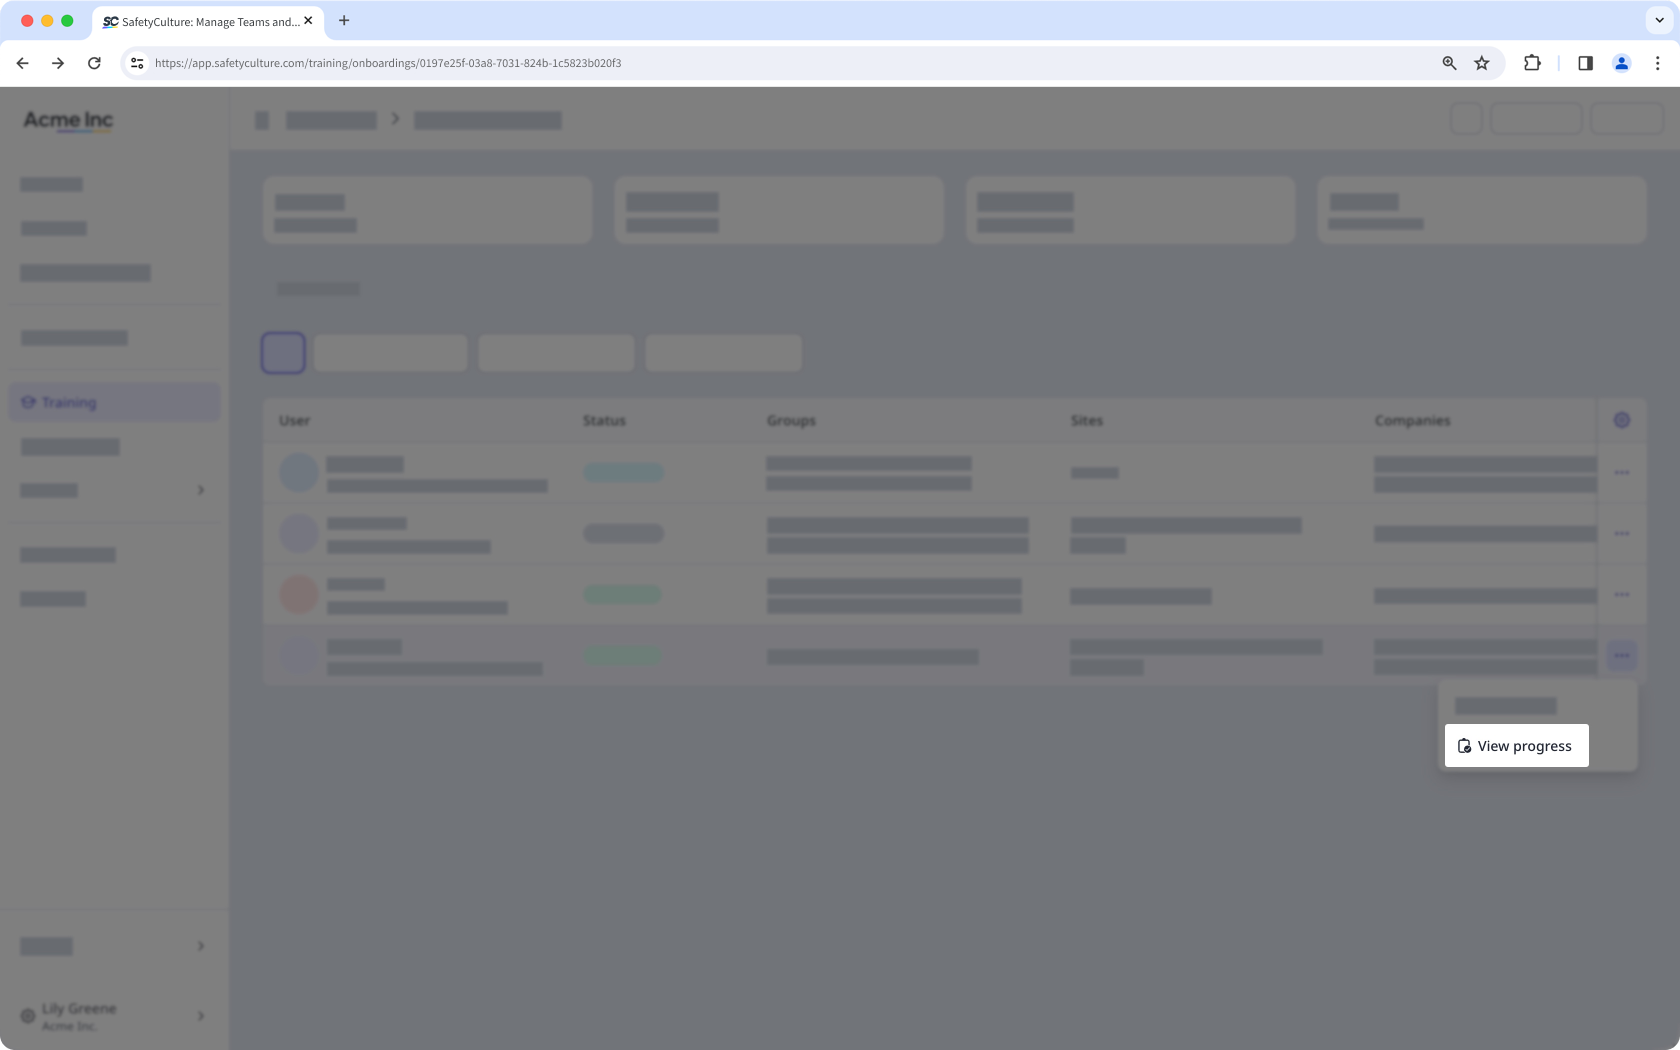
On this page, you can view a user's progress on each step of the onboarding workflow.
Edit an onboarding workflow
Select Training in the sidebar or in More.
Click Onboard at the top of the page.
Select an onboarding workflow.
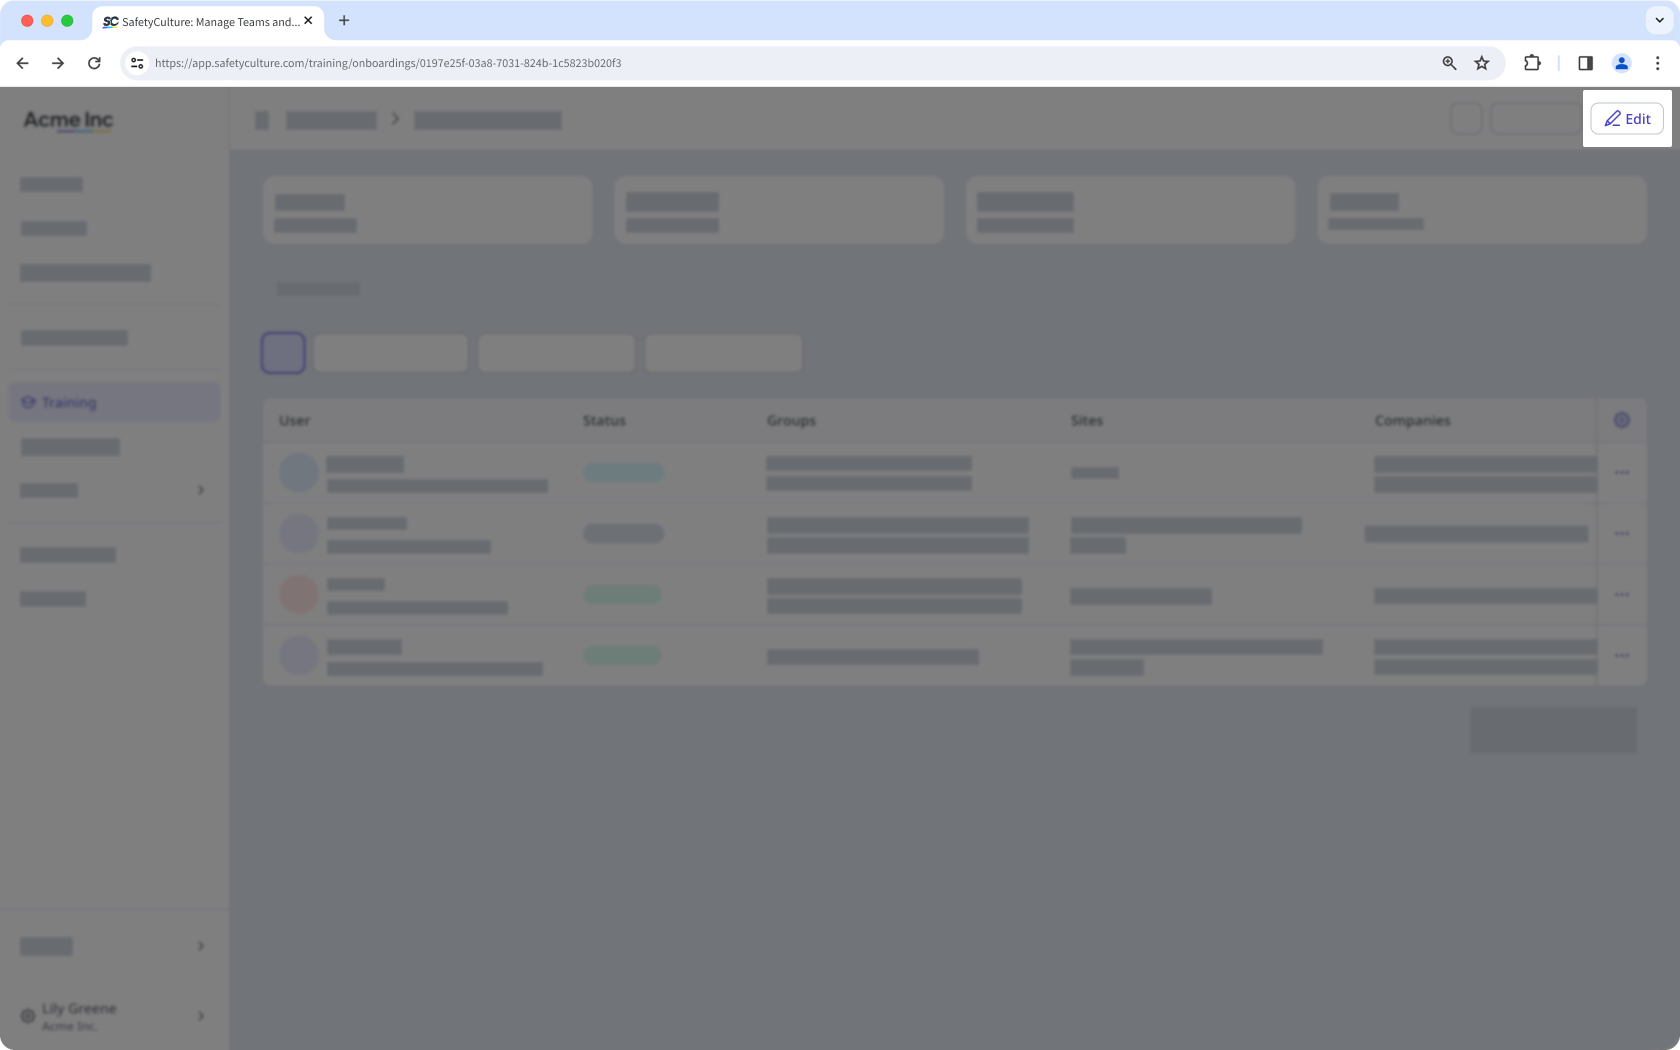
Click Edit on the upper-right of the page.
Click on the upper-left of your page to rename the onboarding workflow.
To add training steps, click Training on the right-hand side of the page, then:
Click next to a course to add it to the workflow. Alternatively, click to drag and drop the course into the workflow list.
Click Open library at the bottom of the page to browse the Library and add courses.
Click Manage courses at the bottom of the page to update your training courses.
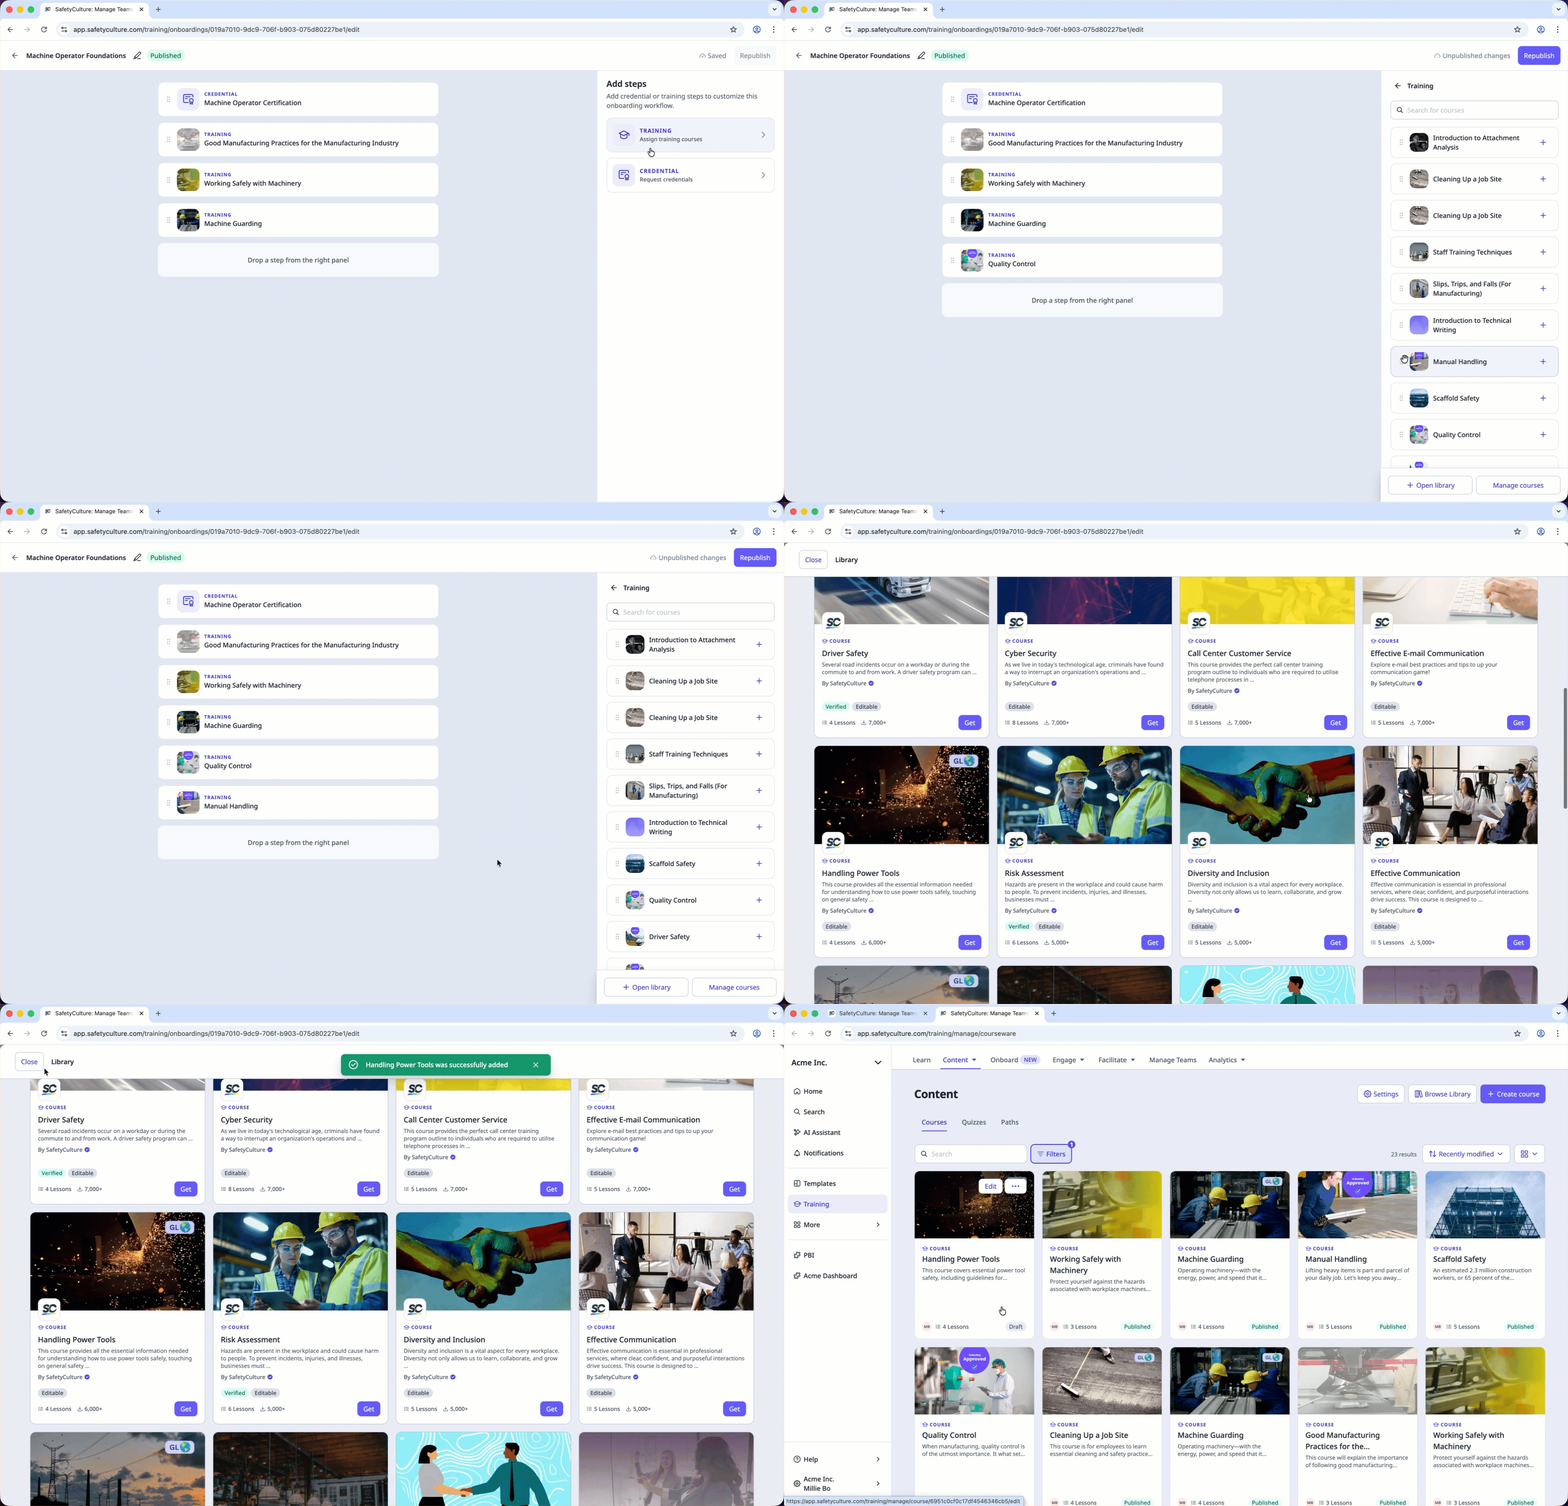
To add credential steps, click Credentials on the right-hand side of the page, then:
Click next to a credential type to add it to the workflow. Alternatively, click to drag and drop the credential type into the workflow list.
Click Create type at the bottom of the page to create a new credential type.
Click Manage credentials at the bottom of the page to update your credentials.
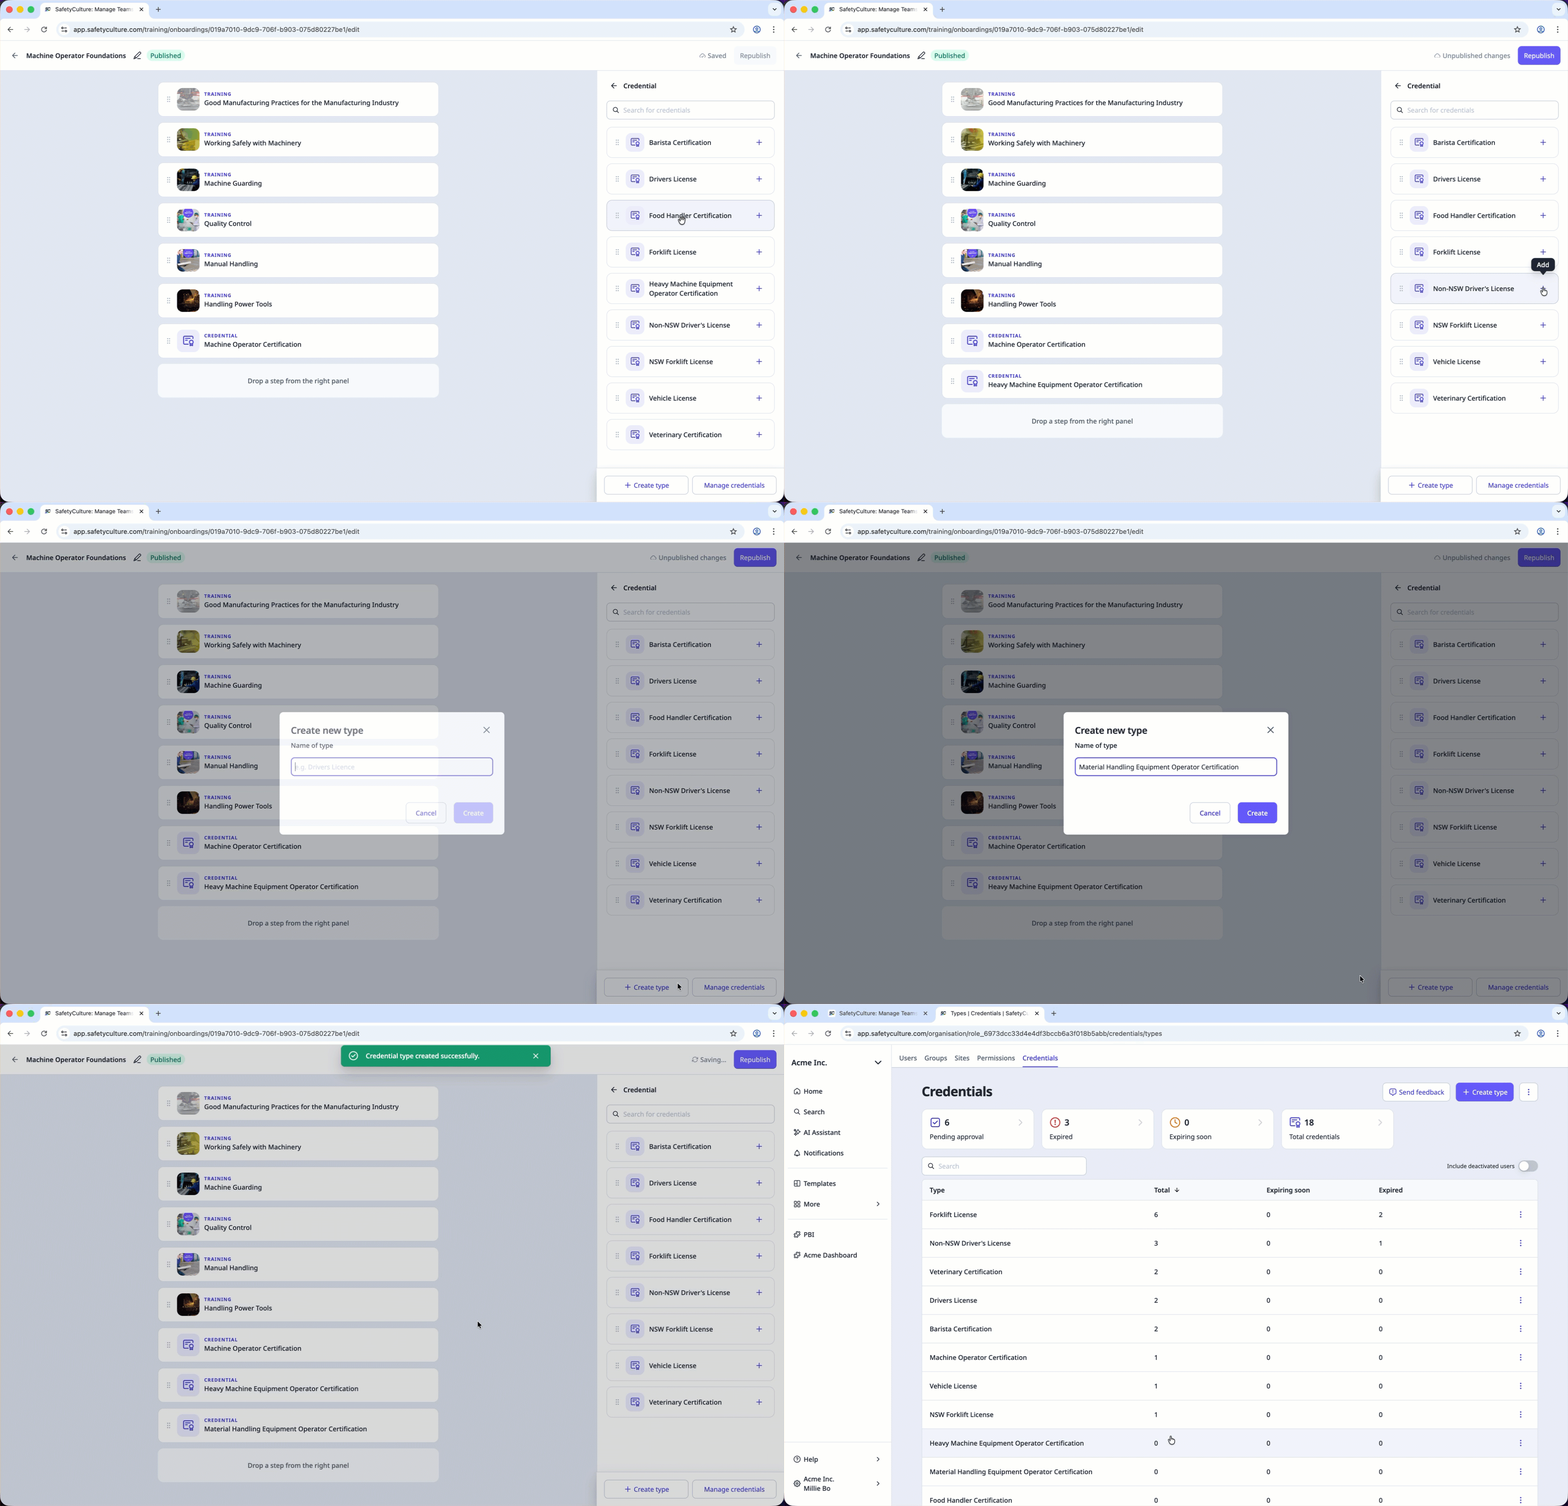
To add scenario steps, click Scenario on the side panel and select any of the following:
To add scenarios: Click next to a scenario. Alternatively, click to drag and drop the scenario into the workflow list.
To manage scenarios: Click Manage scenarios at the bottom of the page to update your scenarios.
Click to drag and reorder the workflow steps.
To remove a step, hover over a step and click .
Click Next: Republish on the upper-right of the page.
Once you're ready, click Republish.
Delete an onboarding workflow
Select Training in the sidebar or in More.
Click Onboard at the top of the page.
Click on the onboarding workflow's right-hand side and select Delete.
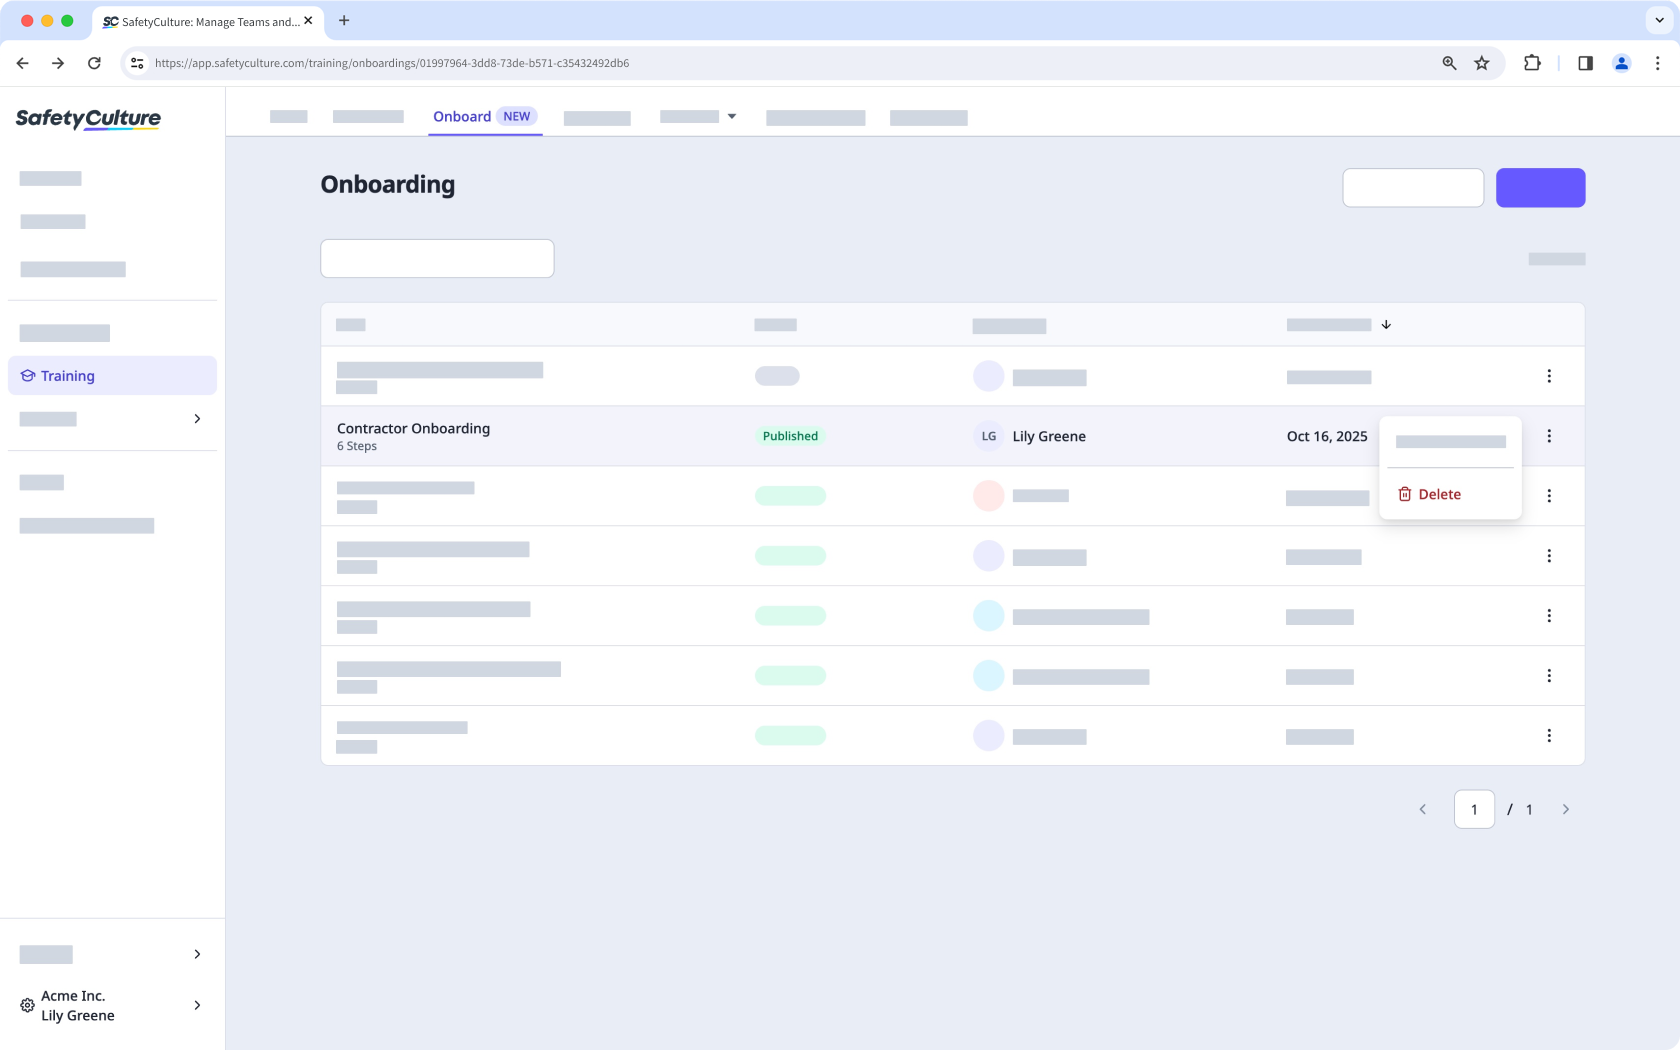
In the pop-up window, enter "delete" and click Delete.
You can manage onboarding for workers in your company from the Contractors dashboard.
Need more help?
Was this page helpful?