Zuletzt aktualisiert: 3. September 2026
Was Sie brauchen
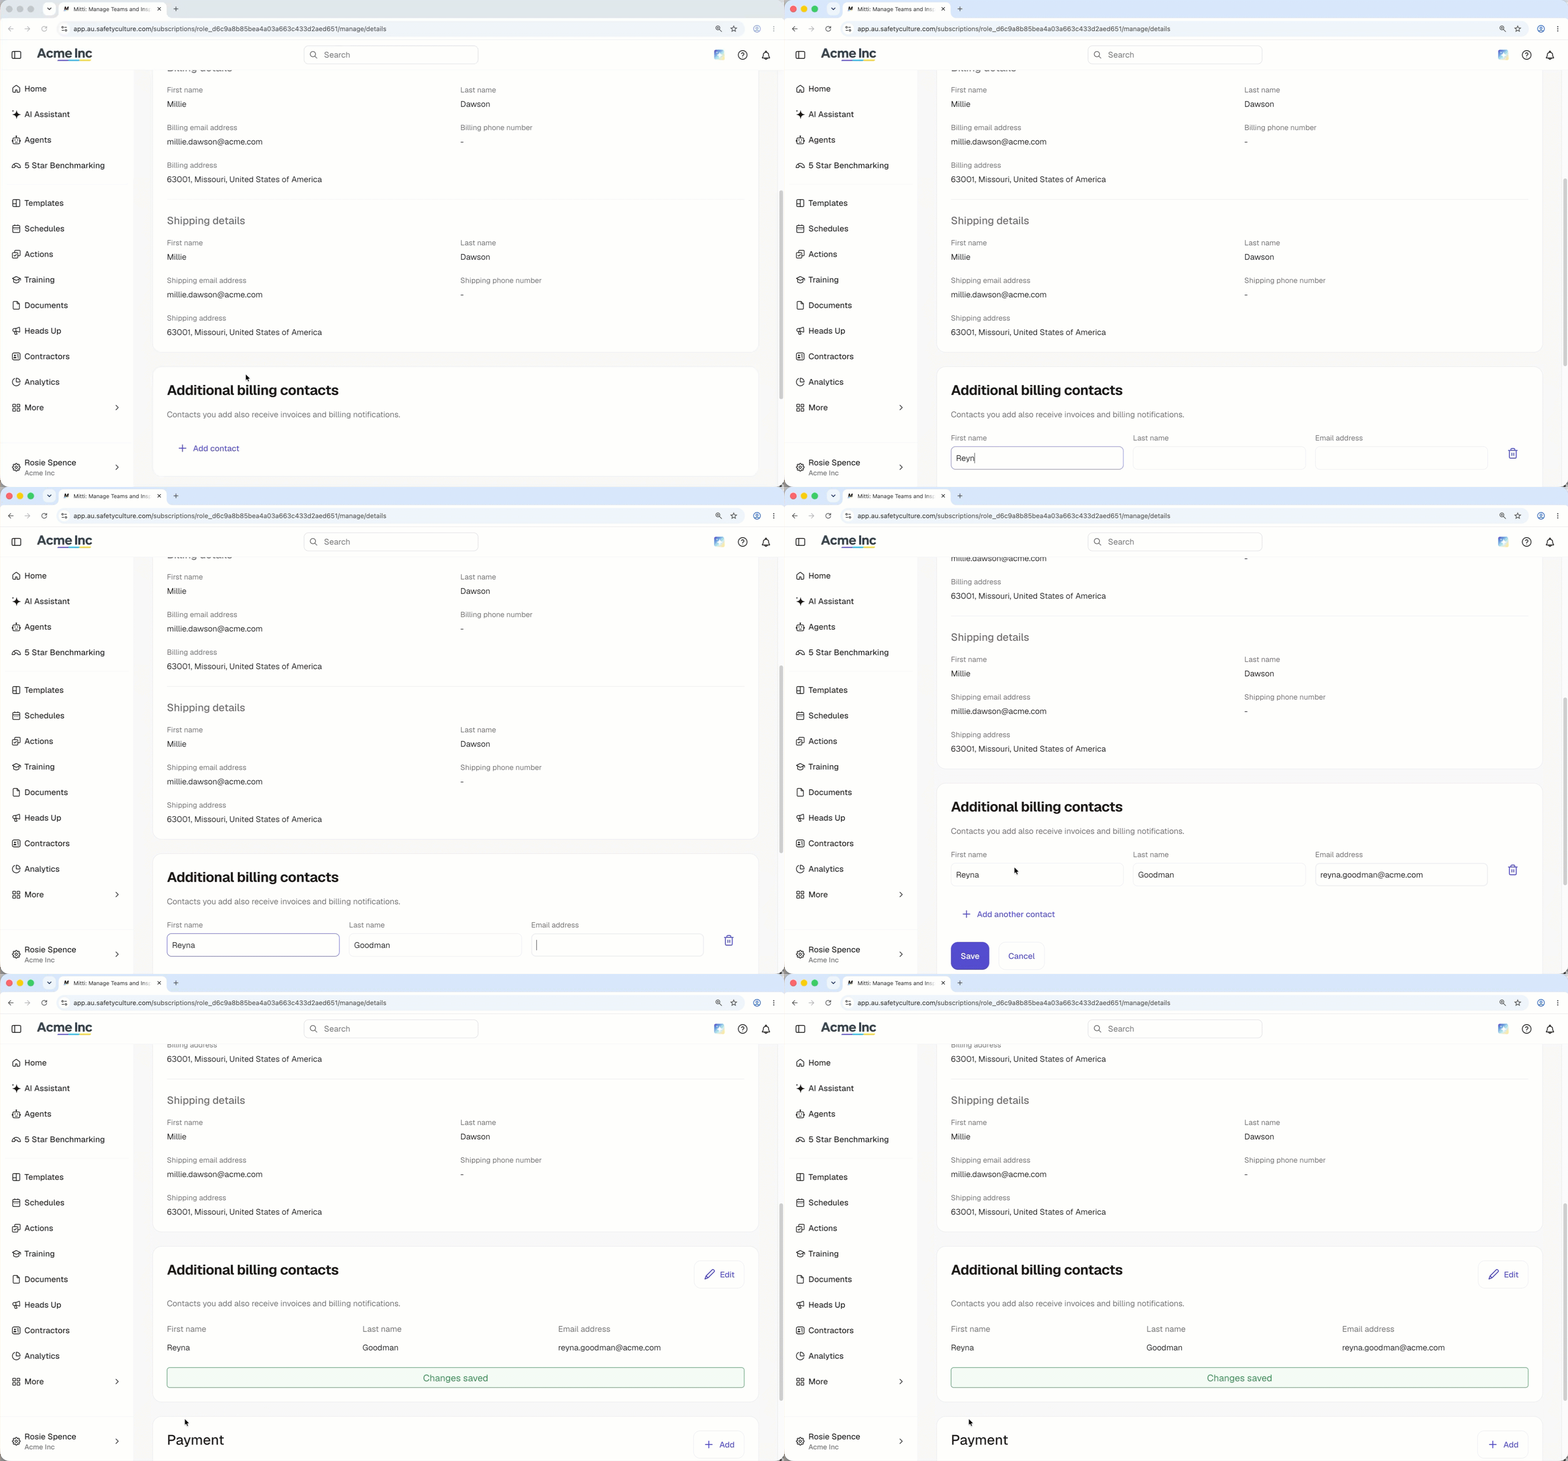
Einen weiteren Rechnungskontakt hinzufügen
Click your organization name on the lower-left corner of the page and select Abrechnung.
Click Einzelheiten at the top of the page.
In the "Additional billing contacts" section, click Kontakt hinzufügen.
Enter the first name, last name, and email address of the new billing contact.
Click Speichern.
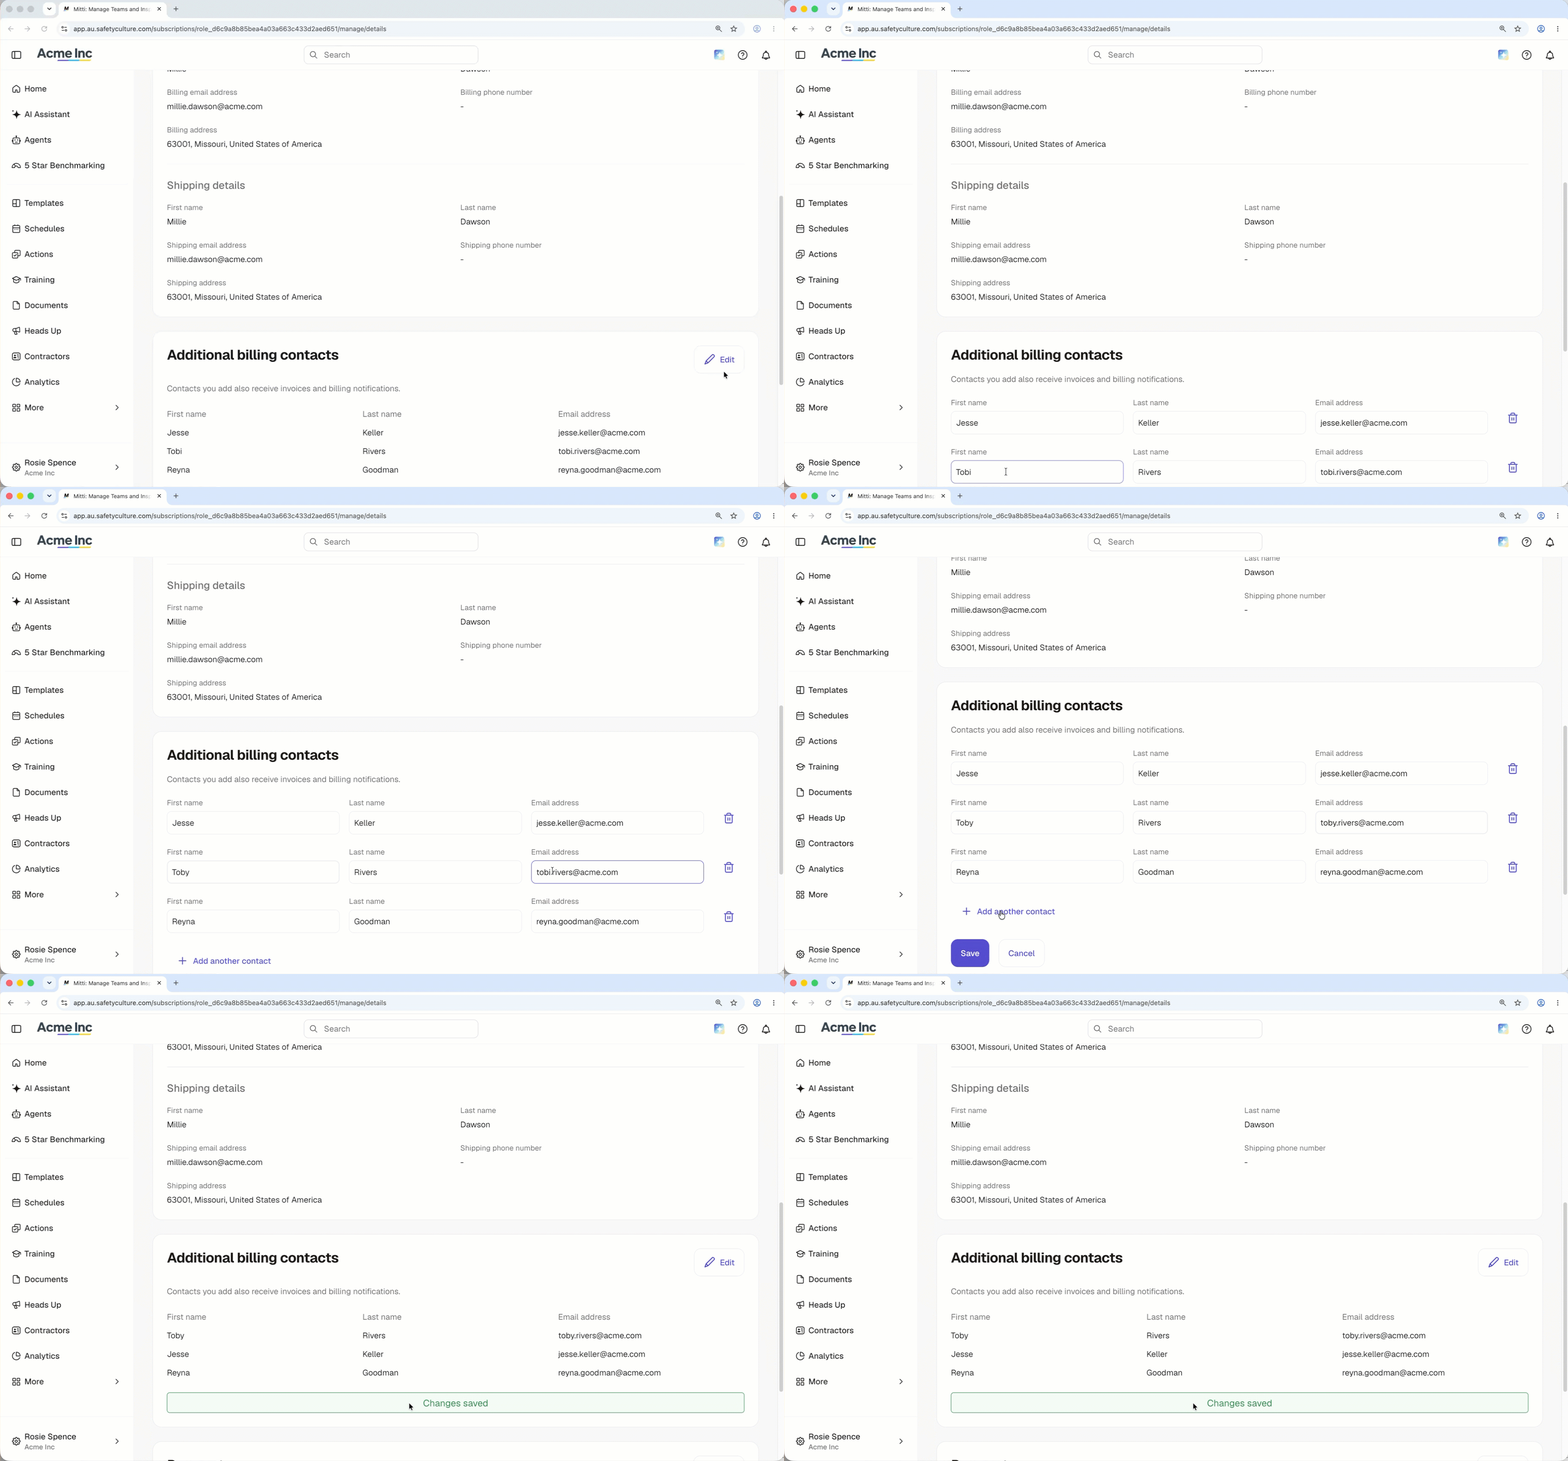
Einen weiteren Rechnungskontakt bearbeiten
Click your organization name on the lower-left corner of the page and select Abrechnung.
Click Einzelheiten at the top of the page.
In the "Additional billing contacts" section, click Bearbeiten.
Edit the name or email address of your billing contact.
Click Speichern.
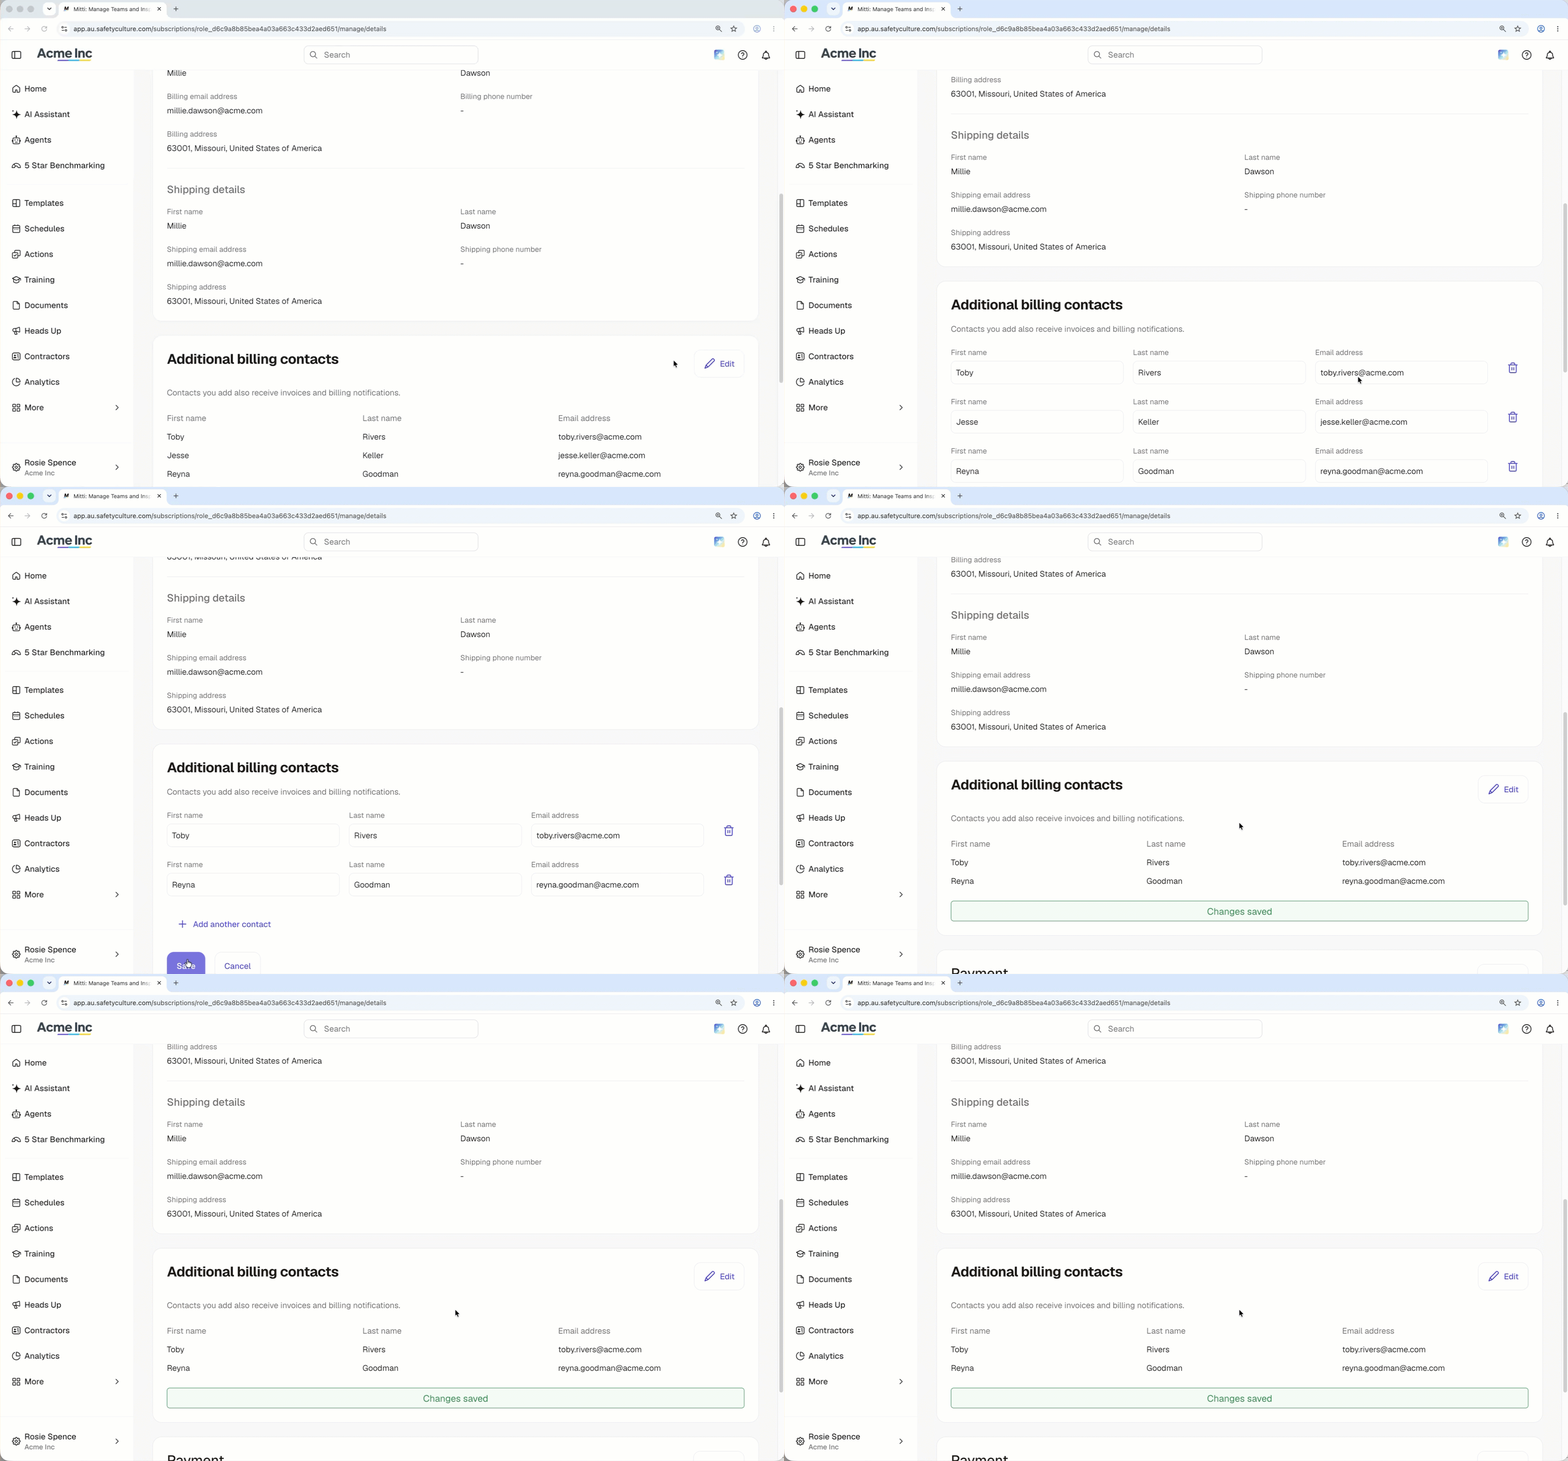
Delete an additional billing contact
Click your organization name on the lower-left corner of the page and select Abrechnung.
Click Einzelheiten at the top of the page.
In the "Additional billing contacts" section, click Bearbeiten.
Click on the right-hand side of the billing contact.
Click Speichern.
Brauchen Sie weitere Hilfe?
War diese Seite hilfreich?