Last updated: July 7, 2025
Template owners are set as approvers by default in newly-created approval workflow pages.
What you'll need
Deleting an approval workflow page is the same process as deleting other template pages. Please note that even after deleting the page, Approval workflow will remain visible in the template until you add an approval workflow page again.
Add an approval workflow page
Select Templates in the sidebar or in More.
Click the template and select Edit template in the side panel.
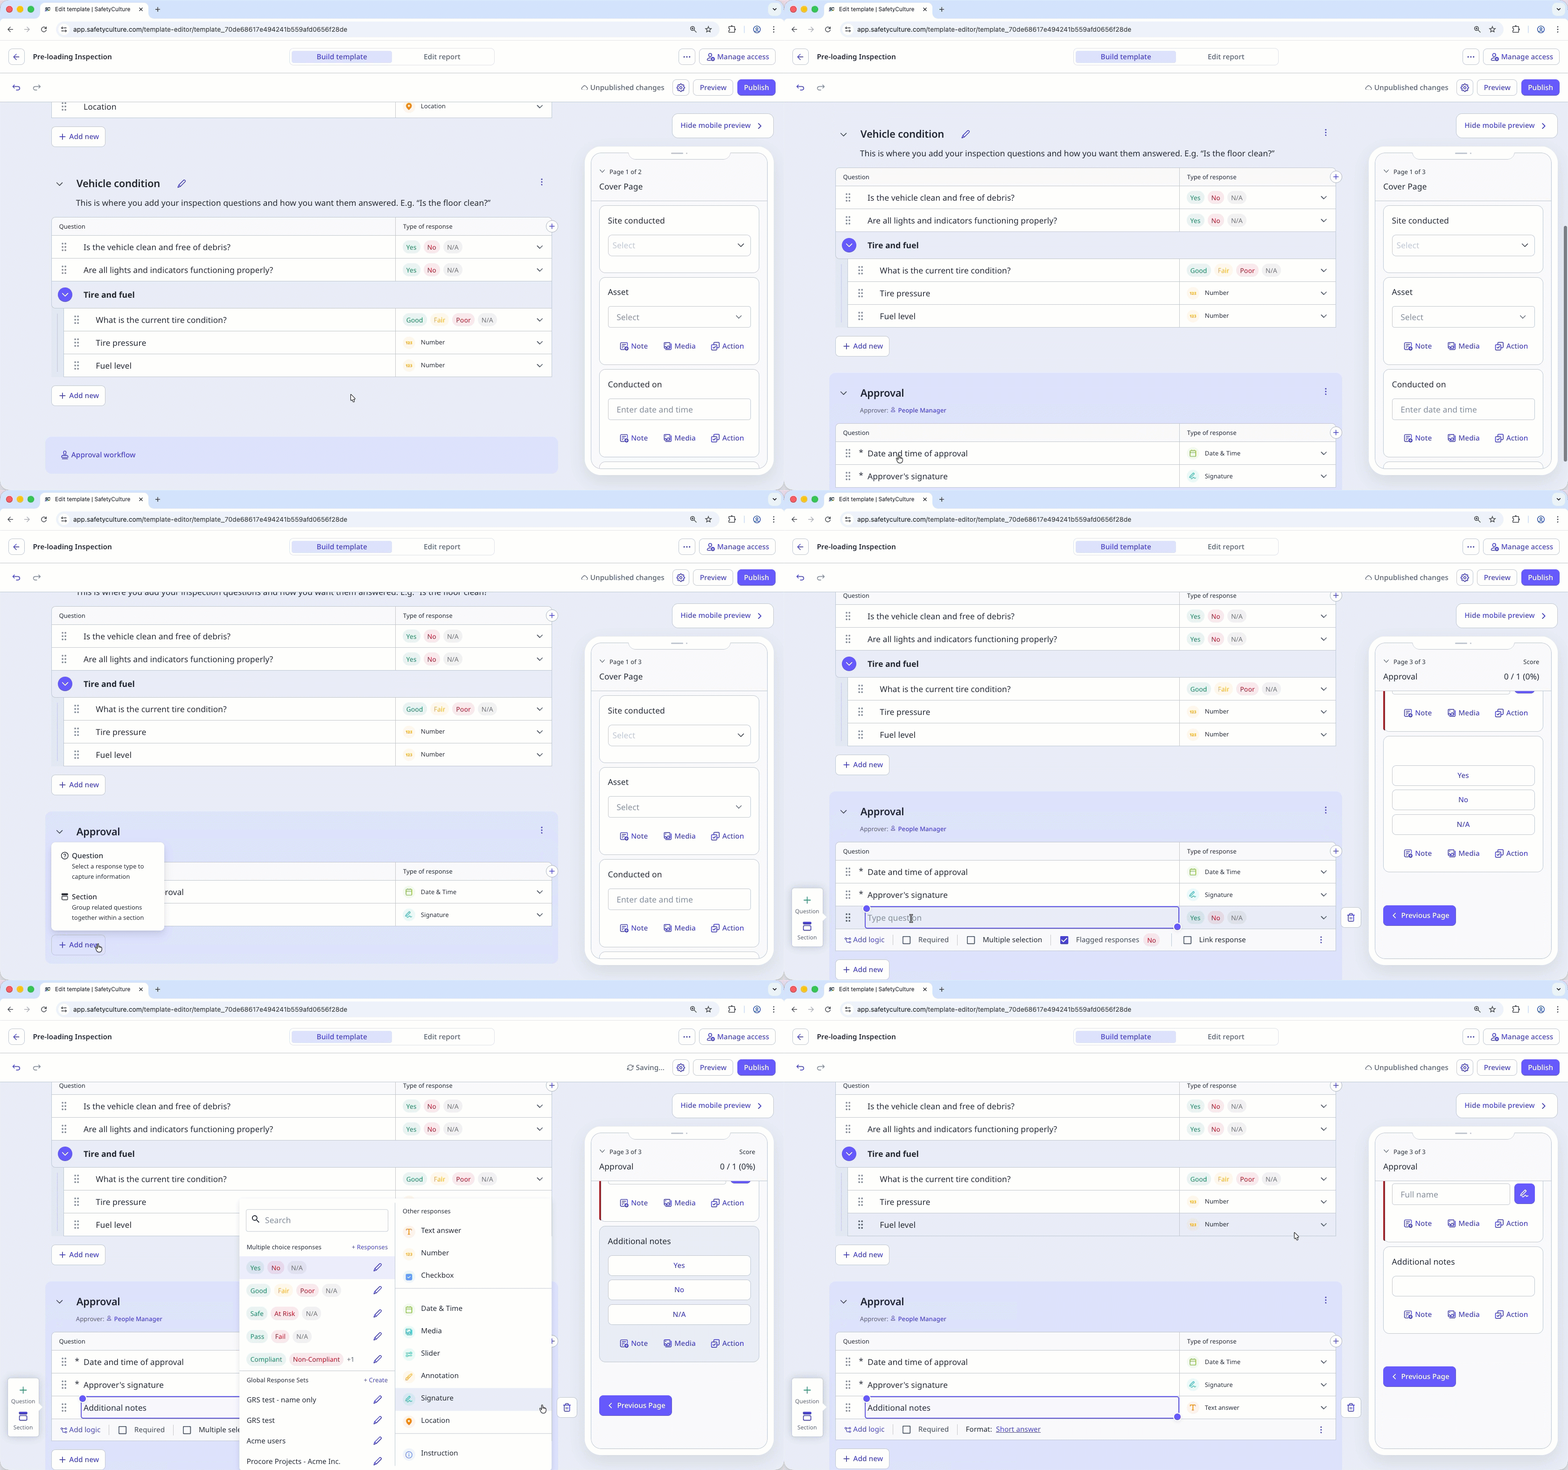
Scroll to the end of the template and click Approval workflow to add an approval workflow page.
By default, the page comes with two questions to capture approval details. You can edit, add, or delete questions, or mark them as required or optional.
Click Publish on the upper-right of the page to publish the template. If you're not ready to publish the template, you can go back to the templates list and come back when you're ready.
Open the mobile app.
Tap Inspections in the navigation bar or select it from More.
Select Templates tab at the top of your screen.
Tap the template and select Edit template from the pop-up options.
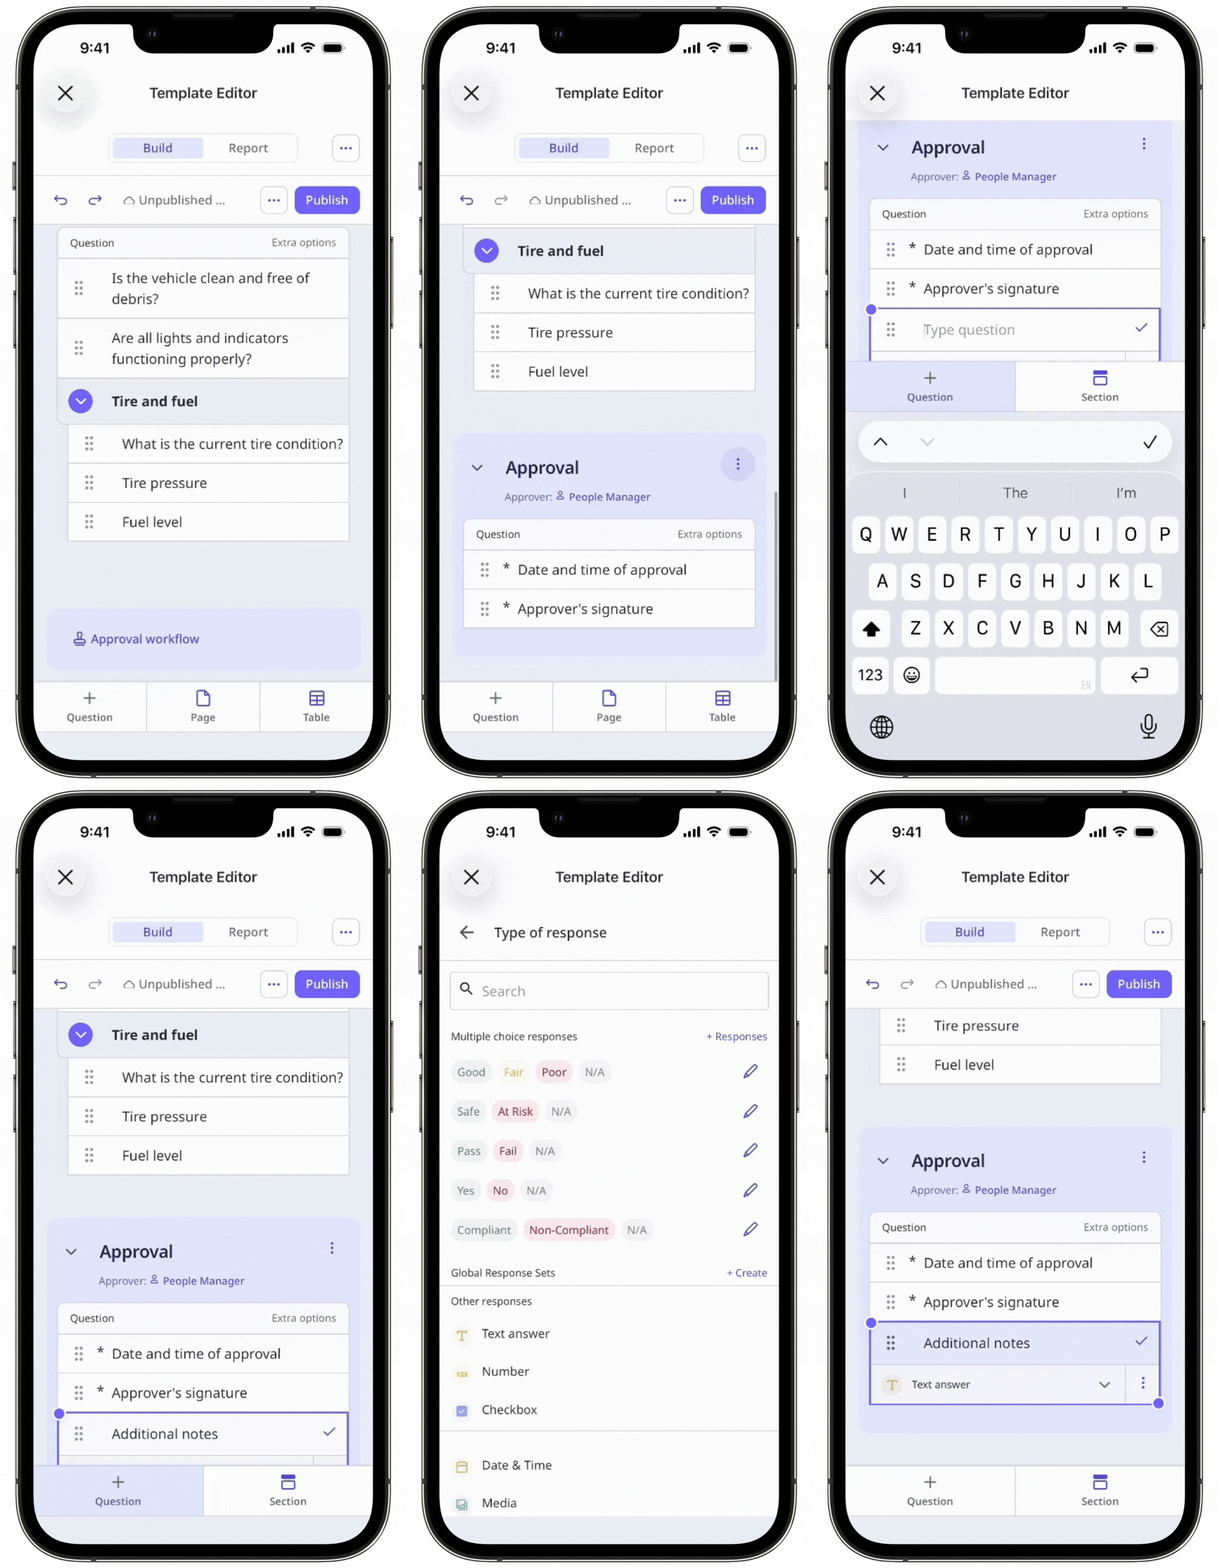
Scroll to the end of the template and tap Approval workflow to add an approval workflow page.
By default, the page comes with two questions to capture approval details. You can edit, add, or delete questions, or mark them as required or optional.
Tap Publish on the upper-right of the page to publish the template. If you're not ready to publish the template, you can go back to the templates list and come back when you're ready.
To assign approvers based on site and group membership, the site question must be marked as required.
To view all users and groups when assigning an approver, make sure your organization's user visibility settings allow users to select everyone in the organization.
Assign an approver
Select Templates in the sidebar or in More.
Click the template and select Edit template in the side panel.
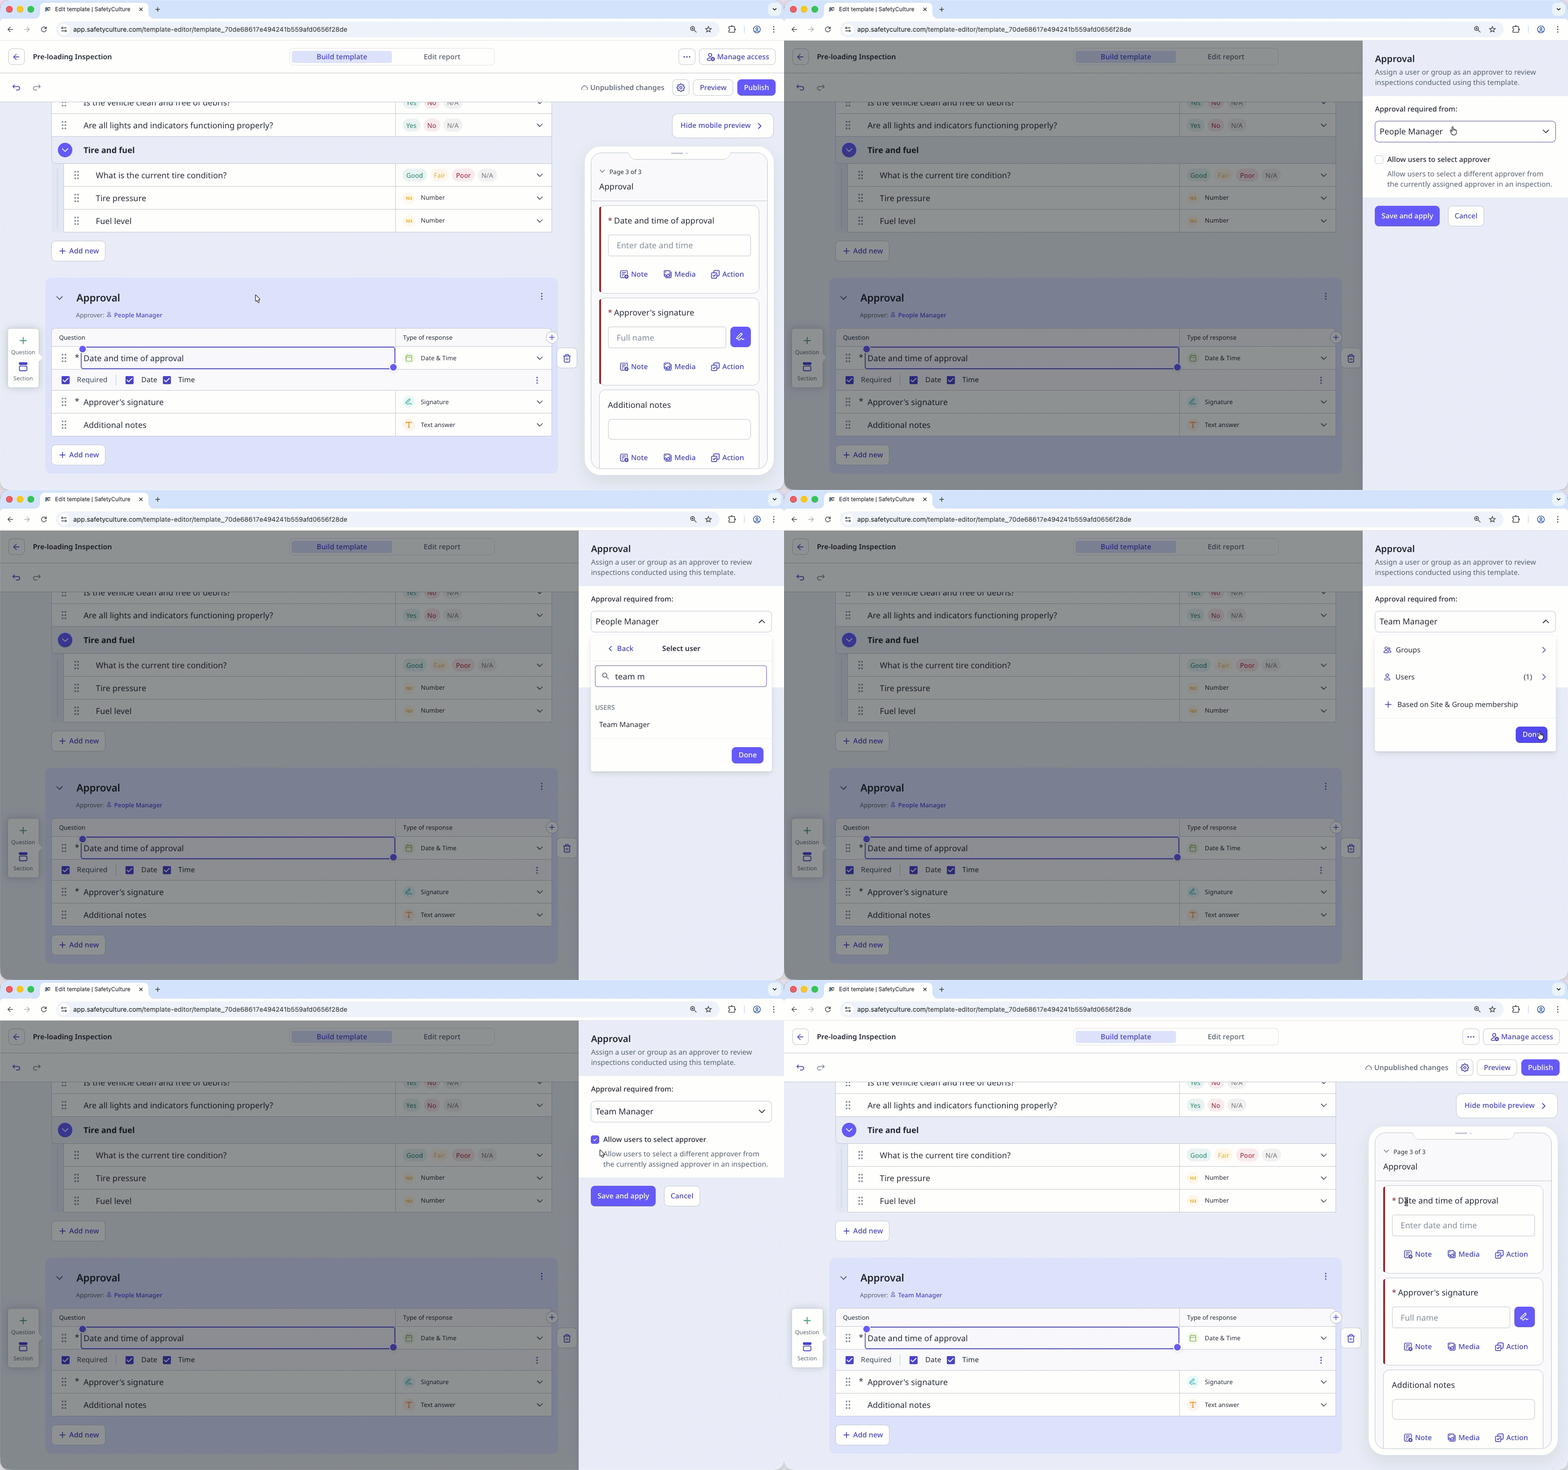
Scroll to the approval workflow page.
Click on below the page's title.
In the side panel, select a user, group, or create rules based on group and site membership to assign the approver automatically. You can also check the "Allow users to select approver" box to give your team control over who can approve their inspections.
Click Save and apply.
Click Publish on the upper-right of the page to publish the template. If you're not ready to publish the template, you can go back to the template list and publish the changes when you're ready.
Open the mobile app.
Tap Inspections in the navigation bar or select it from More.
Select Templates tab at the top of your screen.
Tap the template and select Edit template from the pop-up options.
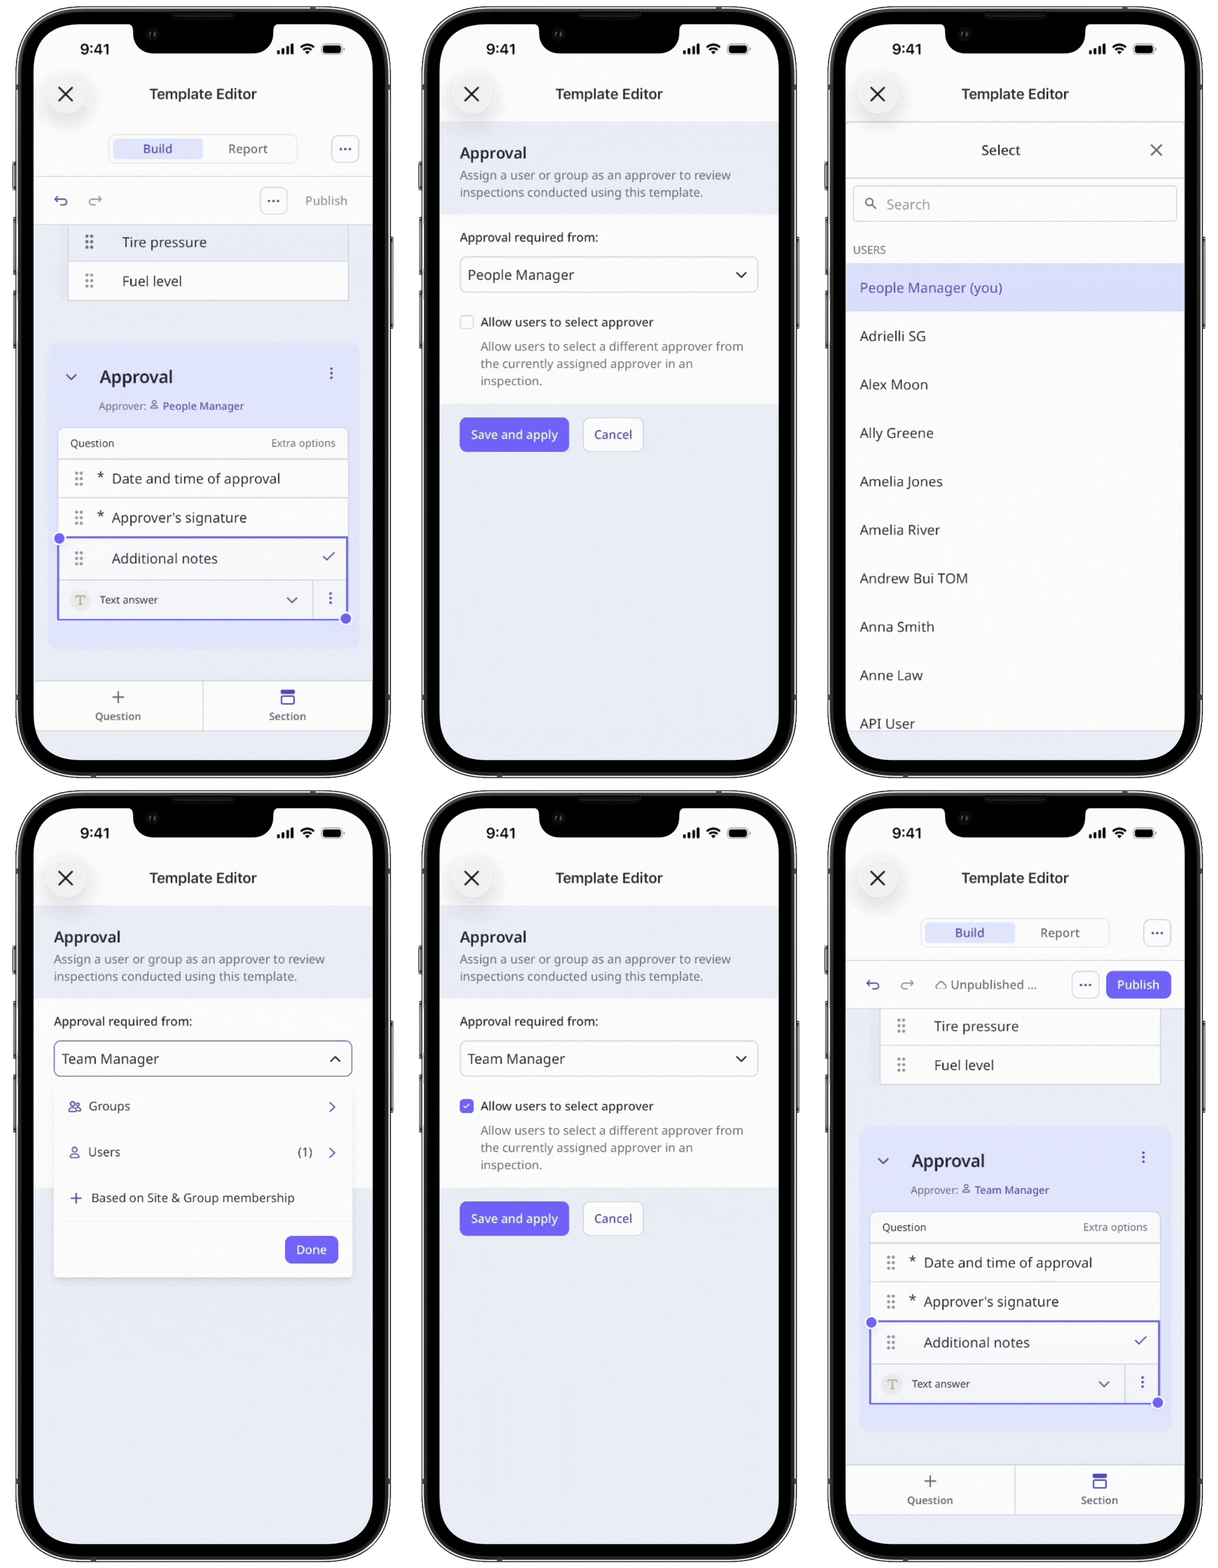
Scroll to the approval workflow page.
Tap below the page's title.
In the side panel, select a user, group, or create rules based on group and site membership to assign the approver automatically, then tap Done. You can also check the "Allow users to select approver" box to give your team control over who can approve their inspections.
Tap Save and apply.
Tap Publish on the upper-right of the page to publish the template. If you're not ready to publish the template, you can go back to the templates list and come back when you're ready.
Approvers will automatically be provided "View, edit" access to newly-created inspections. If you want an approver to access all previous inspections from a template for approval, please edit the template’s access rules to ensure they have the necessary access level.
Need more help?
Was this page helpful?