Last updated: September 24, 2026
We currently have a legacy and a new experience with the Schedules feature.
This article covers the new Schedules experience. Please ensure you're in the new experience by using the toggle on the upper-left of the Schedules page.
What you'll need
If you have "Schedules: Manage" permission, you can edit all schedules in your organization.
End a schedule
Select Schedules in the sidebar or in More.
Click Manage schedules on the top of the page.
Click the schedule.
Click on the upper-right corner of the side panel.
Select Delete schedule.
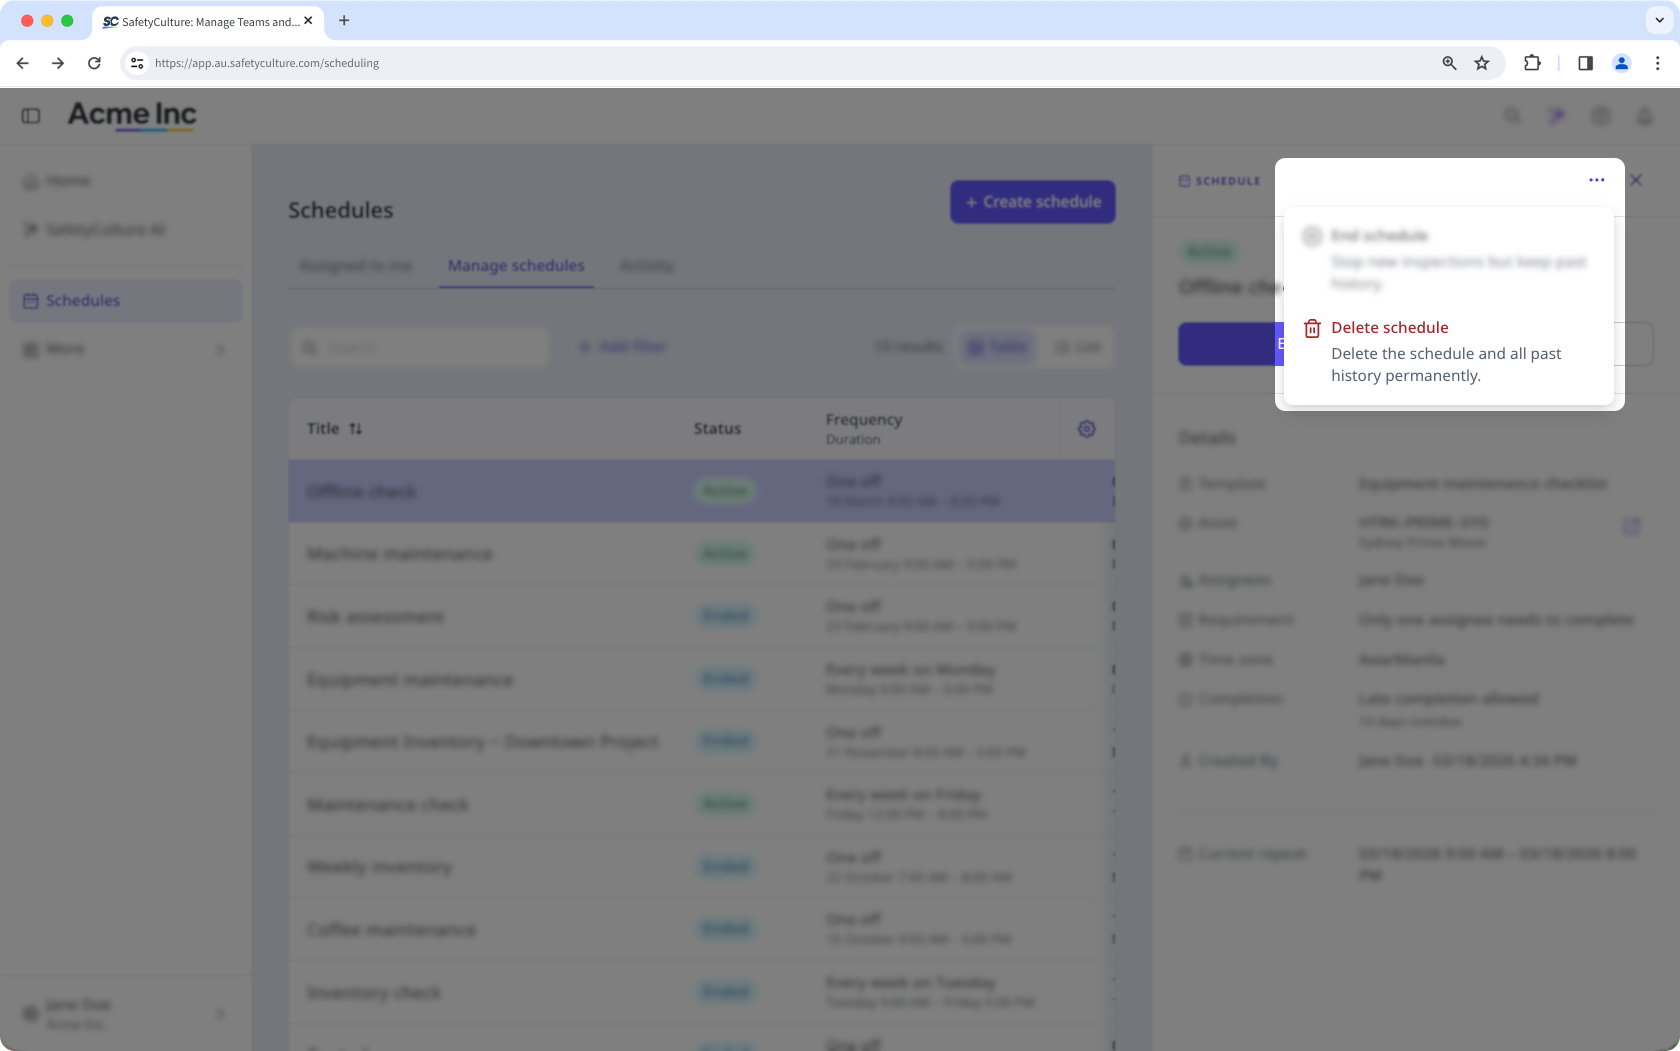
In the pop-up window, click Delete.
Bulk end schedules
You can bulk end up to 1,000 schedules at a time.
Click Schedules from the sidebar or in More.
Click Manage schedules at the top of the page.
Check the box next to each schedule.
Click End at the bottom of the page.
In the pop-up window, click End.
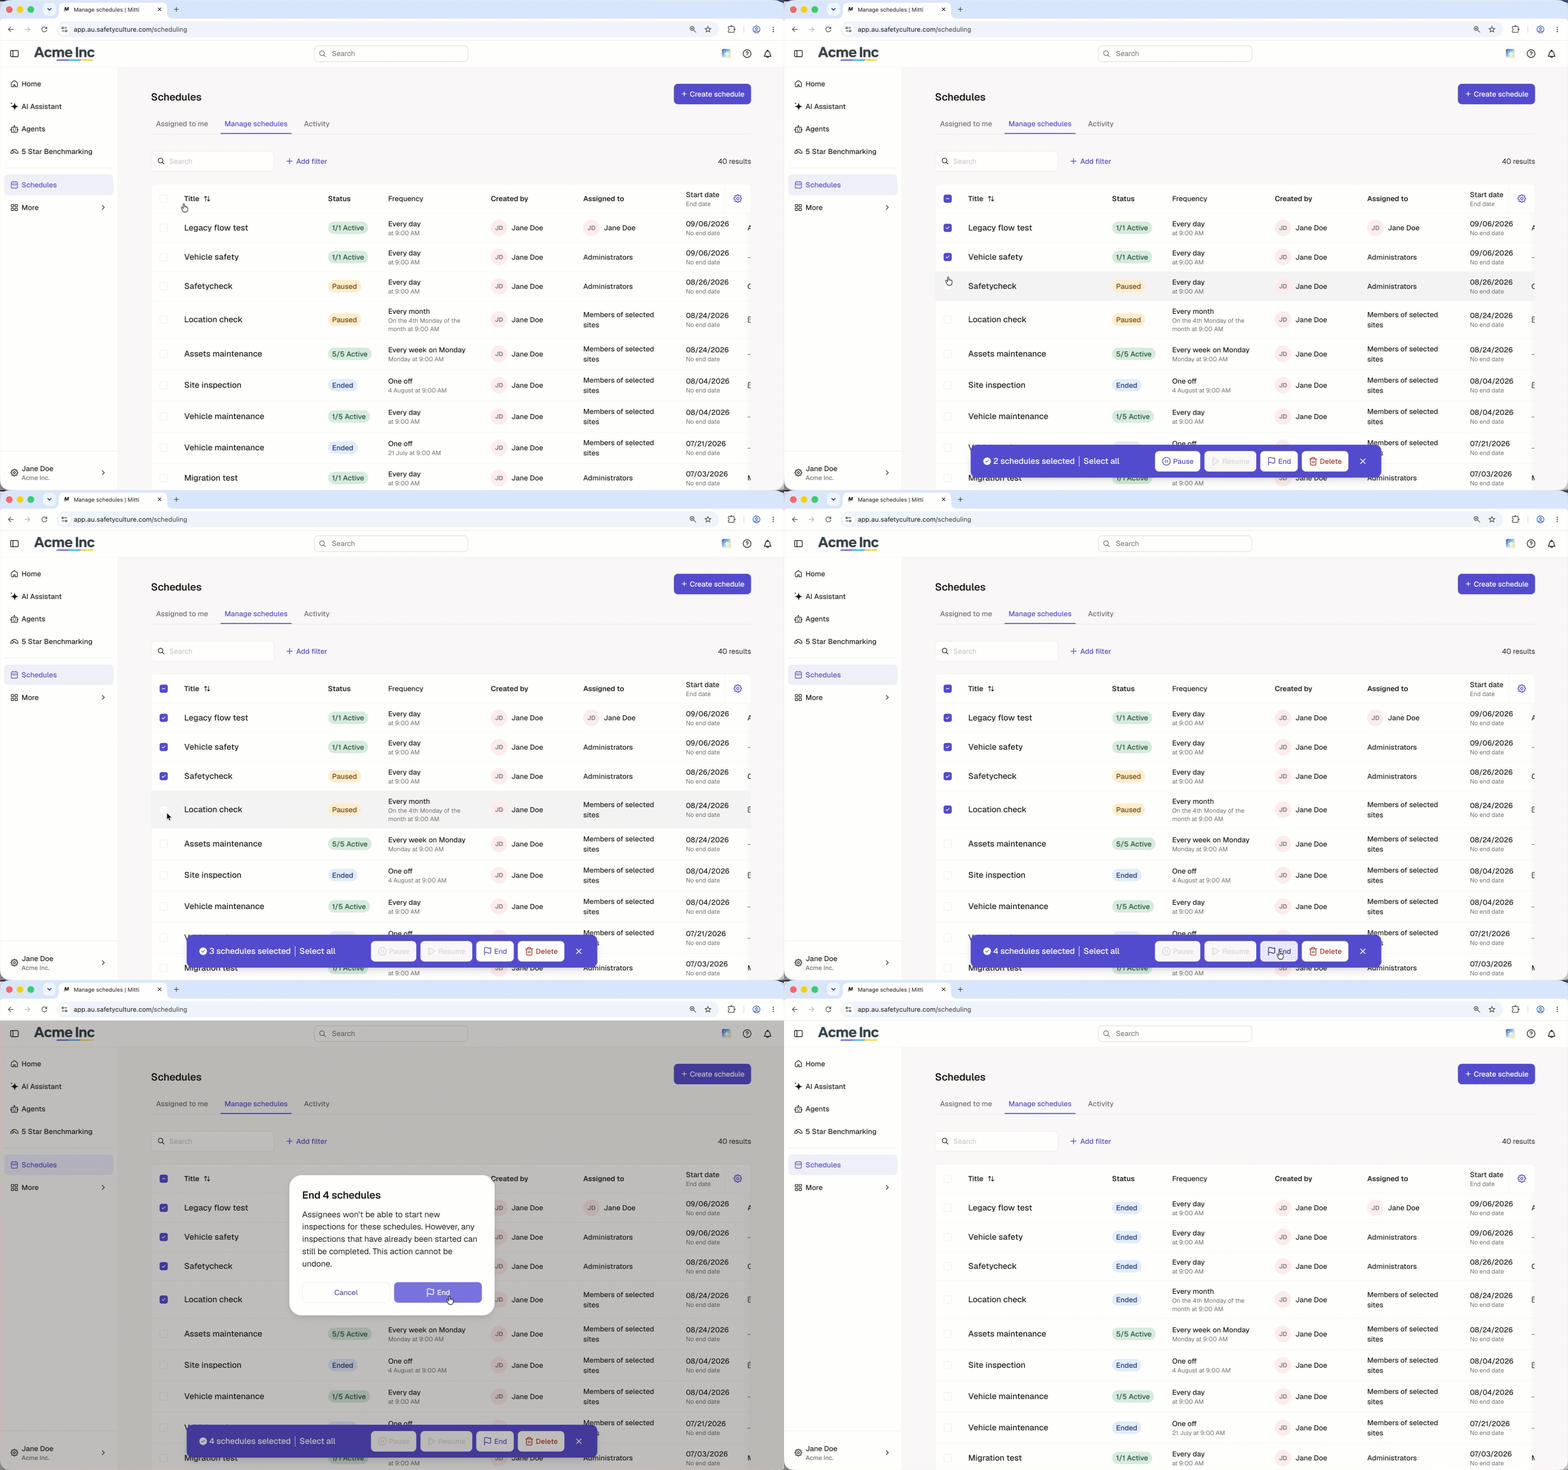
Bulk ending schedules only work when every schedule in your selection is active or paused. If your selection includes active, paused, and ended schedules, narrow it to active or paused schedules to use the option.
What are the differences between the legacy and new Schedules experience?
Feature | Legacy | New |
|---|---|---|
Set end date for schedules | Scheduled repeats continued indefinitely unless manually paused or deleted. | You can set a schedule to end on a specific date or after a number of repeats. This helps when you only need a schedule to run for a limited time, removing the need for manual updates later on. |
Need more help?
Was this page helpful?