Last updated: September 20, 2026
What are sites in Mitti?
Sites in Mitti help you track and manage your team's data by associating it with specific locations, projects, or teams. They provide a shared structure that connects users, content, and activity across multiple features and makes it easier for you to manage access, assignments, and insights as your organization grows.
You can organize sites in a hierarchy that reflects your organization's structure and group them into higher levels, like areas or regions, for easier management of site membership and trend analysis across multiple sites.
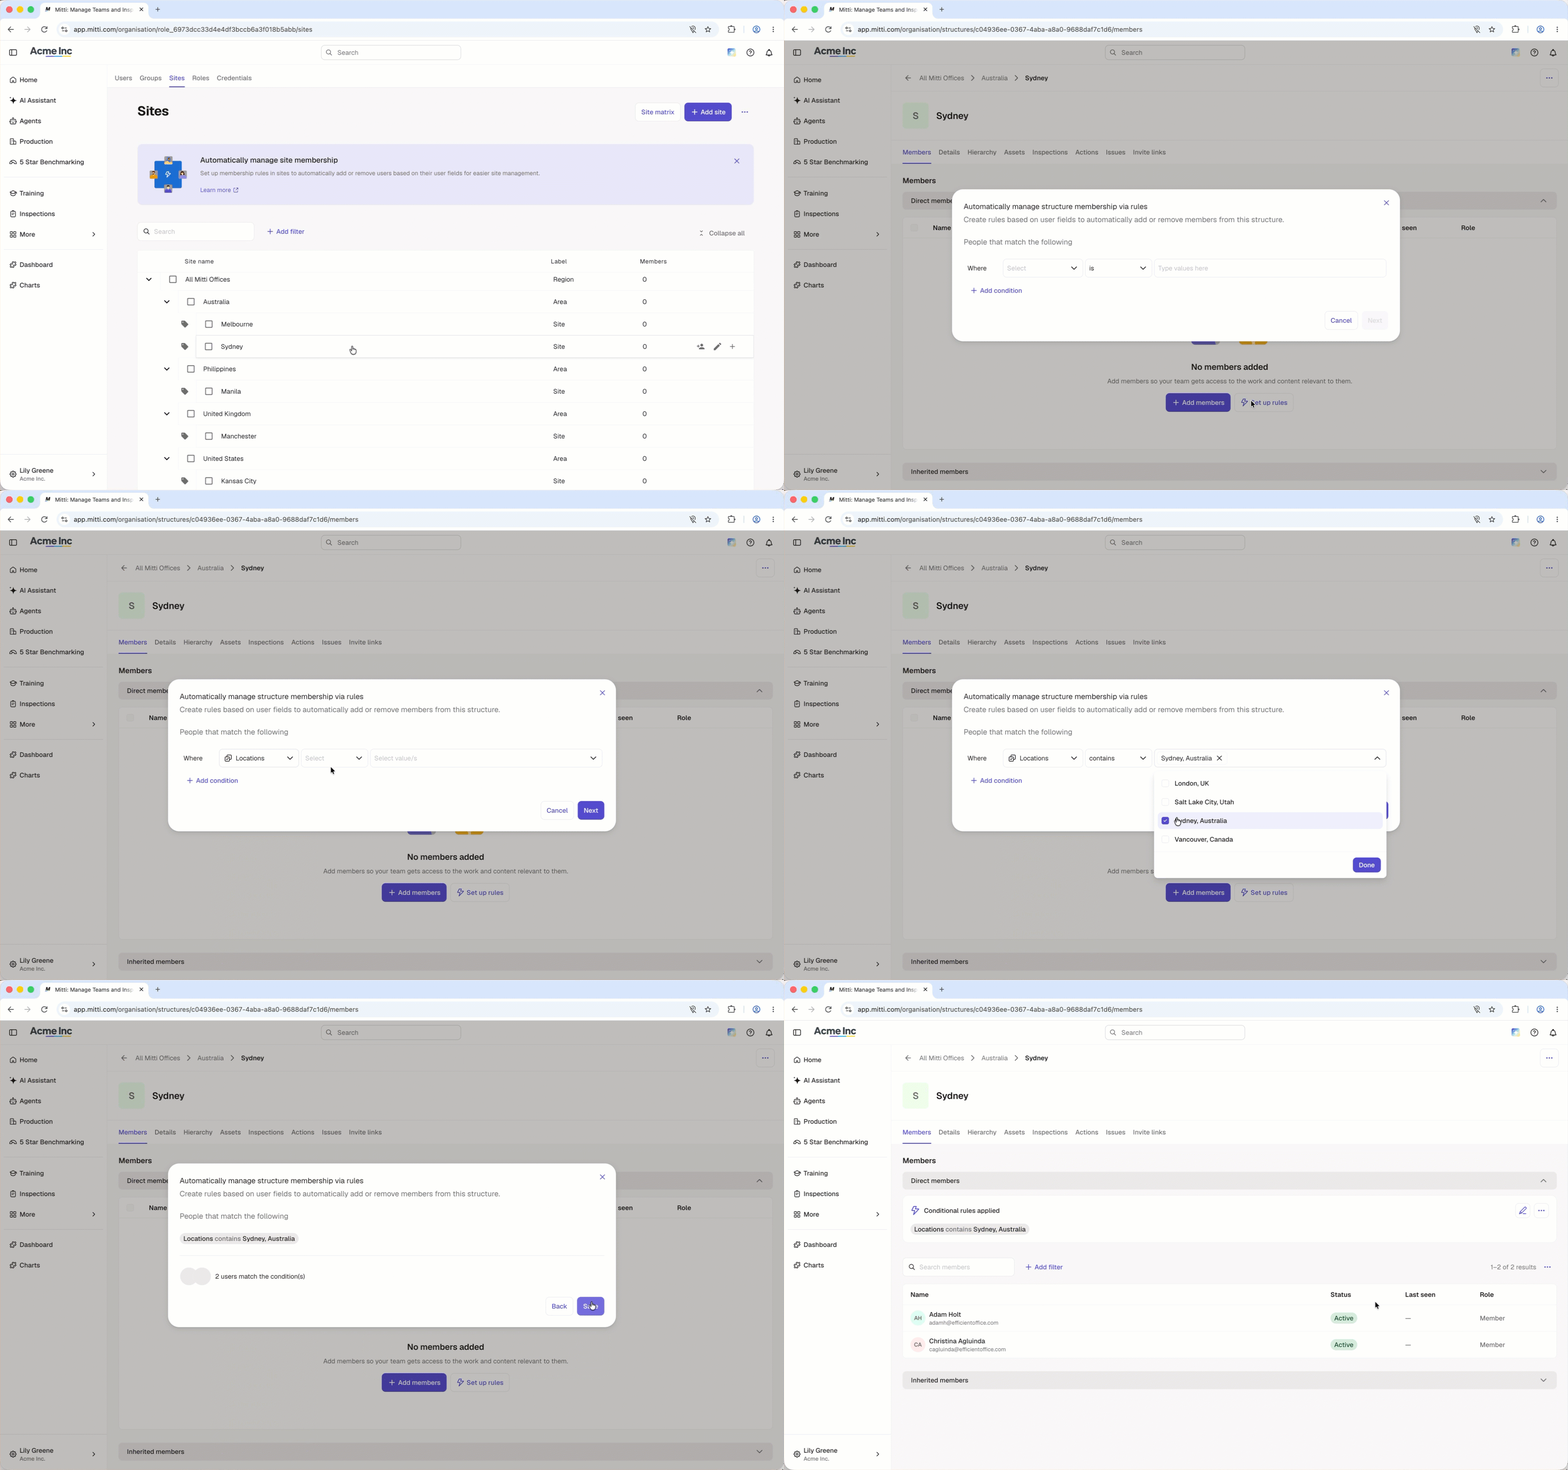
Depending on the feature, sites can be used to manage access and assignments, or to organize and filter data.
Feature | Manage access and assignments | Organization and filtering |
|---|---|---|
Templates | Yes | Yes |
Inspections | Yes | Yes |
Actions | Yes | Yes |
Training | Yes | No |
Issues | Yes | Yes |
Assets | Yes | Yes |
Heads Up | Yes | No |
Investigations | No | Yes |
Documents | No | Yes |
Analytics | No | Yes |
Contractors | No | Yes |
What you'll need
You can only have up to 50,000 sites in your organization. If you need to add more than 50,000 sites to your organization, let us know by providing your feedback.
Add a site
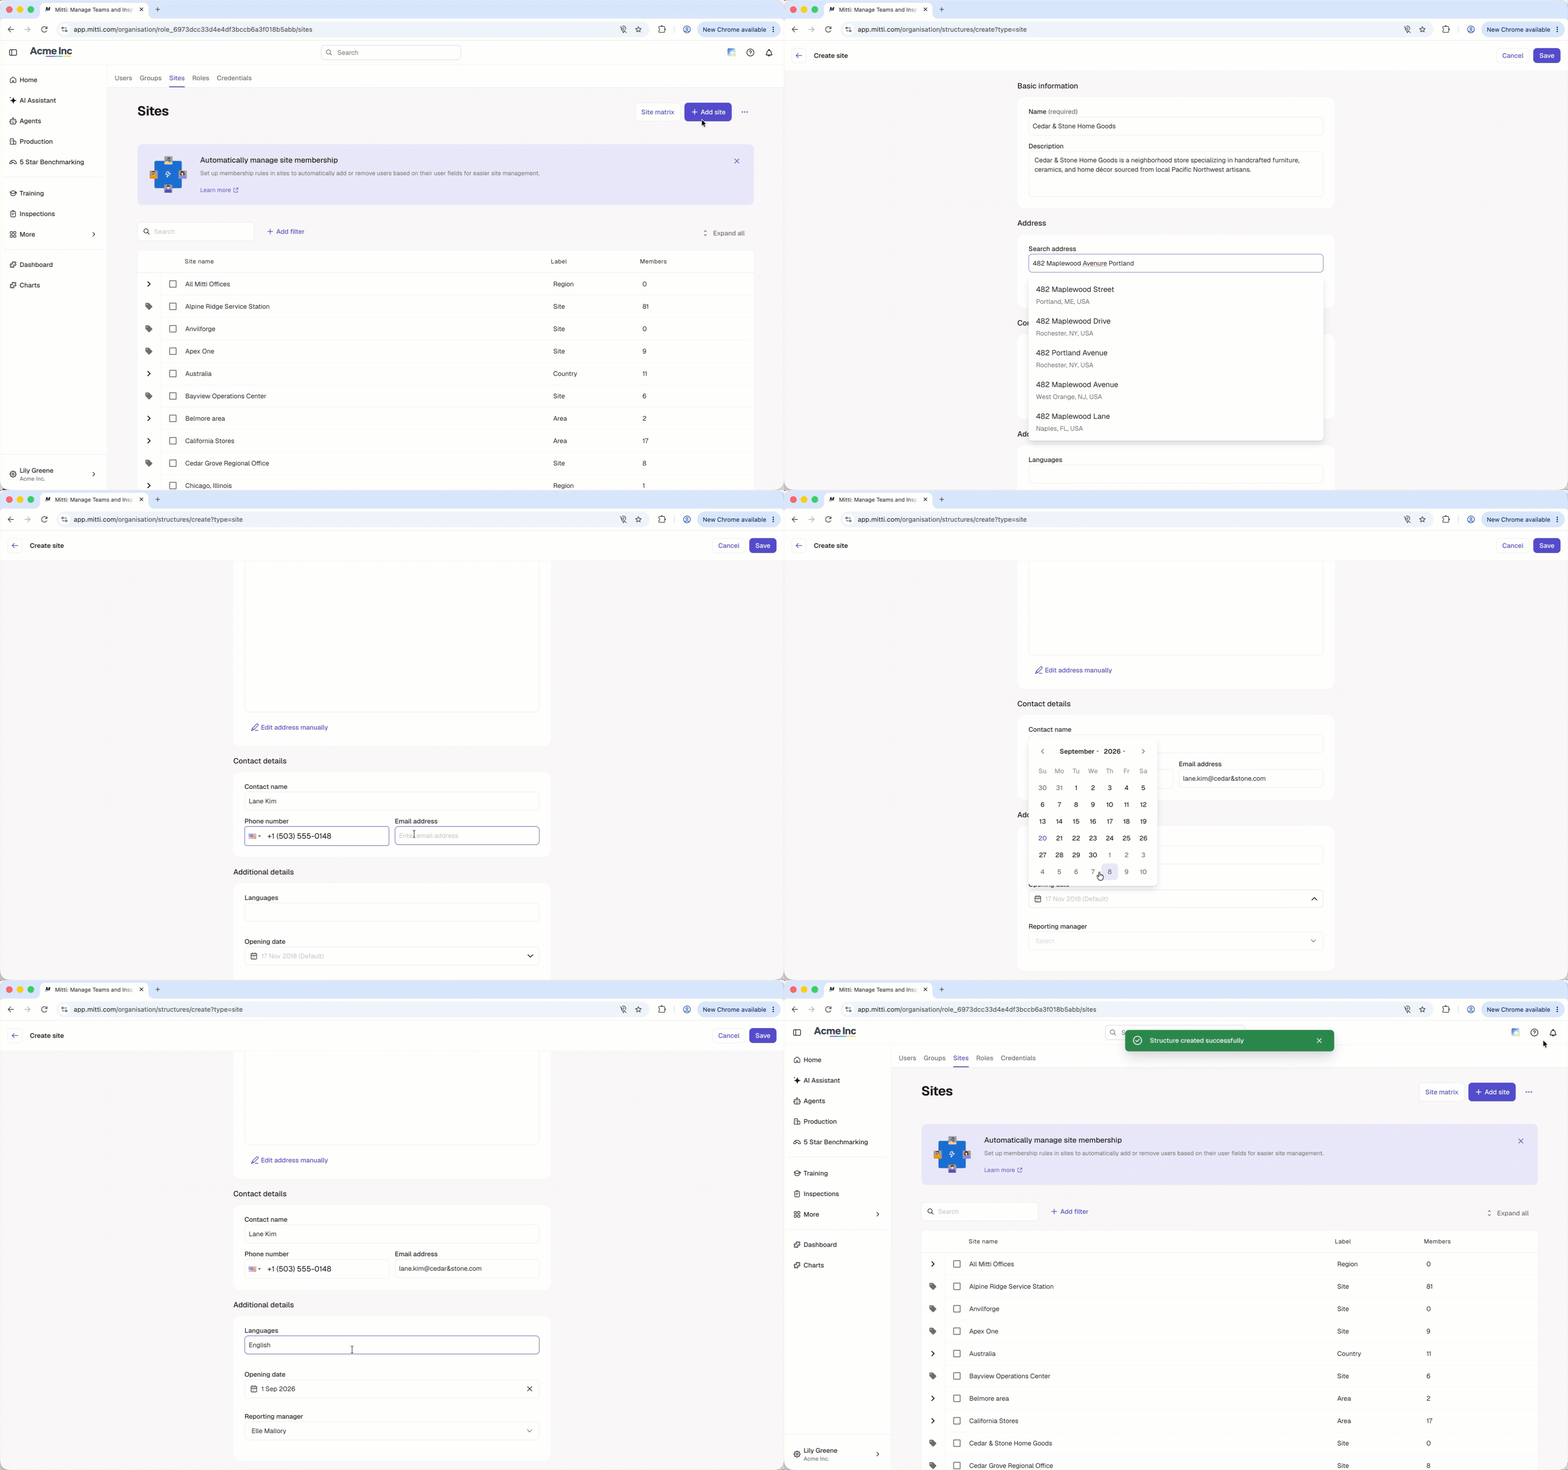
Click your organization name on the lower-left corner of the page and select Sites.
Click Add site on the upper-right of the page.
Enter the "Name" and "Description", and configure the organization fields accordingly.
Click Save on the upper-right corner of the page.
Add a site or level in-line
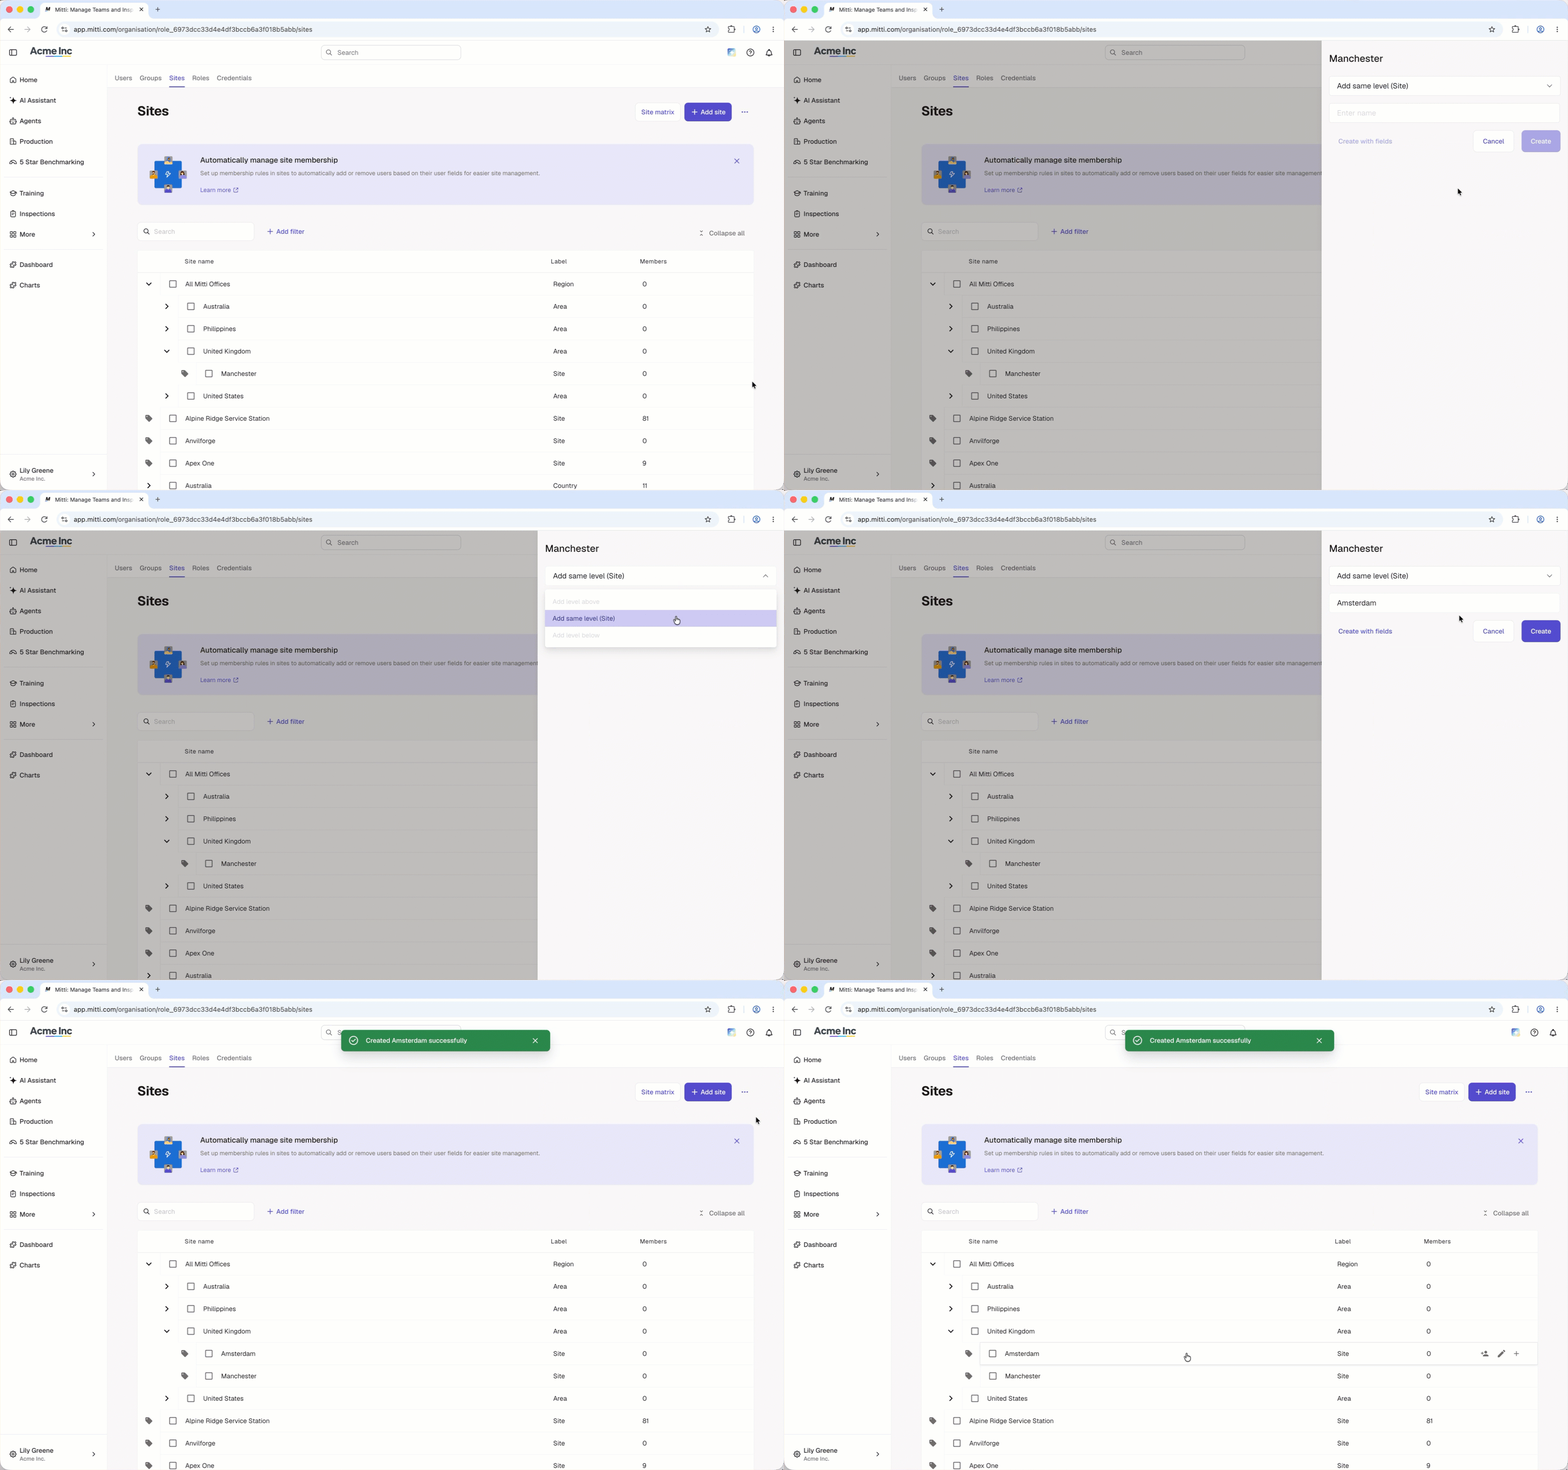
Click your organization name on the lower-left corner of the page and select Sites.
Hover over a site and click .
In the pop-up window, click the dropdown menu and select the level you want to add:
Add level above: Add an area, region, state, or country above the selected level.
Add same level: Add the same level as the selected.
Add level below: Add a site, area, region, or state below the selected level.
Enter the name of site. If you want to configure the organization fields of the site, click Create with fields.`
Click Create.
When updating existing sites via CSV, leave the members column unchanged to avoid adding or removing current site members.
Bulk add sites via CSV upload
Click your organization name on the lower-left corner of the page and select Sites.
Click on the upper-right corner of the page and select Bulk upload sites (CSV).
Download the example CSV template by clicking Download sites template.
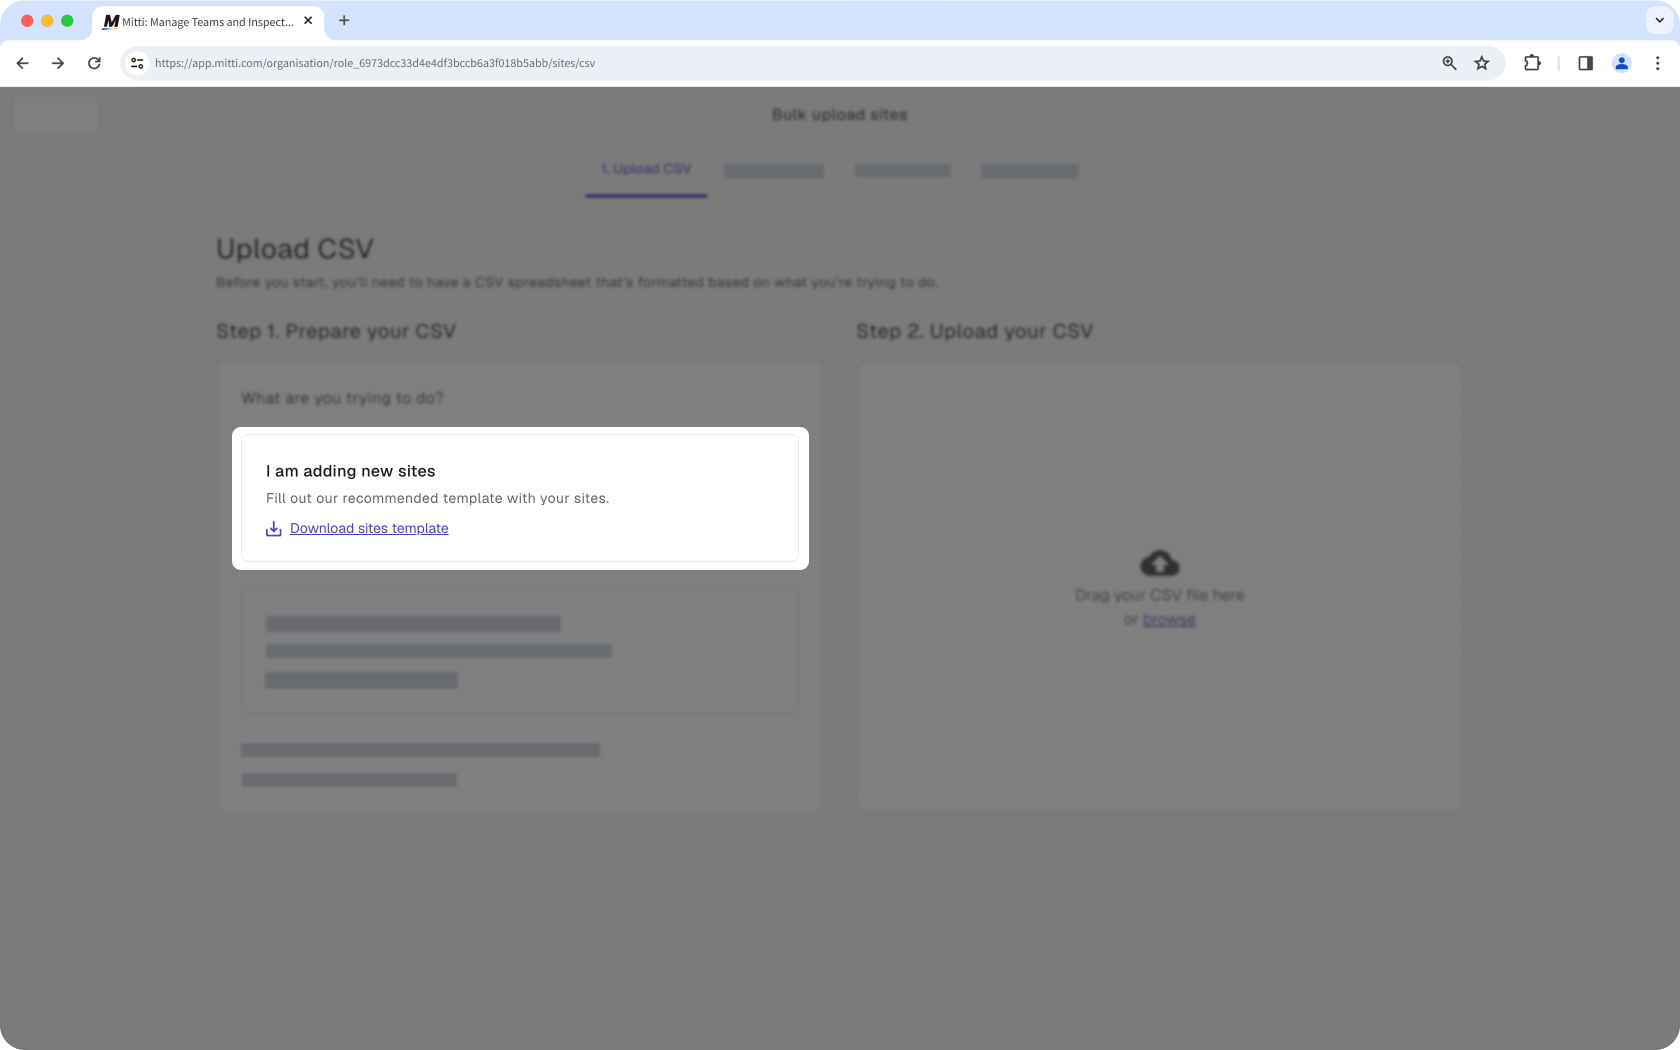
Add new sites at each level of the hierarchy by entering their names in the relevant columns. You can also add site members by entering their email addresses under the "members" column, separated using a semicolon.
Drag and drop your CSV file or click browse to select the file from your device.
Match your CSV column headers with their corresponding fields, then click Review data.
Confirm that your CSV data has been uploaded correctly, then click Save and upload.
CSV files encoded in a different format will be automatically encoded as UTF-8 to prevent any errors, such as broken characters, after uploading.
Troubleshooting CSV upload errors
Need more help?
Was this page helpful?