Last updated: October 25, 2026
What you'll need
Create a global role
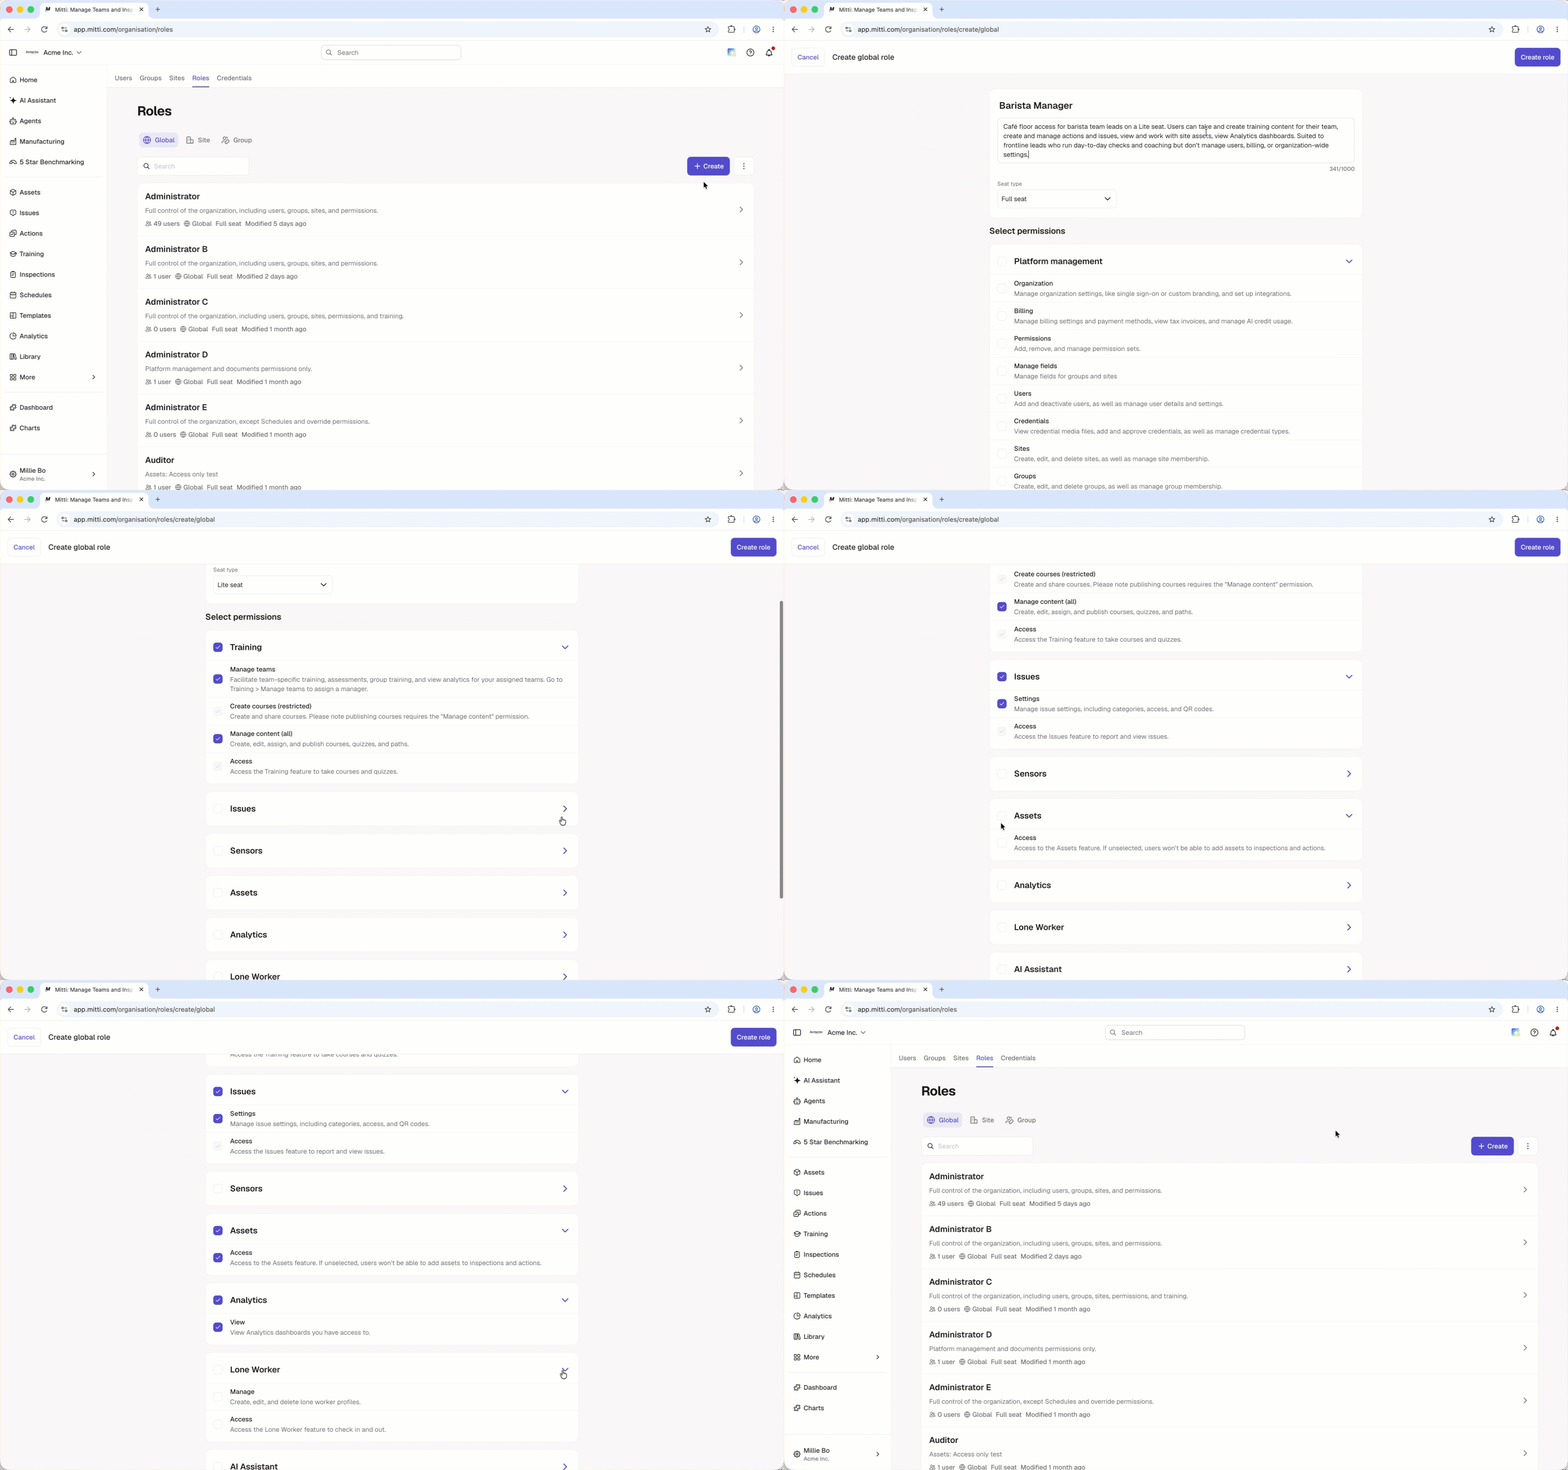
Click your organization name on the lower-left corner of the page and select Roles.
Click Create at the upper-right corner of the global role list and select Create global role.
Configure the following details accordingly:
Name: Enter the role name.
Description: Enter the role description.
Seat type: Click the dropdown and select the seat type.
Select permissions: Select the permissions you want to assign to the role.
Click Create role at the upper-right of the page.
Edit a role
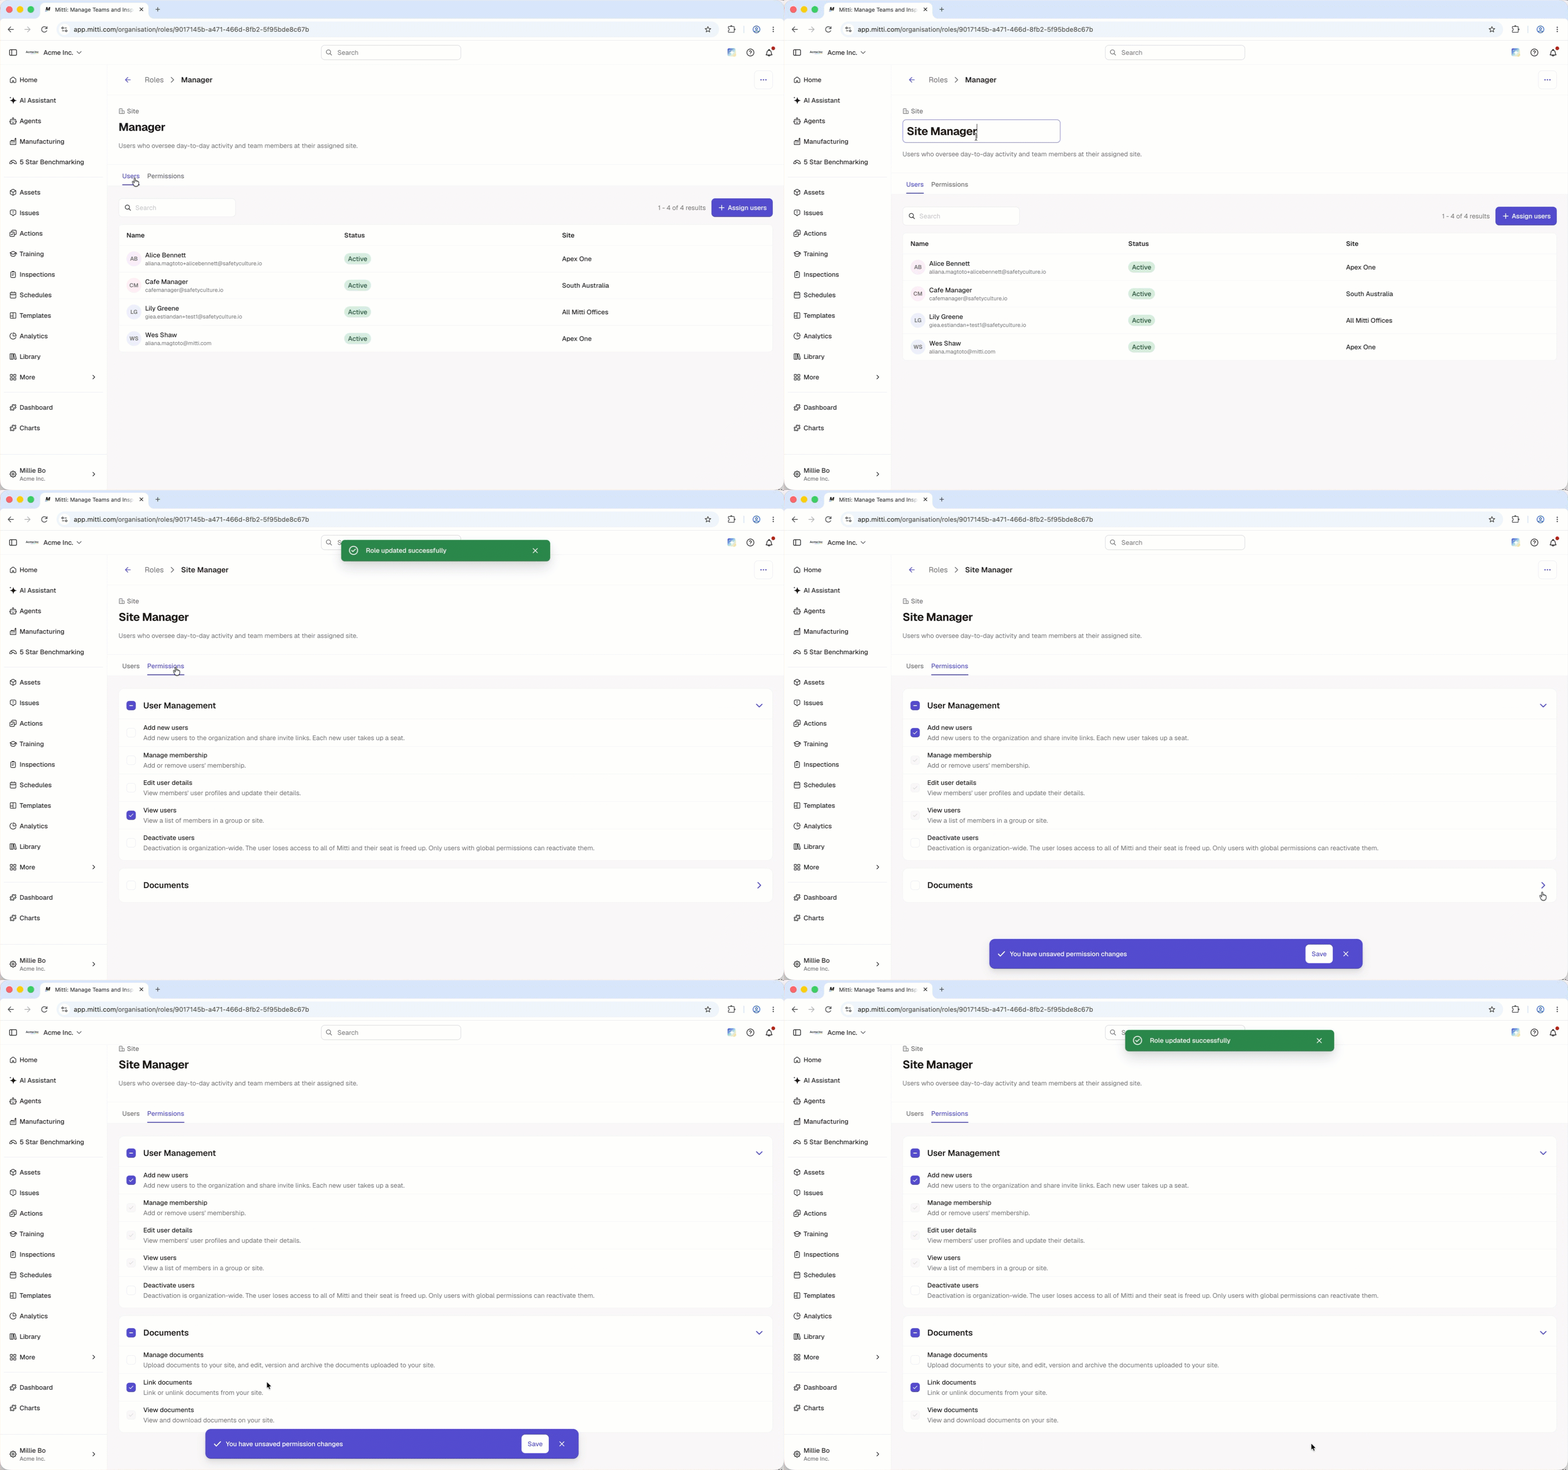
Click your organization name on the lower-left corner of the page and select Roles.
Click Global, Site, or Group at the top of the page.
Click the role.
Edit the role details accordingly:
Name: Hover over the role name and click . Enter the new name, then press Enter.
Description: Hover over the role description and click . Enter the new description, then press Enter.
Permissions: Click Permissions tab at the top of the page, then check or uncheck the permissions. Then, click Save on the lower-right of the page.
Set default global roles
Click your organization name on the lower-left corner of the page and select Roles.
Click on the upper-right of the page and select Set default global roles.
In the pop-up window, select the default global role for each seat type.
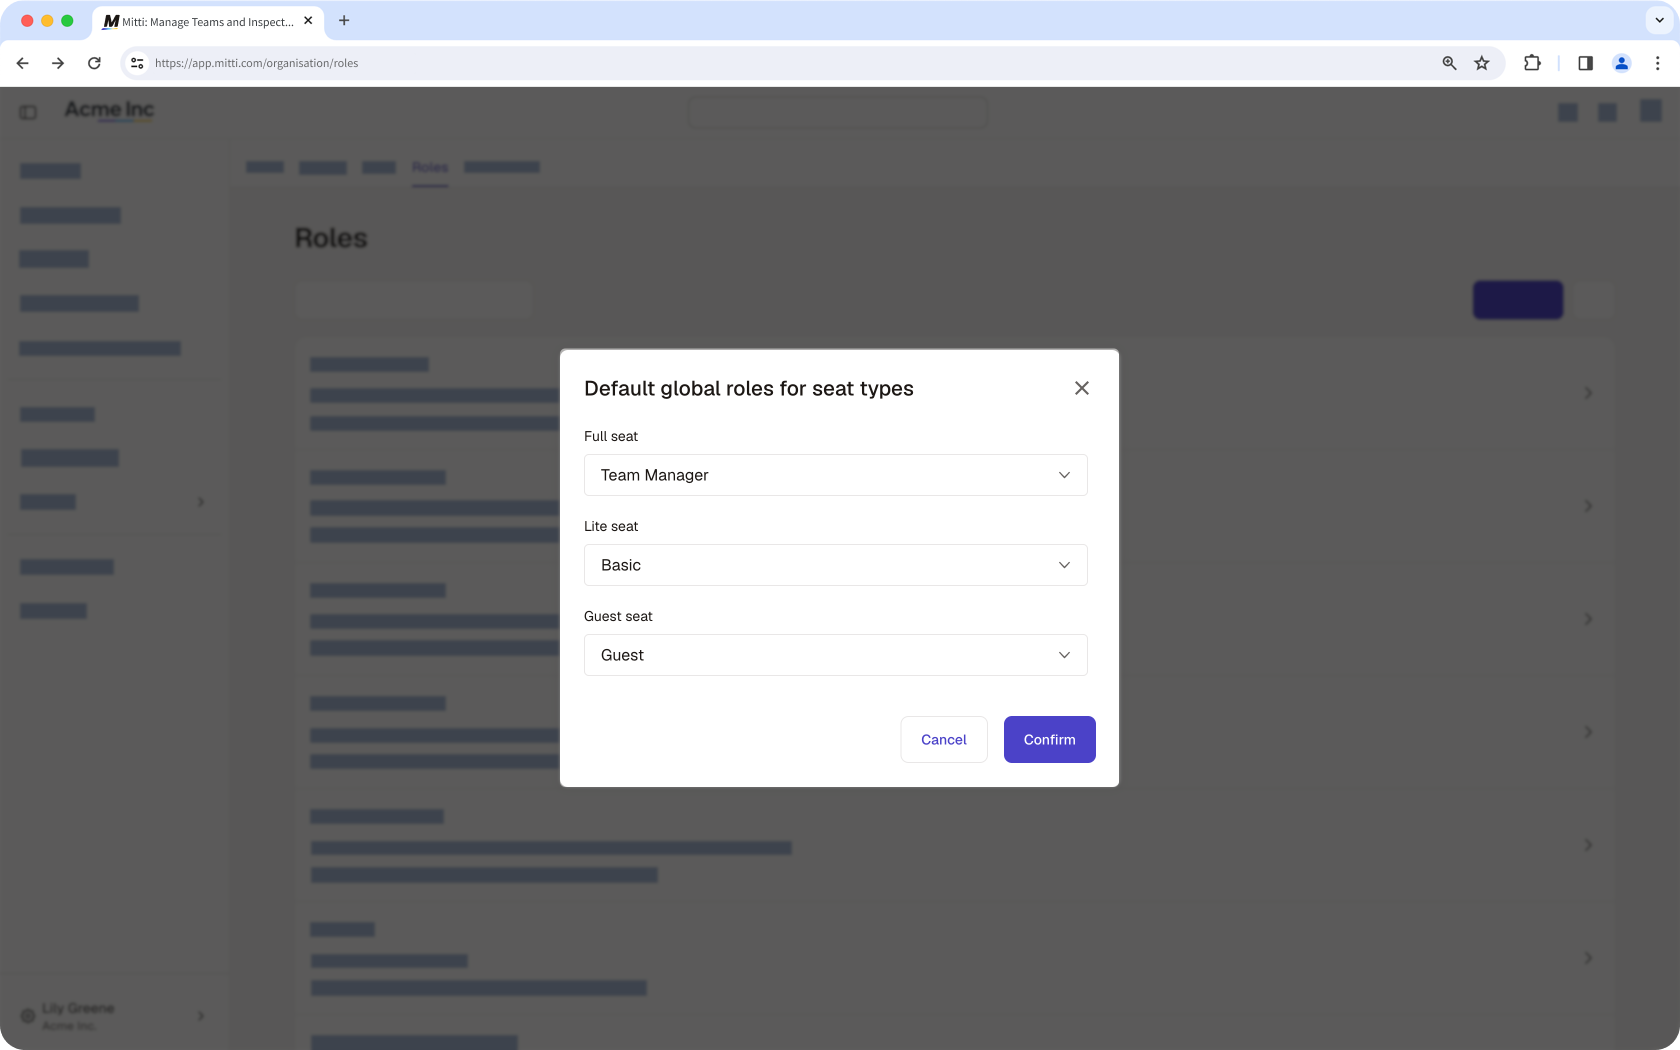
Click Confirm.
← Previous article: Manage your users (Part 1) | Next article: Manage your users (Part 3) →
Need more help?
Was this page helpful?