Last updated: August 21, 2024
Users
Once you've determined who in your organization would need access to Mitti, it's time to add them to the platform. Depending on their roles and core responsibilities, you should grant specific permission sets that will offer them a customized experience while allowing you to regulate which features they can use.
Add a user
Before you can add users, you need to confirm your account's email address. If you haven't received the confirmation email, check your spam folder or request a new one via the web app.
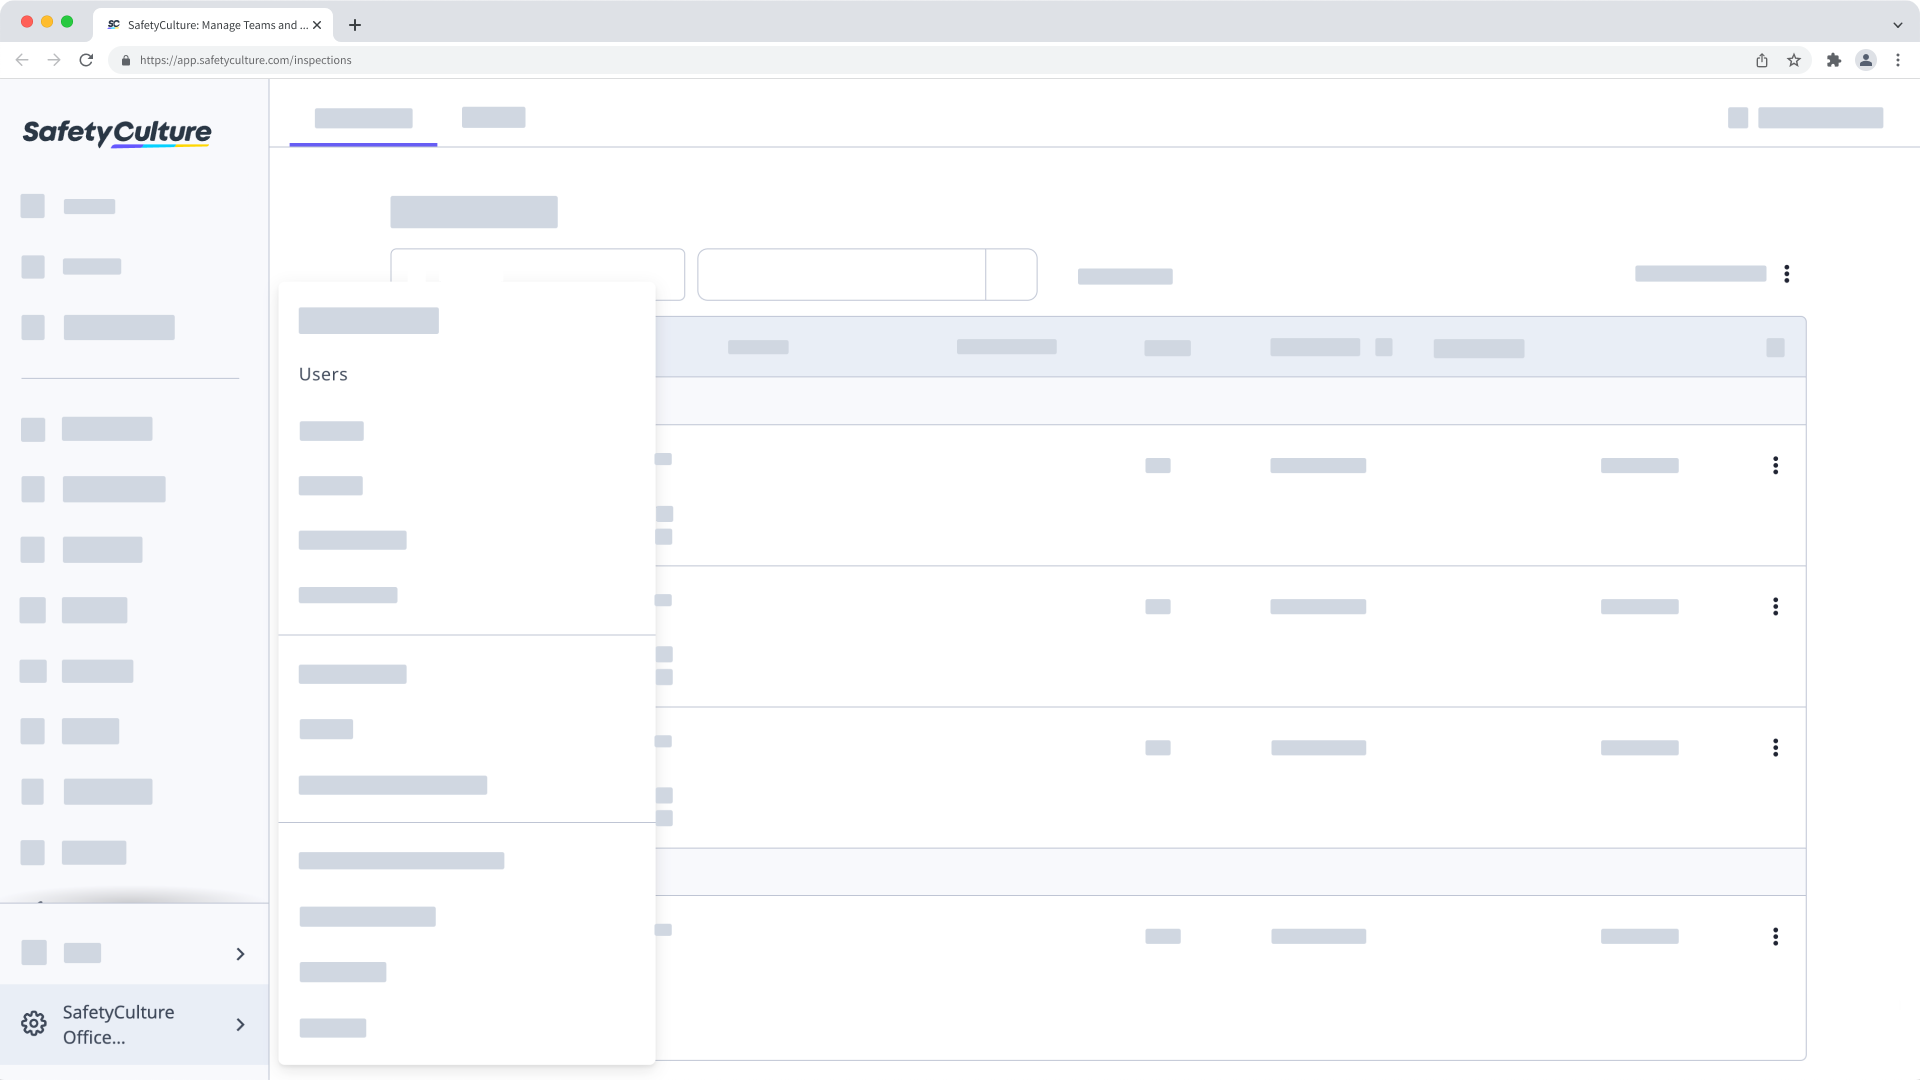
Click your organization name on the lower-left corner of the page and select Users.
Click Add users on the upper-right corner of the page.
Enter the email address or username of the new user. Fill in their details accordingly.
Set a password, and select a seat type. A password is required for username login users.
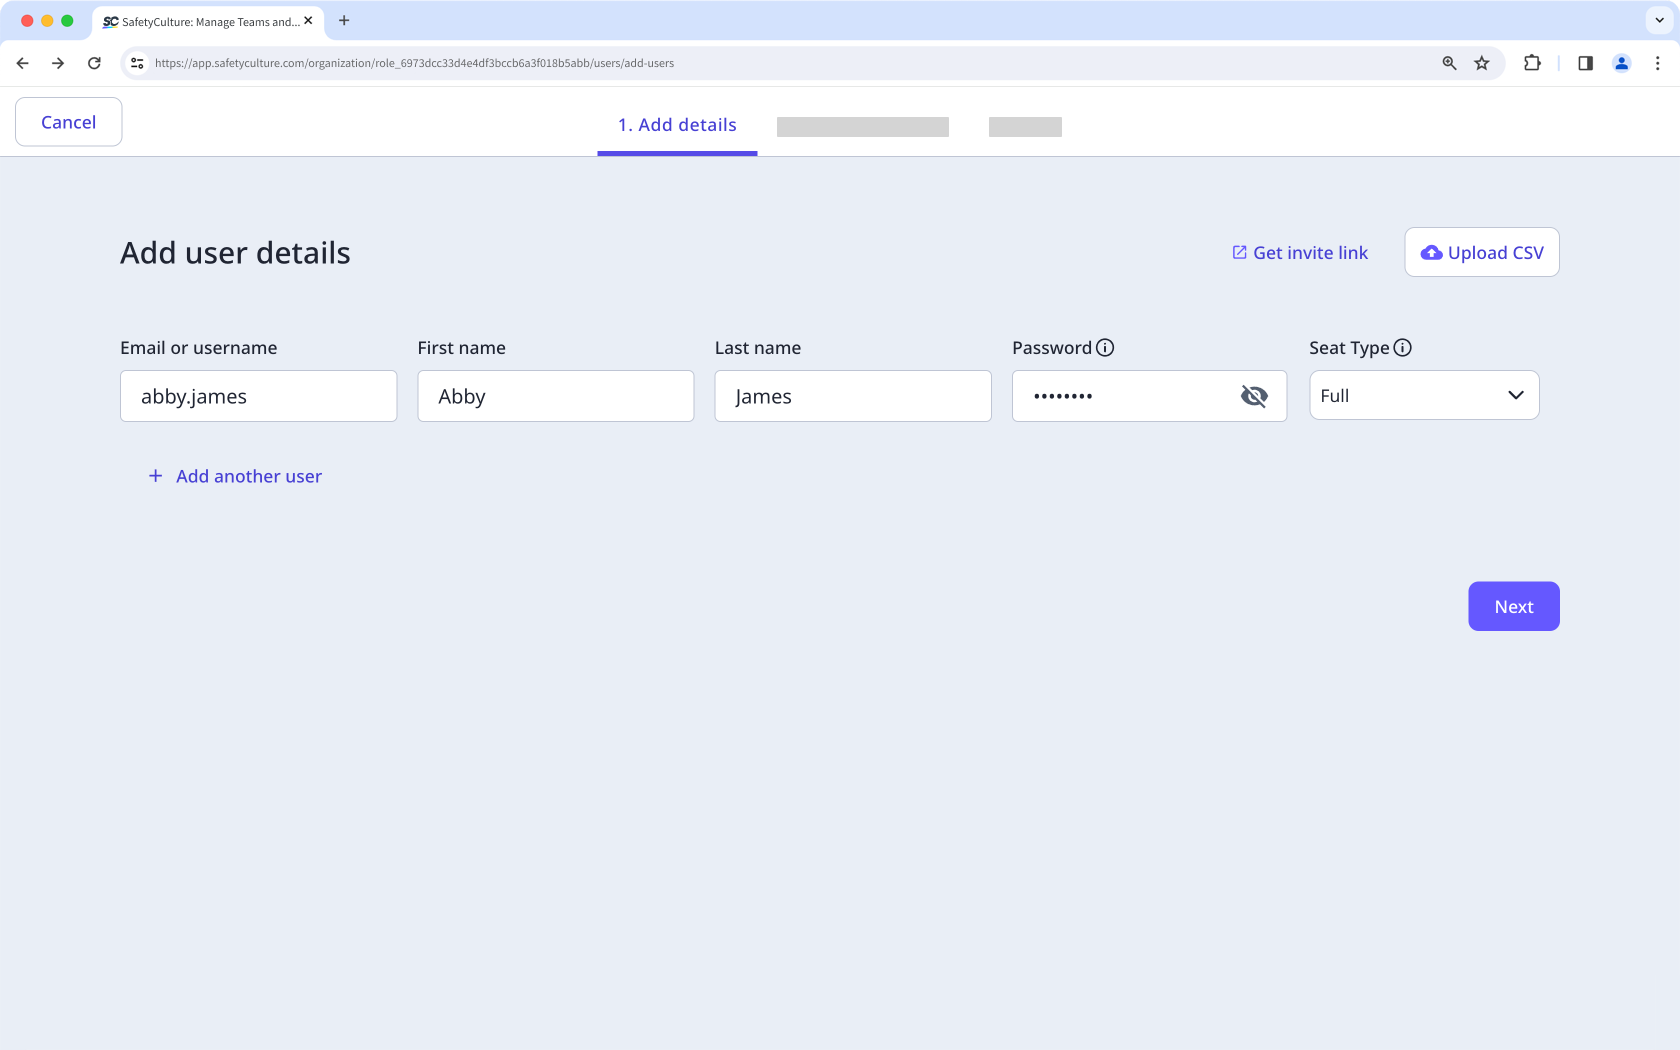
Click Next.
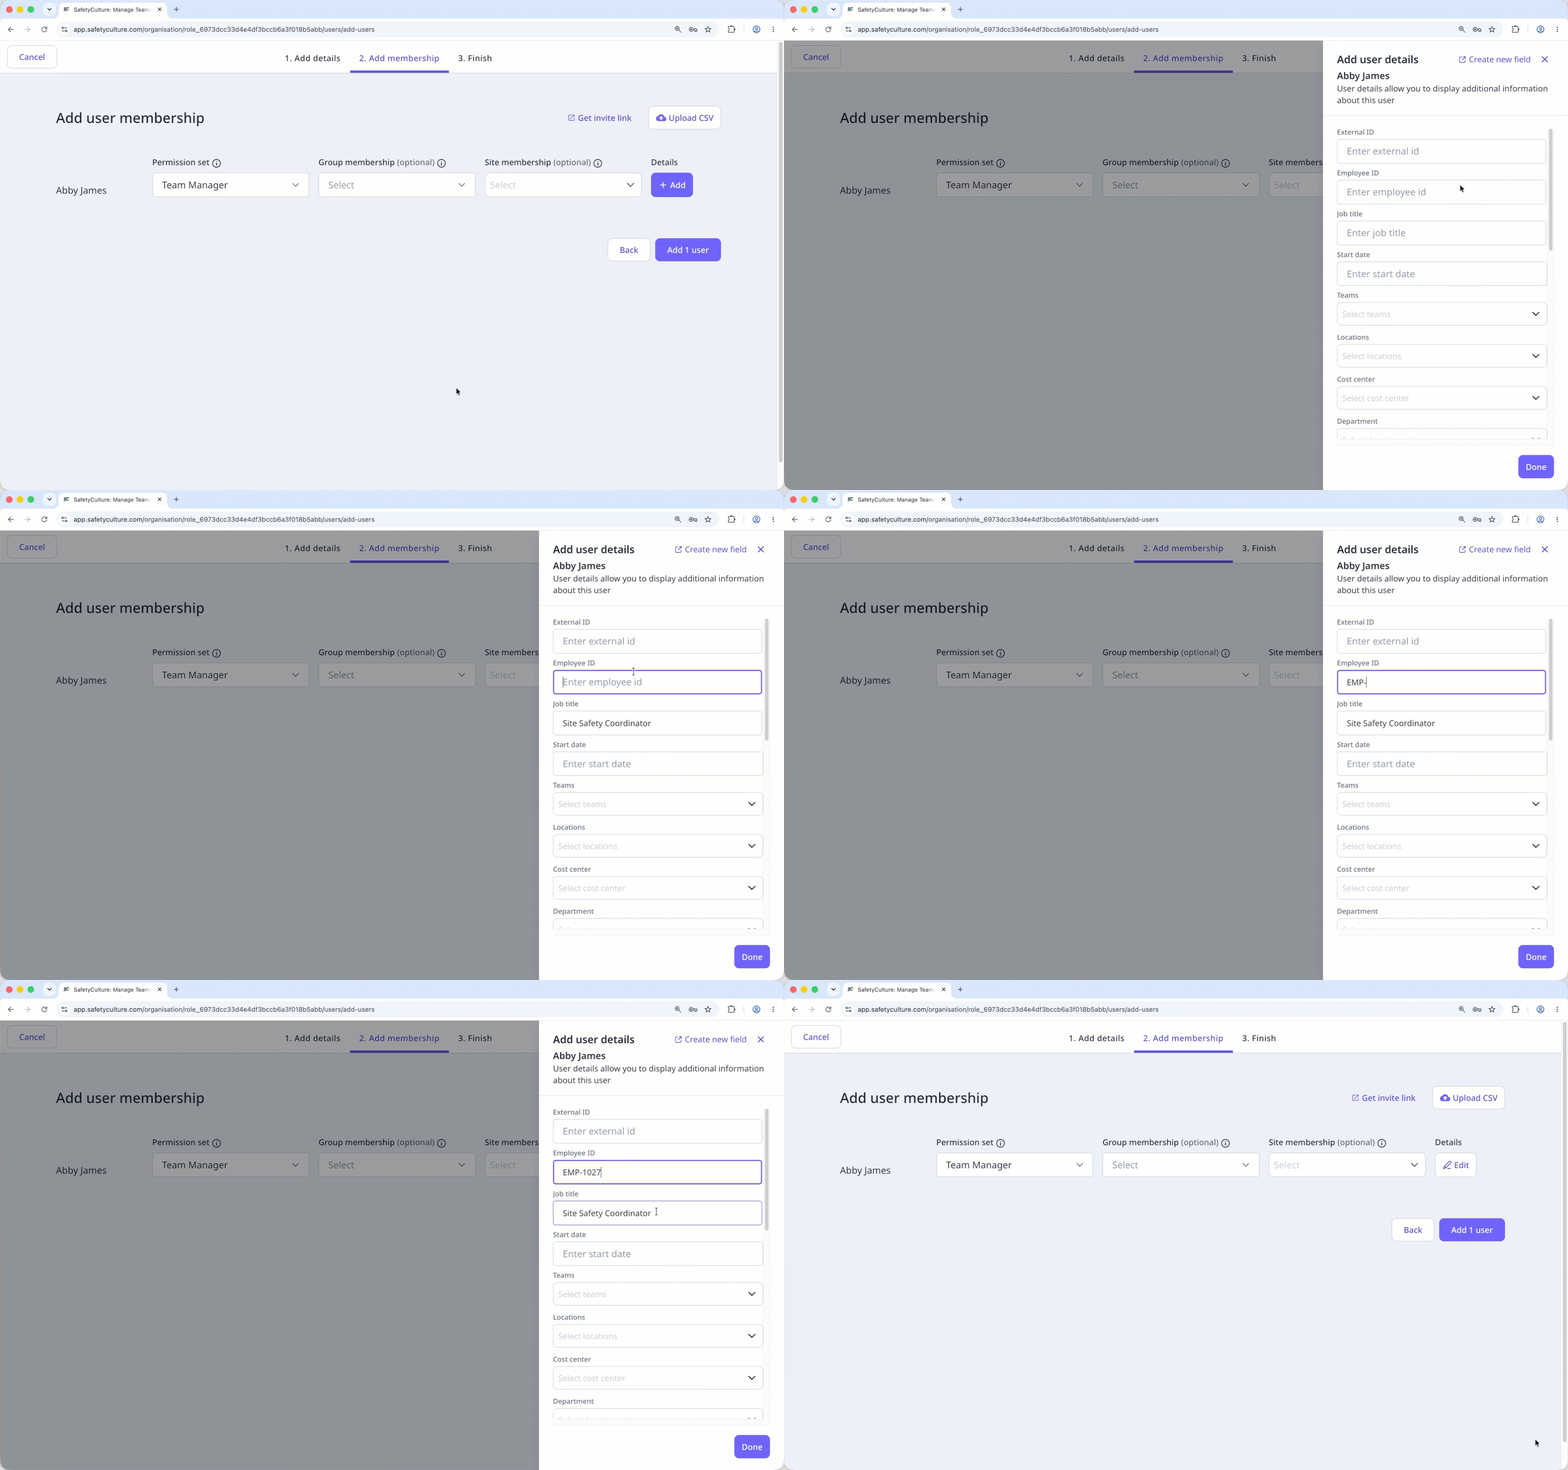
If you have the "Platform management: Permissions" permission (opens in new tab), you can select the permission set (opens in new tab) you want to assign to the user. If required, you can also add the user to groups (opens in new tab) and sites (opens in new tab).
Click Add on the right-hand side of the page. In the side panel, enter the user's field details, then click Done.
Click Add users.
In the pop-up window, you can:
Send password instructions via email to an email-based user.
Turn "Require password reset" on if you want the new user to reset their password when they log in for the first time. It applies to users with and without an email address. This feature is currently in Early Access.
Click Continue.
Reviewing and maximizing your seats within the Mitti platform is important as your organization grows and shifts. We recommend you read the following articles to learn more:
Group matrix
Groups (opens in new tab) are a great way to help you organize users and manage document access in bulk. Later down the line, you can use the Group matrix to effortlessly visualize the group memberships of each user and even assign them to groups collectively.
What you'll need
Bulk add or remove users from groups
Click your organization name on the lower-left corner of the page and select Groups.
Click Group matrix on the upper-right of the page.
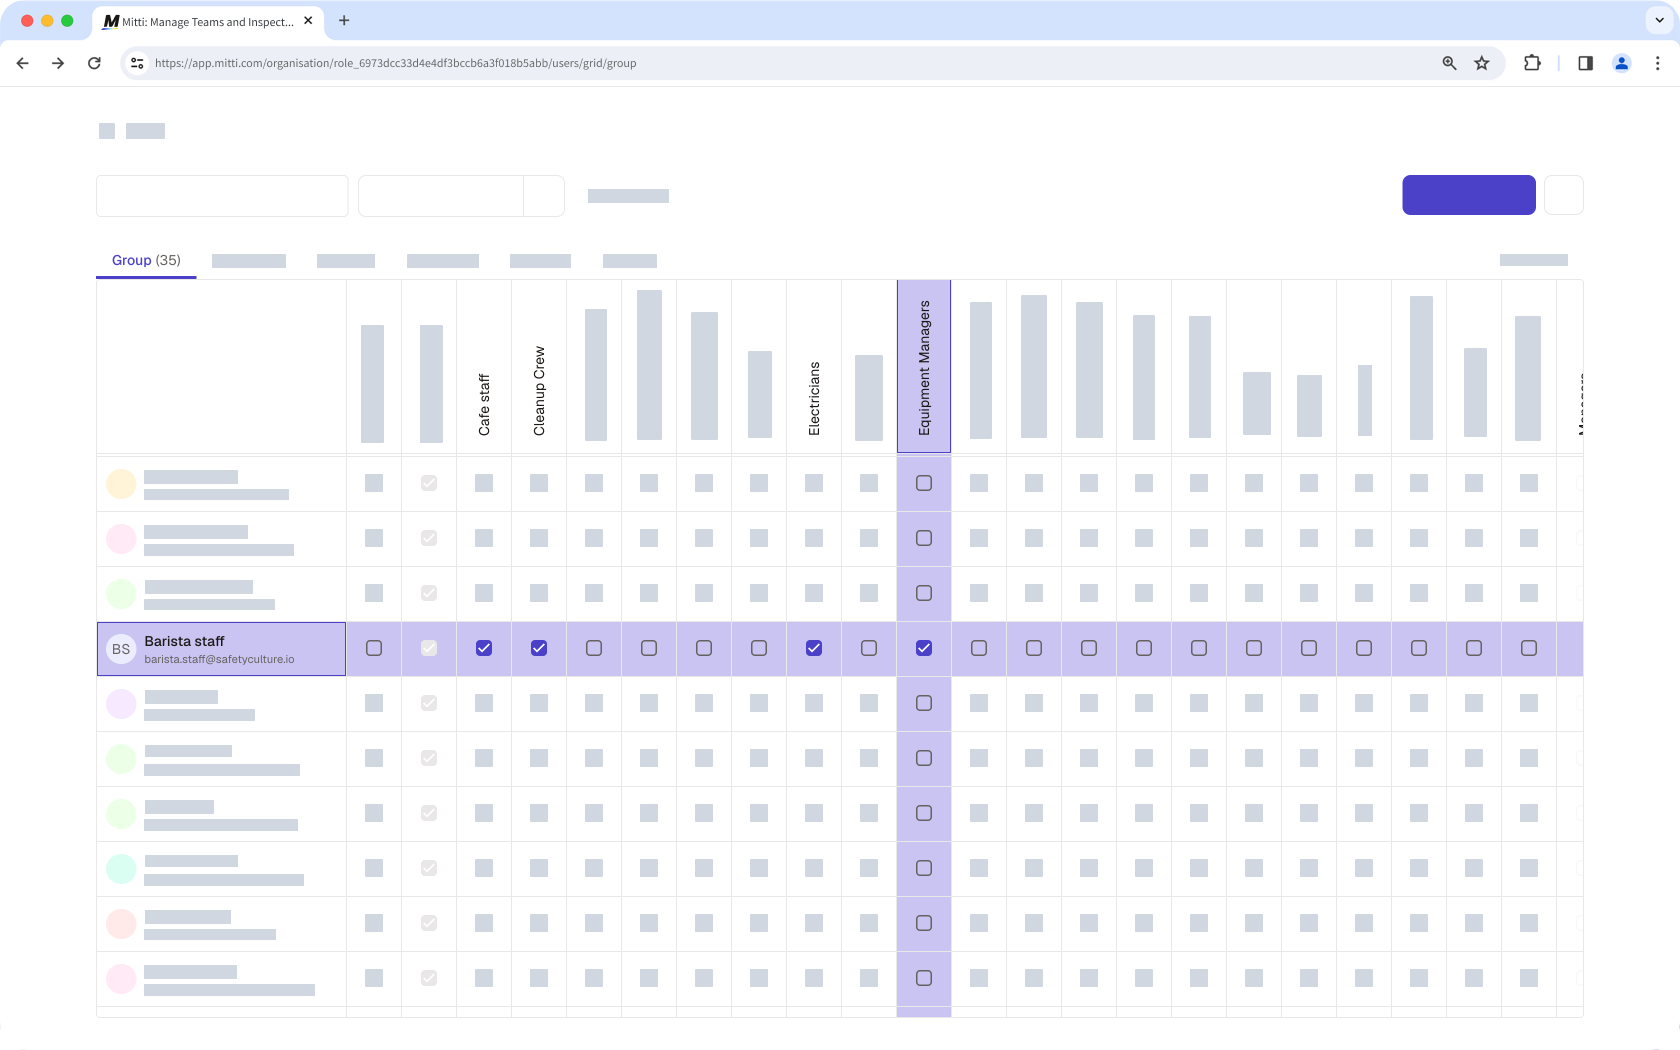
On this page, group names are listed horizontally, and users are listed vertically in alphabetical order.
Check or uncheck the box on the left-hand side of the user's name. Changes are applied automatically.
Site matrix
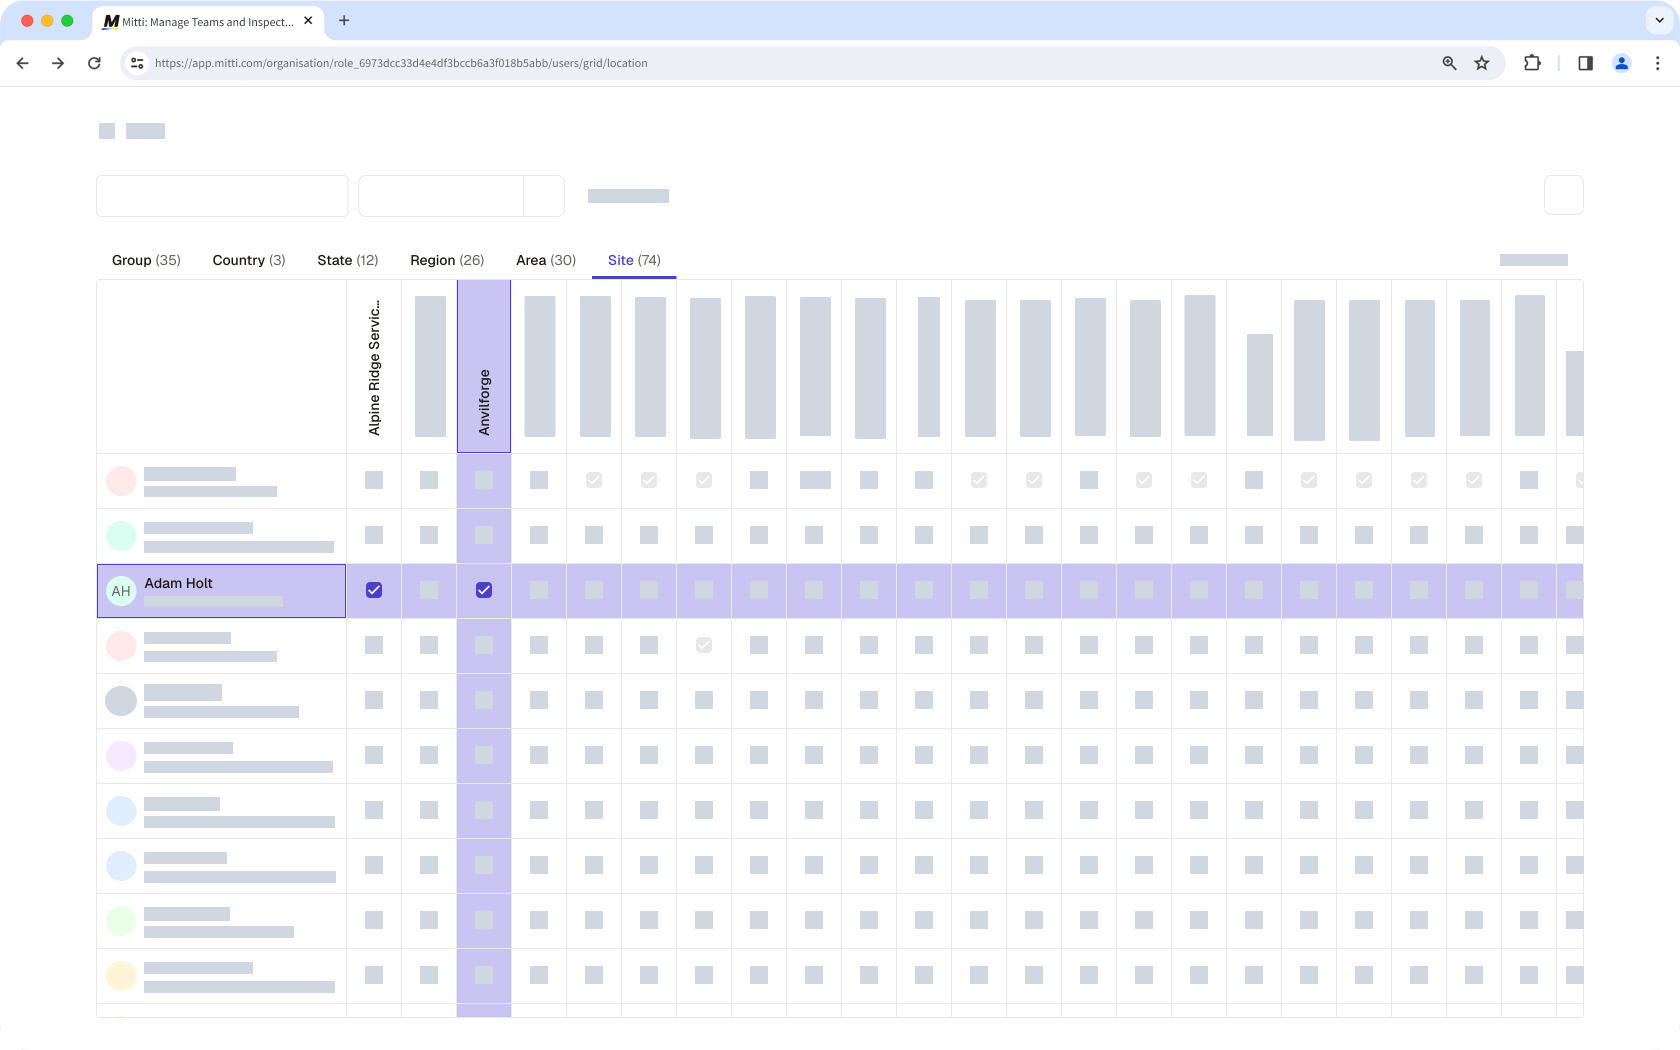
If you're looking to add several users to multiple sites or levels, adding them as site members using the Site matrix is the most efficient way. It provides a comprehensive overview of all the sites in your organization, including which users are currently assigned to them.
What you'll need
Bulk add members from sites via the Site matrix
Click your organization name on the lower-left corner of the page and select Sites.
Click Site matrix on the upper-right of the page.
On this page, site names are listed horizontally, and users are listed vertically in alphabetical order.
Check the boxes on the right-hand side of the user's name. Changes are applied automatically.
← Previous article: Manage your users (Part 2) | Next article: Digitize checklists (Part 1) →
Need more help?
Was this page helpful?