Last updated: September 16, 2026
Why create navigation layouts?
Navigation layouts allow administrators to create tailored navigation experiences and apply them to roles, ensuring teams in your organization see the features most relevant to them. This is especially useful for organizations where different roles have varying workflows, helping users stay focused, work more efficiently, and spend less time looking for what they need.
For example, managers and field workers have different responsibilities, so rather than navigating through the same set of features, administrators can create navigation layouts tailored to each role, giving every team a streamlined experience built around the way they work.
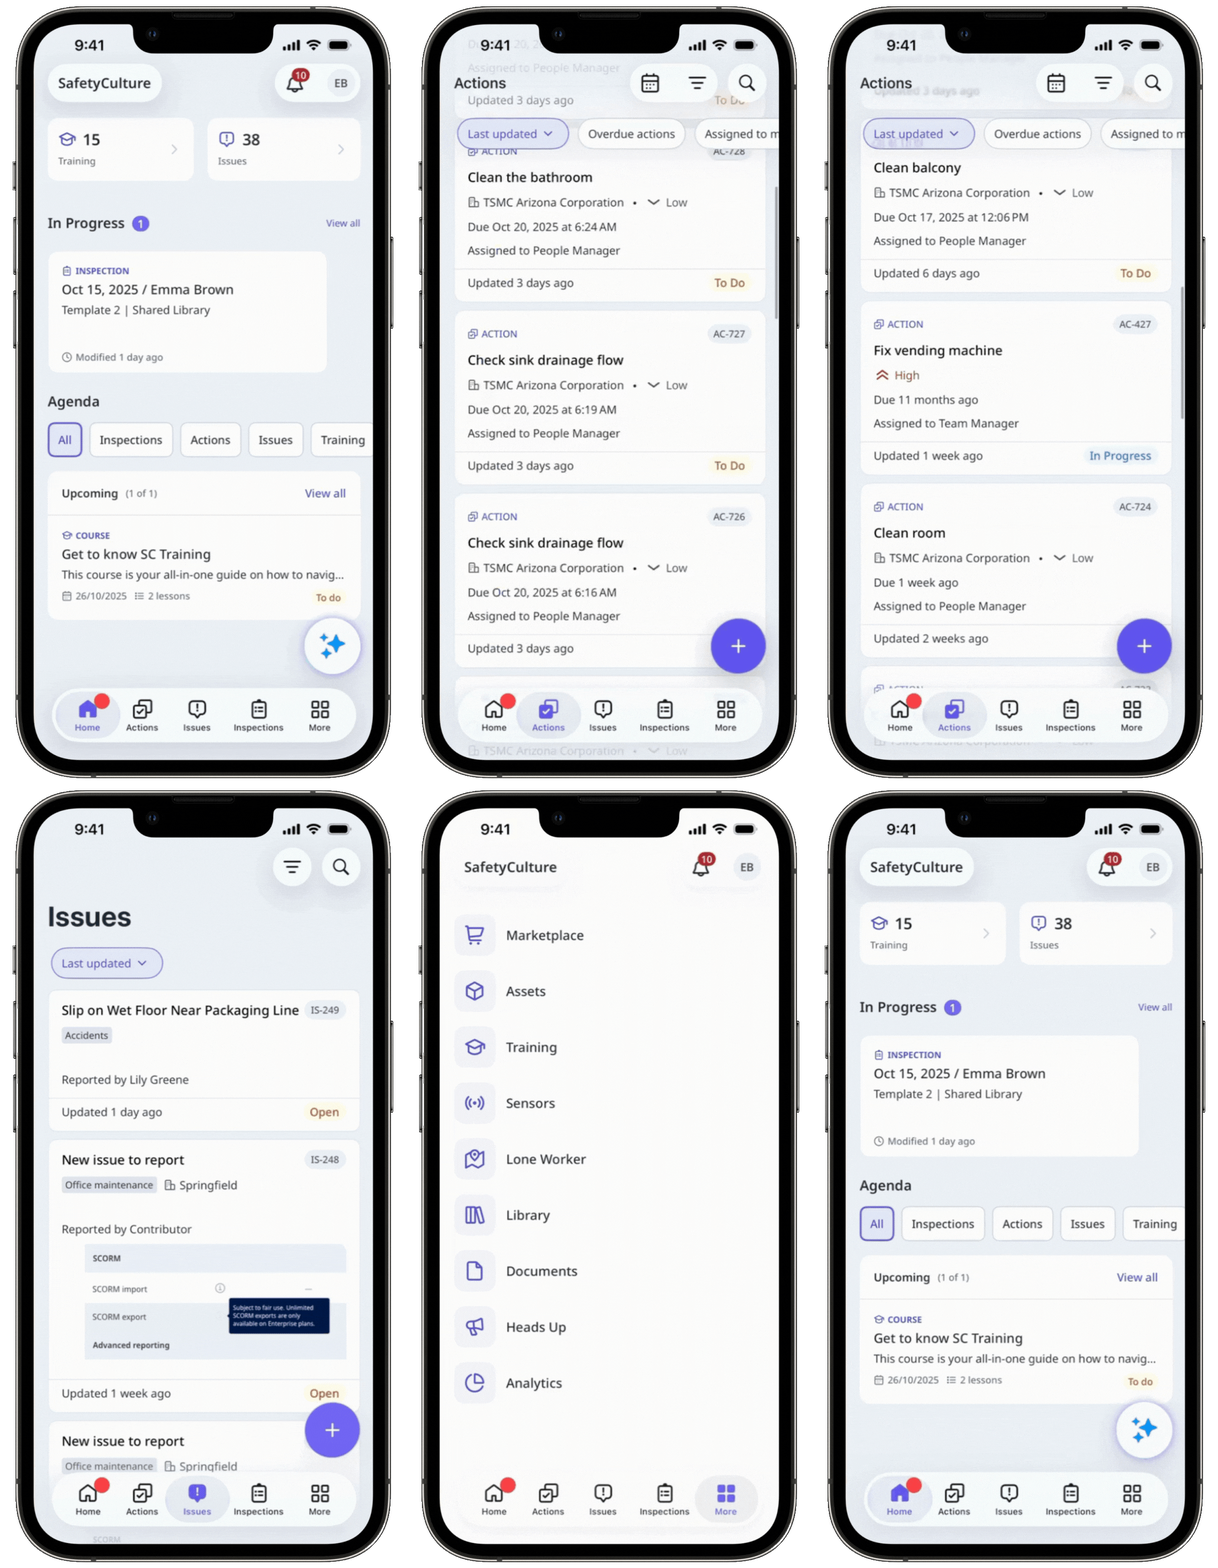
The default layout applies to users with roles that have no assigned layout.
What you'll need
Create a layout
Click your organization name on the lower-left corner of the page and select Organization settings.
Scroll to the "Navigation" section, and click Edit.
Click Create new layout on the lower-left of the list.
In the pop-up window, click the dropdown menu, and select a role.
Click Create.
Click on the upper-left of the page to edit the navigation layout name.
Modify what's included in the new layout:
Check the features you want to display on the web app’s sidebar and the mobile app’s navigation bar, and uncheck those you’d like to keep under More.
Click and hold on the left-hand side of the features to sort them.
Click or to hide or show the features from More.
Click Next on the upper-right corner of the page.
Click Save changes on the lower-left of the “Navigation” section.
In the pop-up window, click Save and apply.
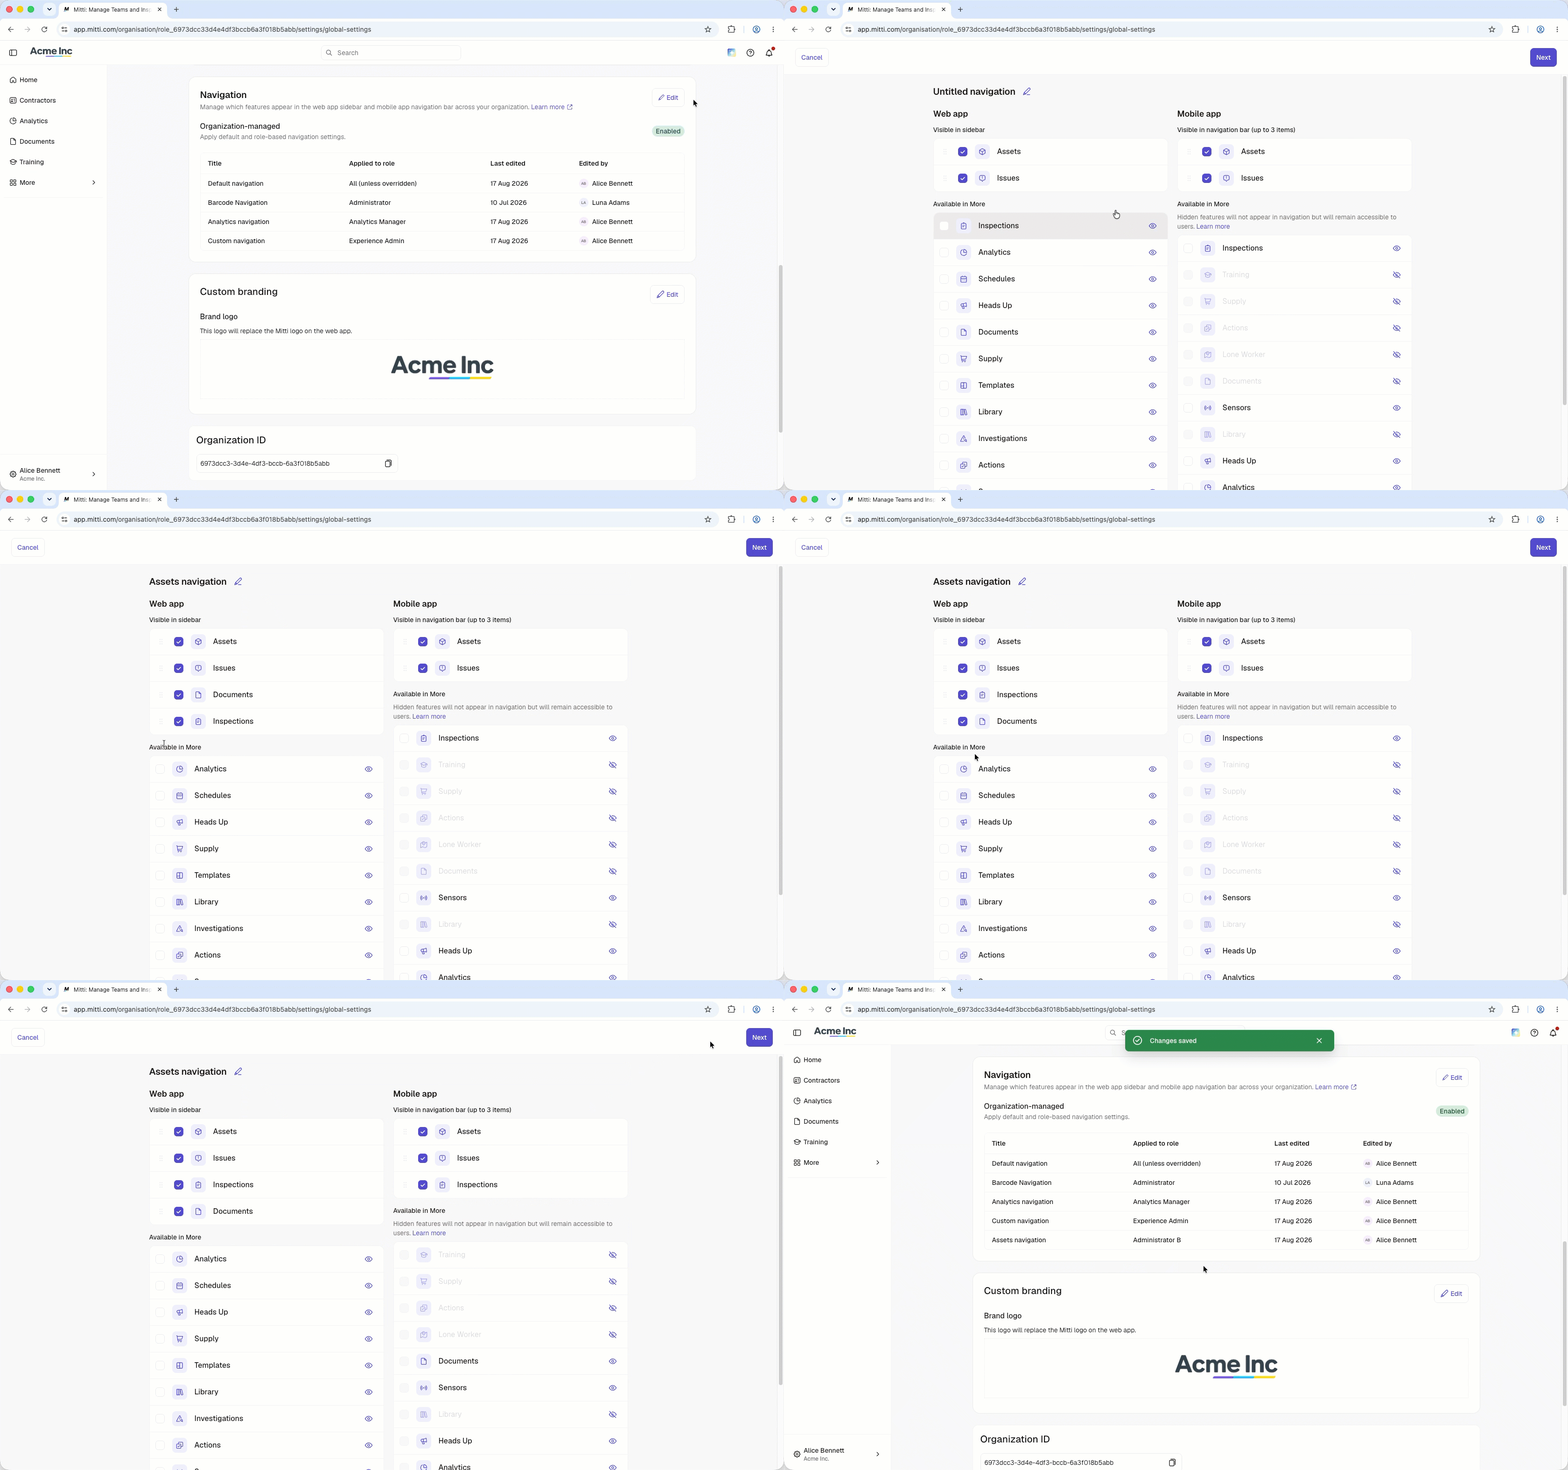
You can only create one layout for each role.
Edit a layout
Click your organization name on the lower-left corner of the page and select Organization settings.
Scroll to the "Navigation" section, and click Edit.
Click on the right-hand side of the layout, and select Edit layout.
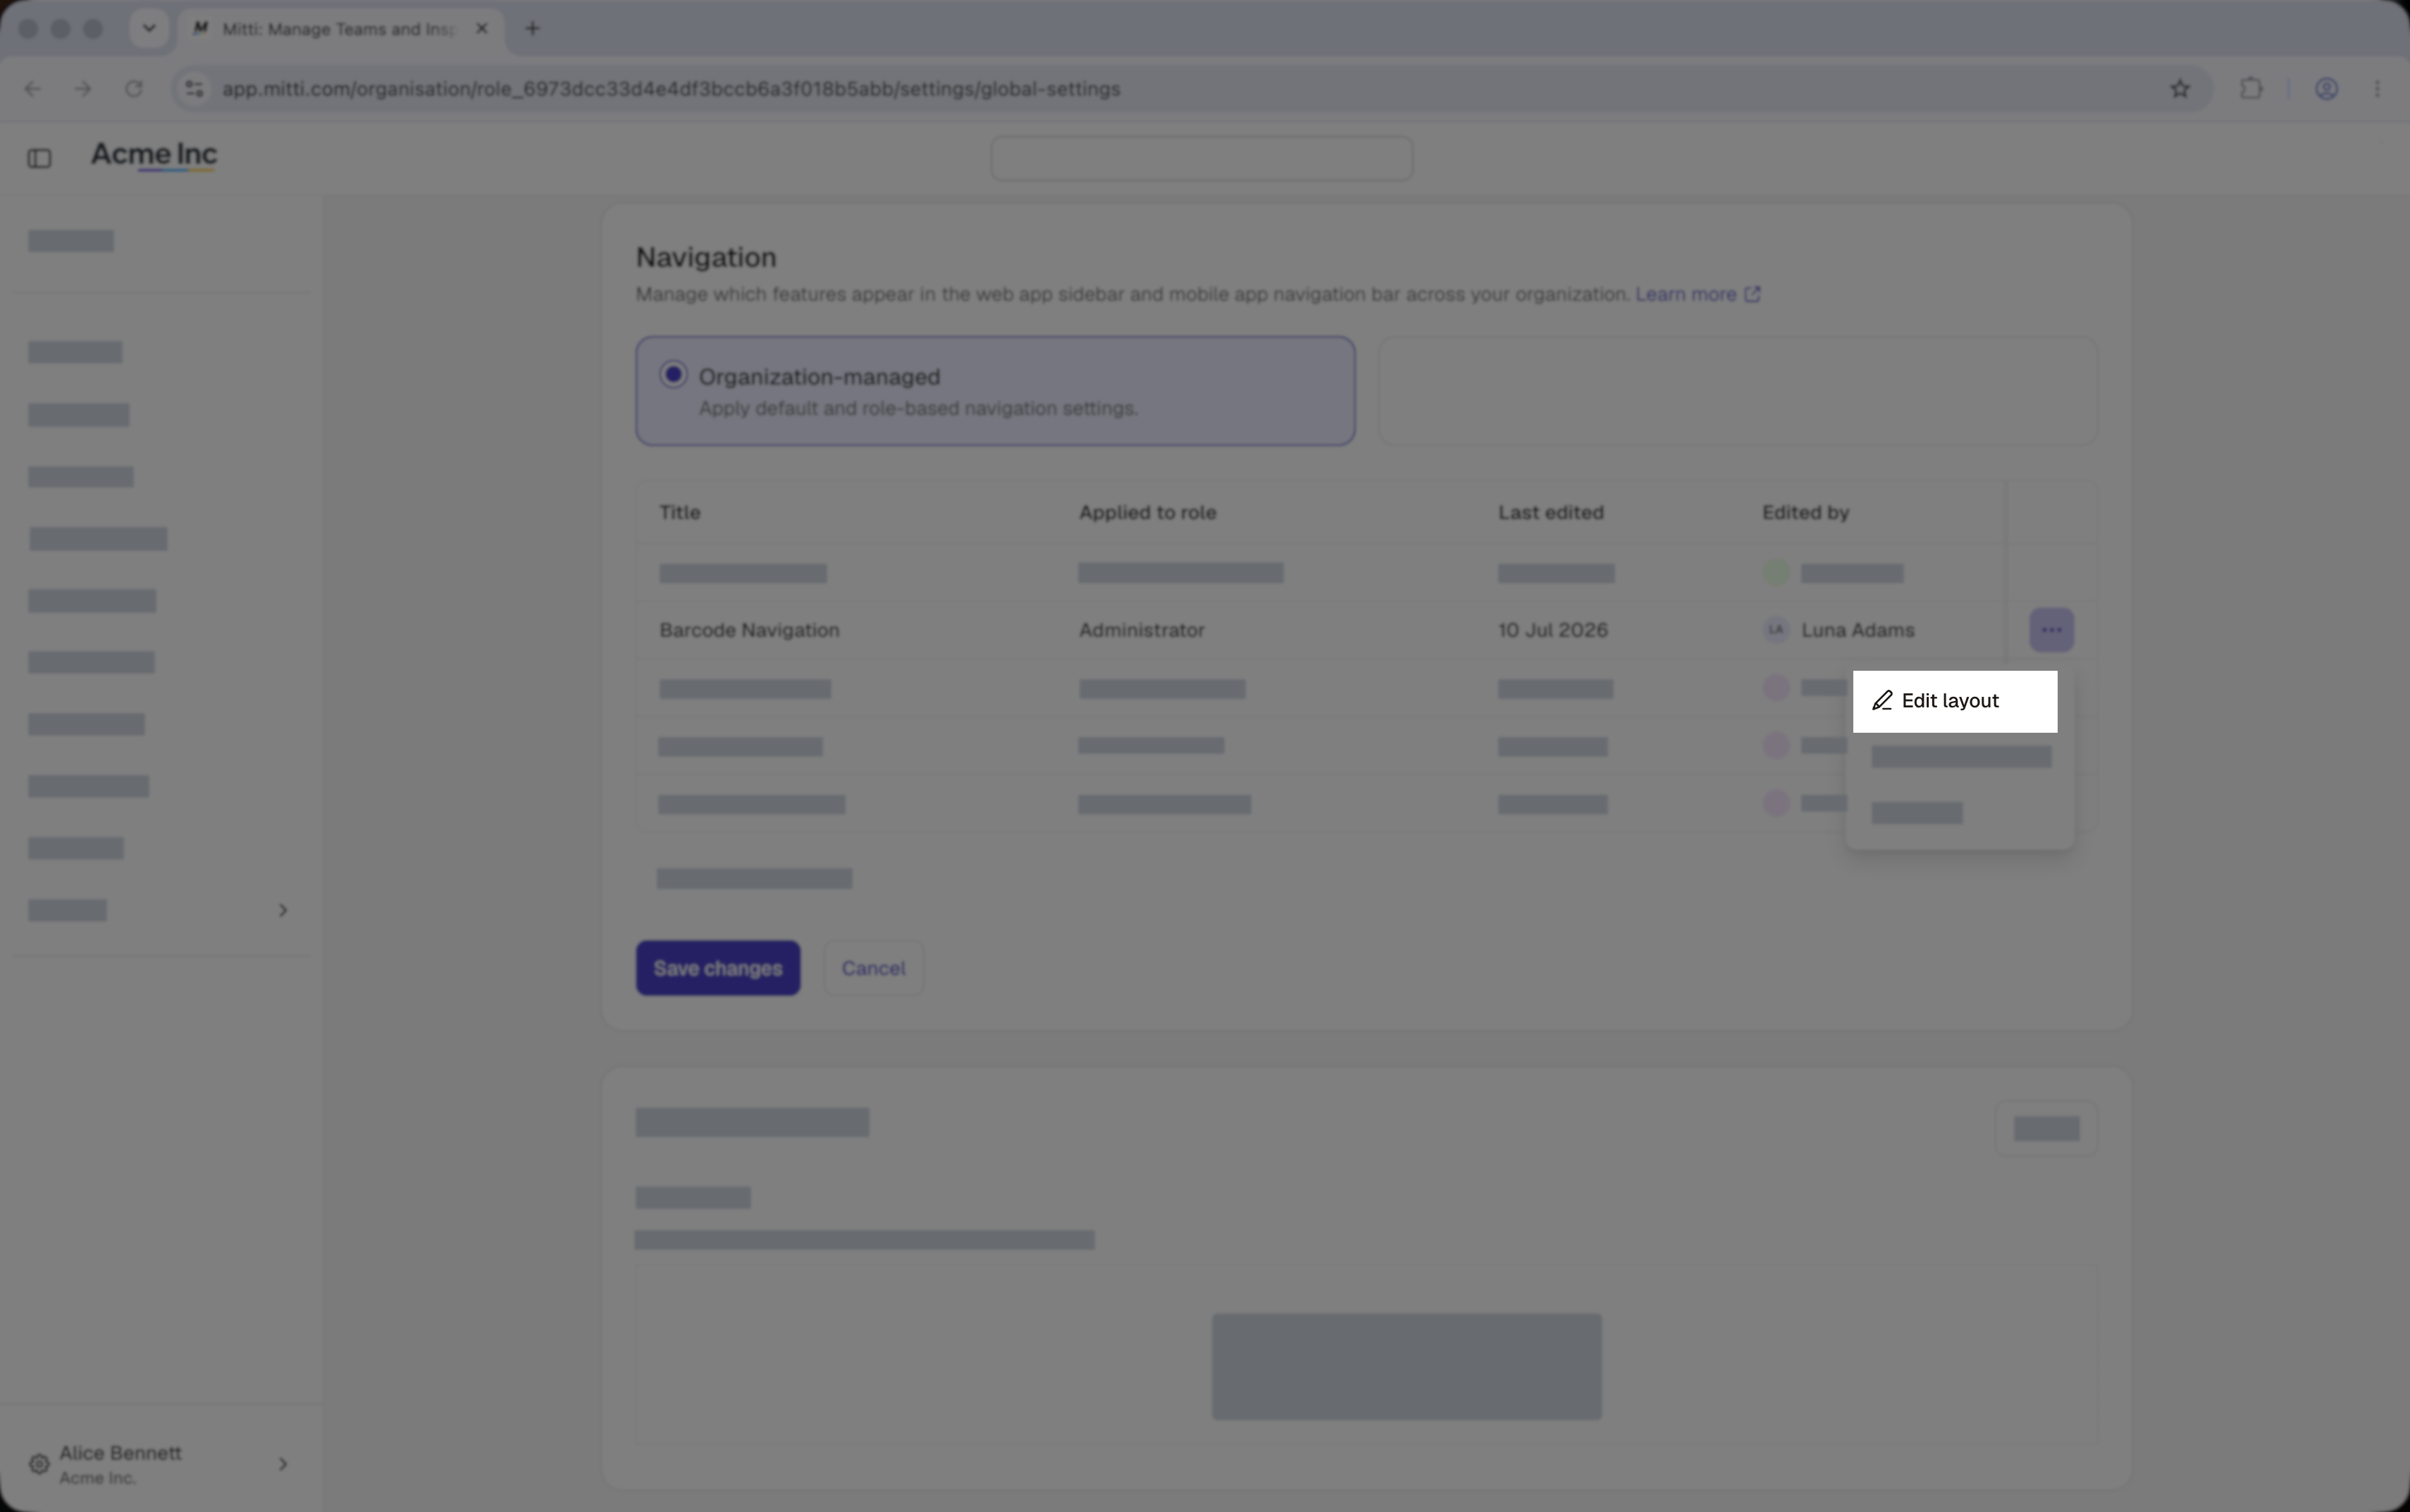
Edit the navigation layout accordingly.
Click Next on the upper-right corner of the page.
Click Save changes on the lower-left of the “Navigation” section.
In the pop-up window, click Save and apply.
Duplicate a layout
Click your organization name on the lower-left corner of the page and select Organization settings.
Scroll to the "Navigation" section, and click Edit.
Click Edit on the upper-right of the "Navigation" section.
Click on the right-hand side of the layout, and select Duplicate layout.
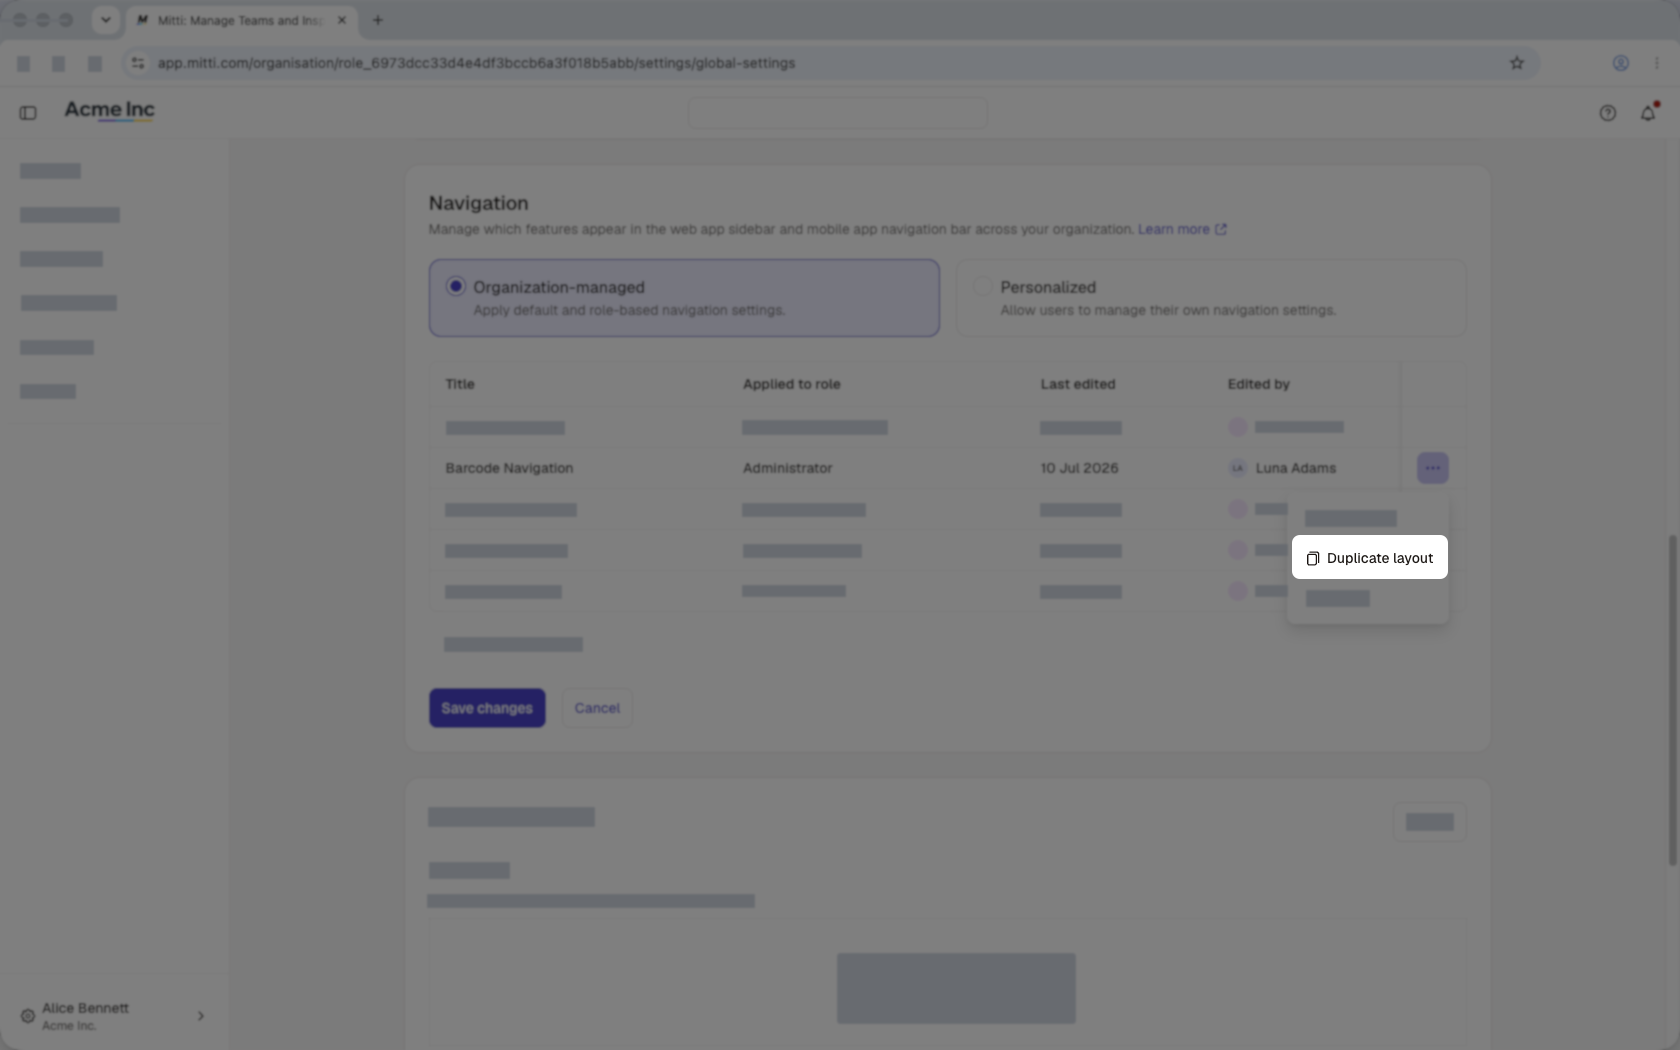
In the pop-up window, click the dropdown menu, and select a role.
Click Apply.
Click Save changes on the lower-left of the “Navigation” section.
In the pop-up window, click Save and apply.
Delete a layout
Click your organization name on the lower-left corner of the page and select Organization settings.
Scroll to the "Navigation" section, and click Edit.
Click on the right-hand side of the layout, and select Delete.
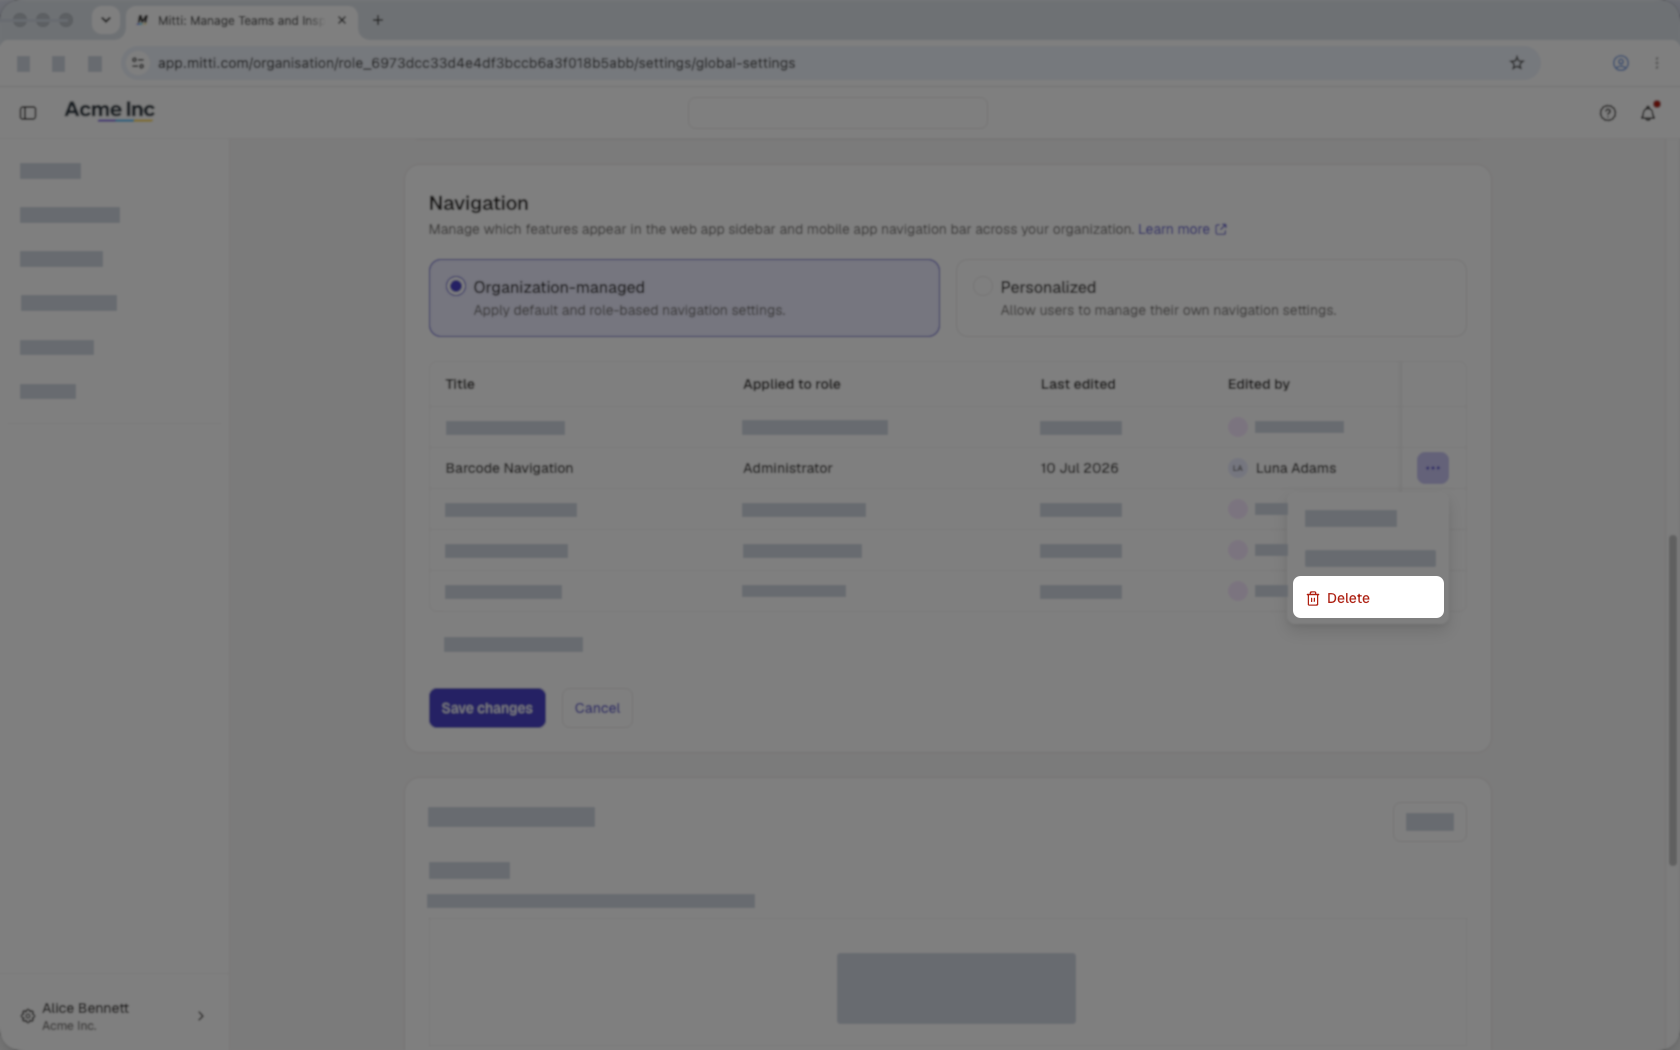
Click Save changes on the lower-left of the “Navigation” section.
In the pop-up window, click Save and apply.
The default navigation cannot be deleted.
Deleting is irreversible, and we cannot restore permanently deleted items. Confirmation is always required before any deletion, so be sure you're not accidentally deleting the wrong item.
Frequently asked questions
Need more help?
Was this page helpful?