Last updated: September 1, 2026
Why add files to Heads Ups?
Adding or linking files gives your team the context they need to understand and act on your message. Include references, visuals, and supporting documents directly in the Heads Up, so important information stays organized and easy to access in one place. You can also require assignees to sign linked files before acknowledging the Heads Up to help confirm they’ve reviewed the content. Signatures create a clear record of who reviewed each file, helping your team maintain accurate records and support compliance requirements.
What’s the difference between adding and linking files?
Add files to upload new and independent attachments specific to a Heads Up. You can also link files when you want to reference and require signatures on existing files from Documents such as manuals, records, or certificates to make them accessible whenever needed.
By choosing whether to add or link, you can share information that best fits your workflow while keeping your team informed, consistent, and aligned.
Add files | Link files | |
|---|---|---|
How | Upload a new file directly to the Heads Up. | Select an existing file from Documents. |
Storage and updates | Files stay within the Heads Up where they were uploaded. | Files stay in Documents, but Heads Ups use the version linked at the time. Uploading a new version in Documents does not update the file in existing Heads Ups. |
Examples | Sharing standalone or supporting documents. | Sharing standard documents such as policies or procedures that require a signature. |
You can require signatures on linked files to ensure assignees review important information before acknowledging the Heads Up.
What you'll need
Add files to a Heads Up
Select Heads Up in the sidebar or in More.
Click Create Heads Up on the upper-right of the page or edit a Heads Up.
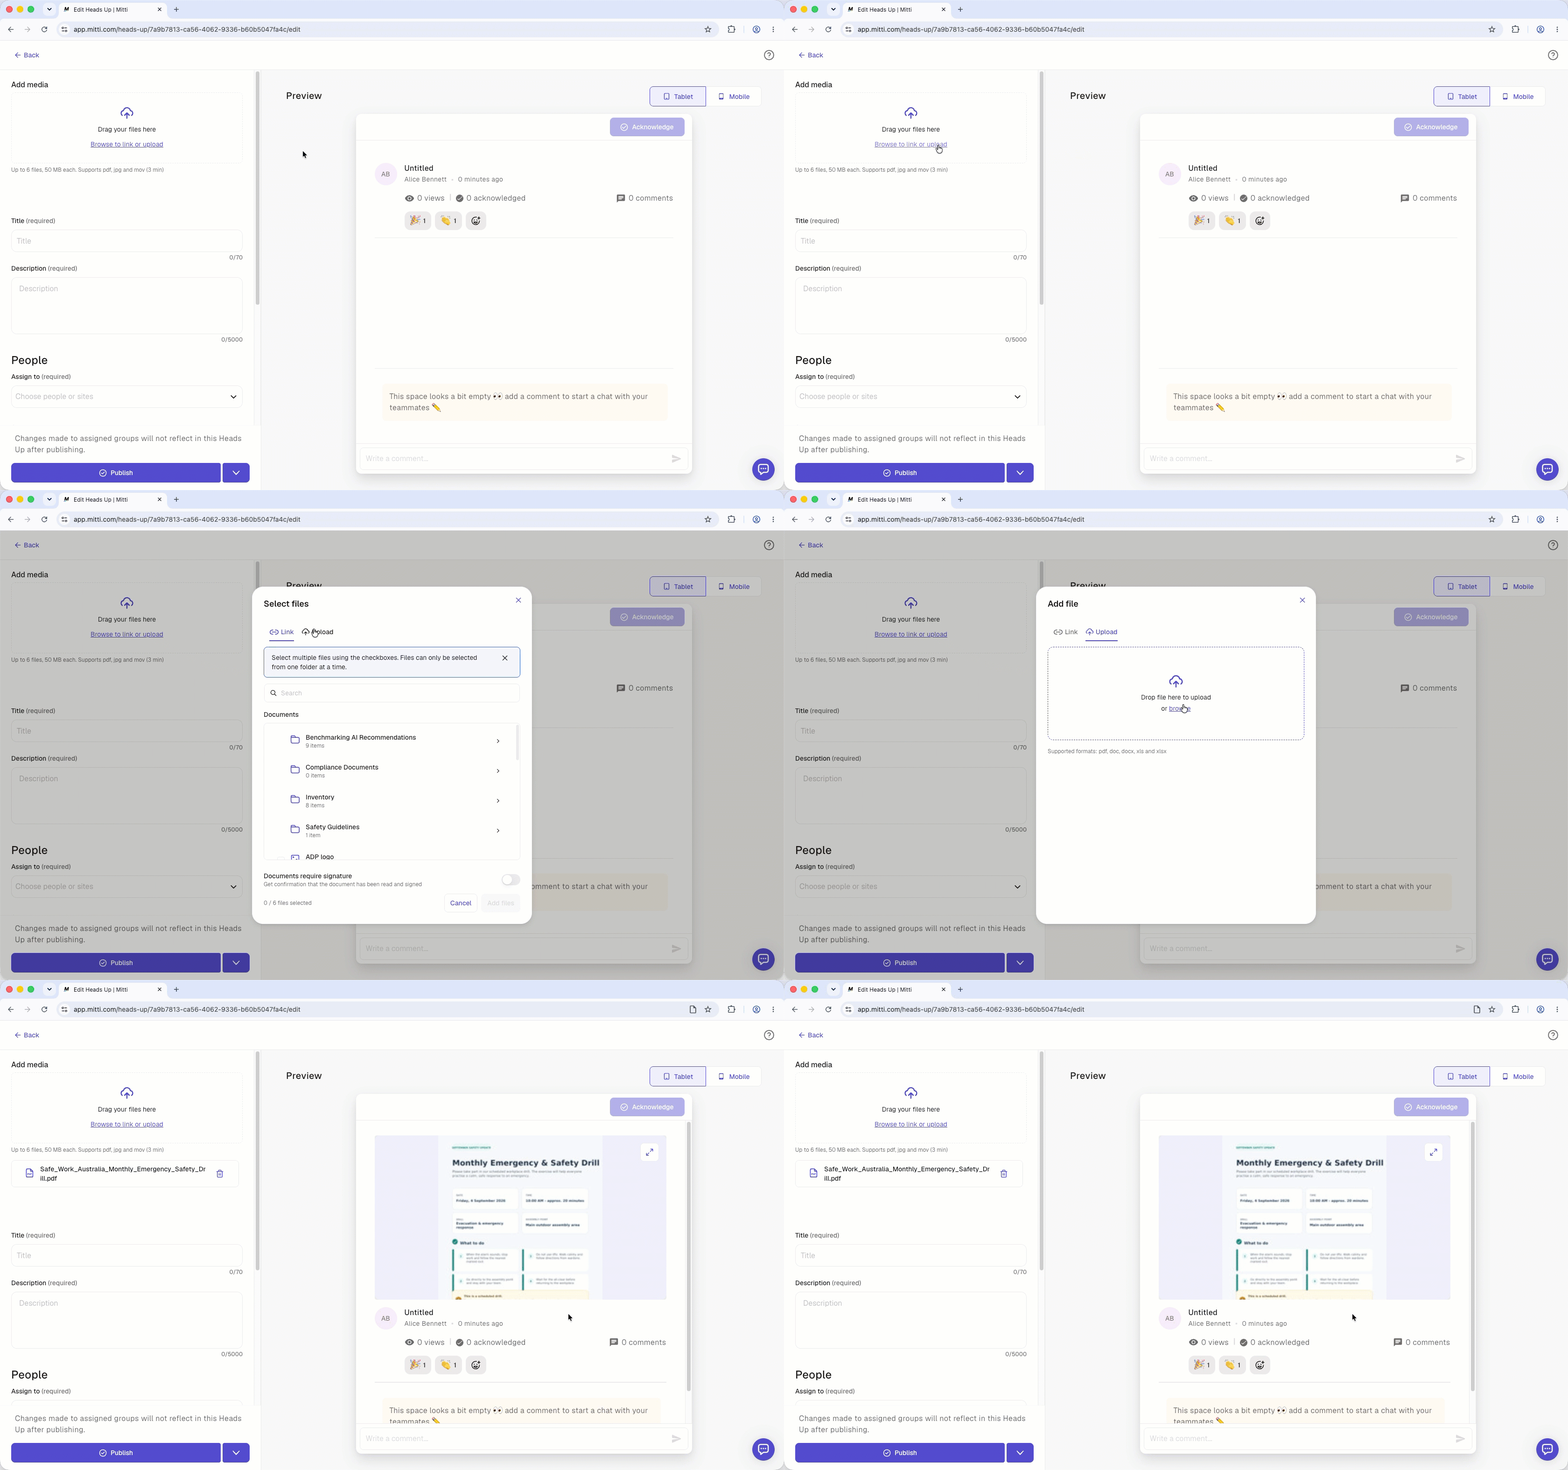
Drag your files to the "Add media" section on the left-hand side of the page or click Browse to link or upload to select files.
In the pop-up window, click Upload.
Drag your files or click browse to select files.
Open the mobile app.
Tap Home at the bottom of your screen.
Tap at the lower-right of your screen and select Create Heads Up.
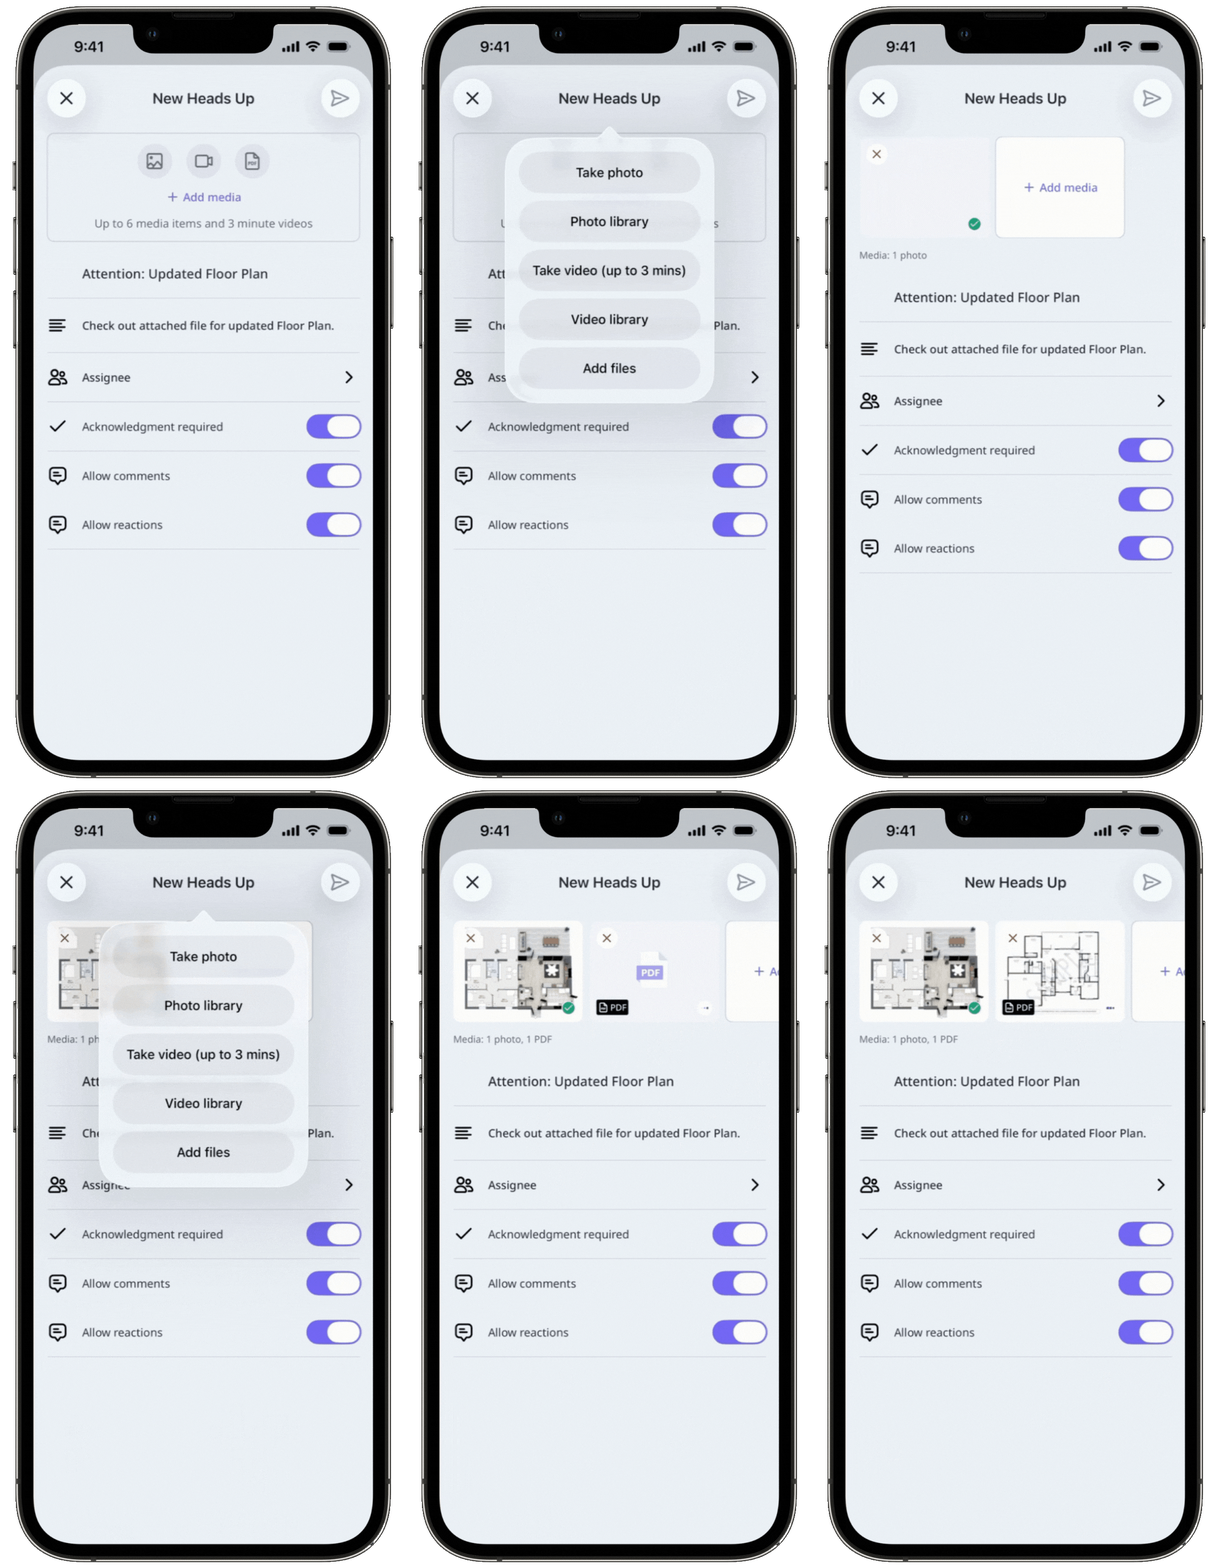
Tap Add Media and select the following:
To take a photo: Tap Take photo and proceed accordingly. Tap Next at the upper-right of your screen and tap Done.
To upload an image: Tap Photo library, select your images, and tap Add at the upper-right of your screen.
To take a video: Tap Take video and proceed accordingly. Tap Upload video.
To upload a video: Tap Video library and select your video.
To attach a file: Tap Add files, select your documents, and tap Open at the upper-right of your screen.
Link files to a Heads Up
Select Heads Up in the sidebar or in More.
Click Create Heads Up on the upper-right of the page or edit a Heads Up.
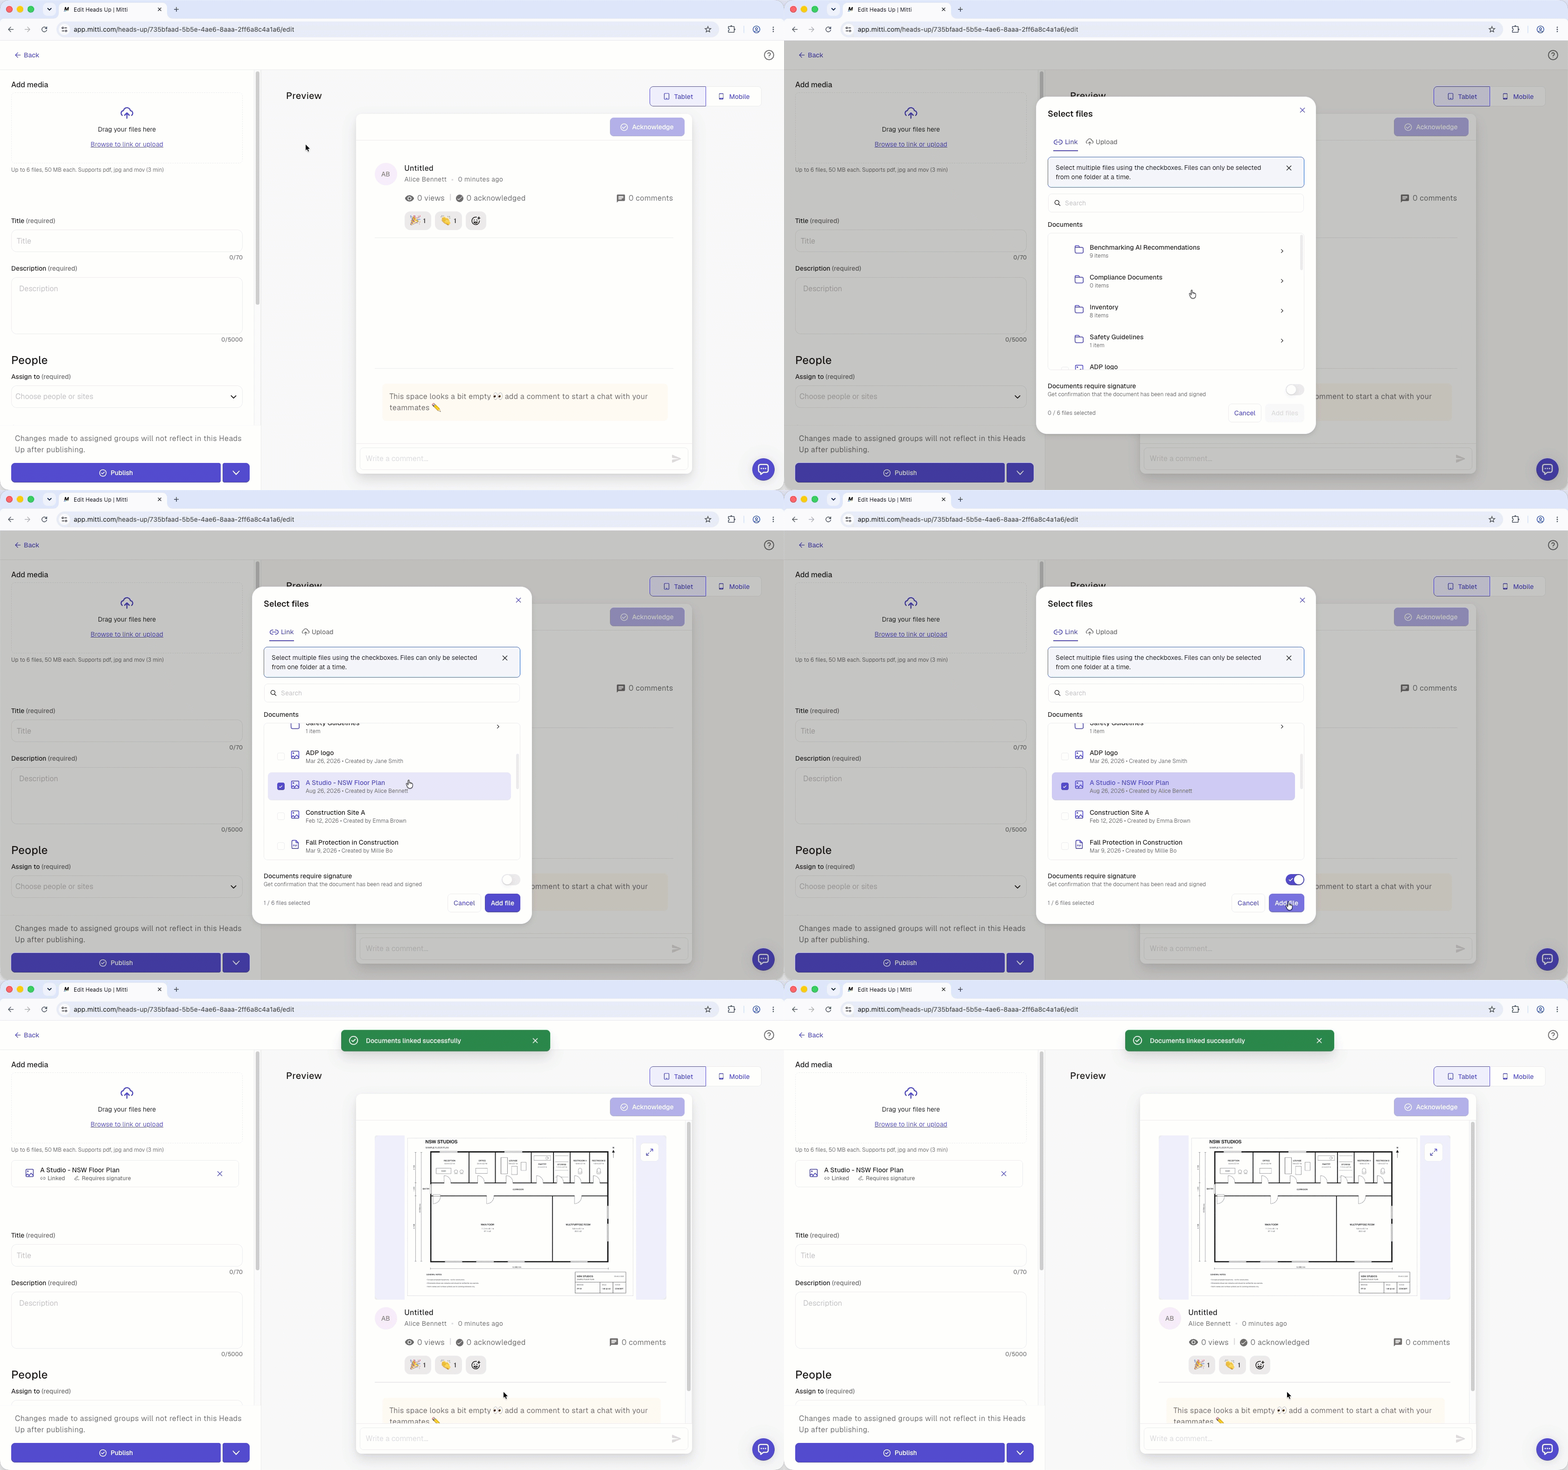
On the left-hand side of the page under "Add media", click Browse to link or upload to select files.
In the pop-up window, select the files you want to link.
Turn “Require signature” on or off, if you want users to add a signature before acknowledging a Heads Up.
Click Add.
Linking and unlinking files from Documents is only supported on the web app.
Unlink a file from a Heads Up
You can only unlink files from a Heads Up while it's still an unpublished draft. When a Heads Up is published, you can't unlink files from it, so you'll need to delete the Heads Up instead.
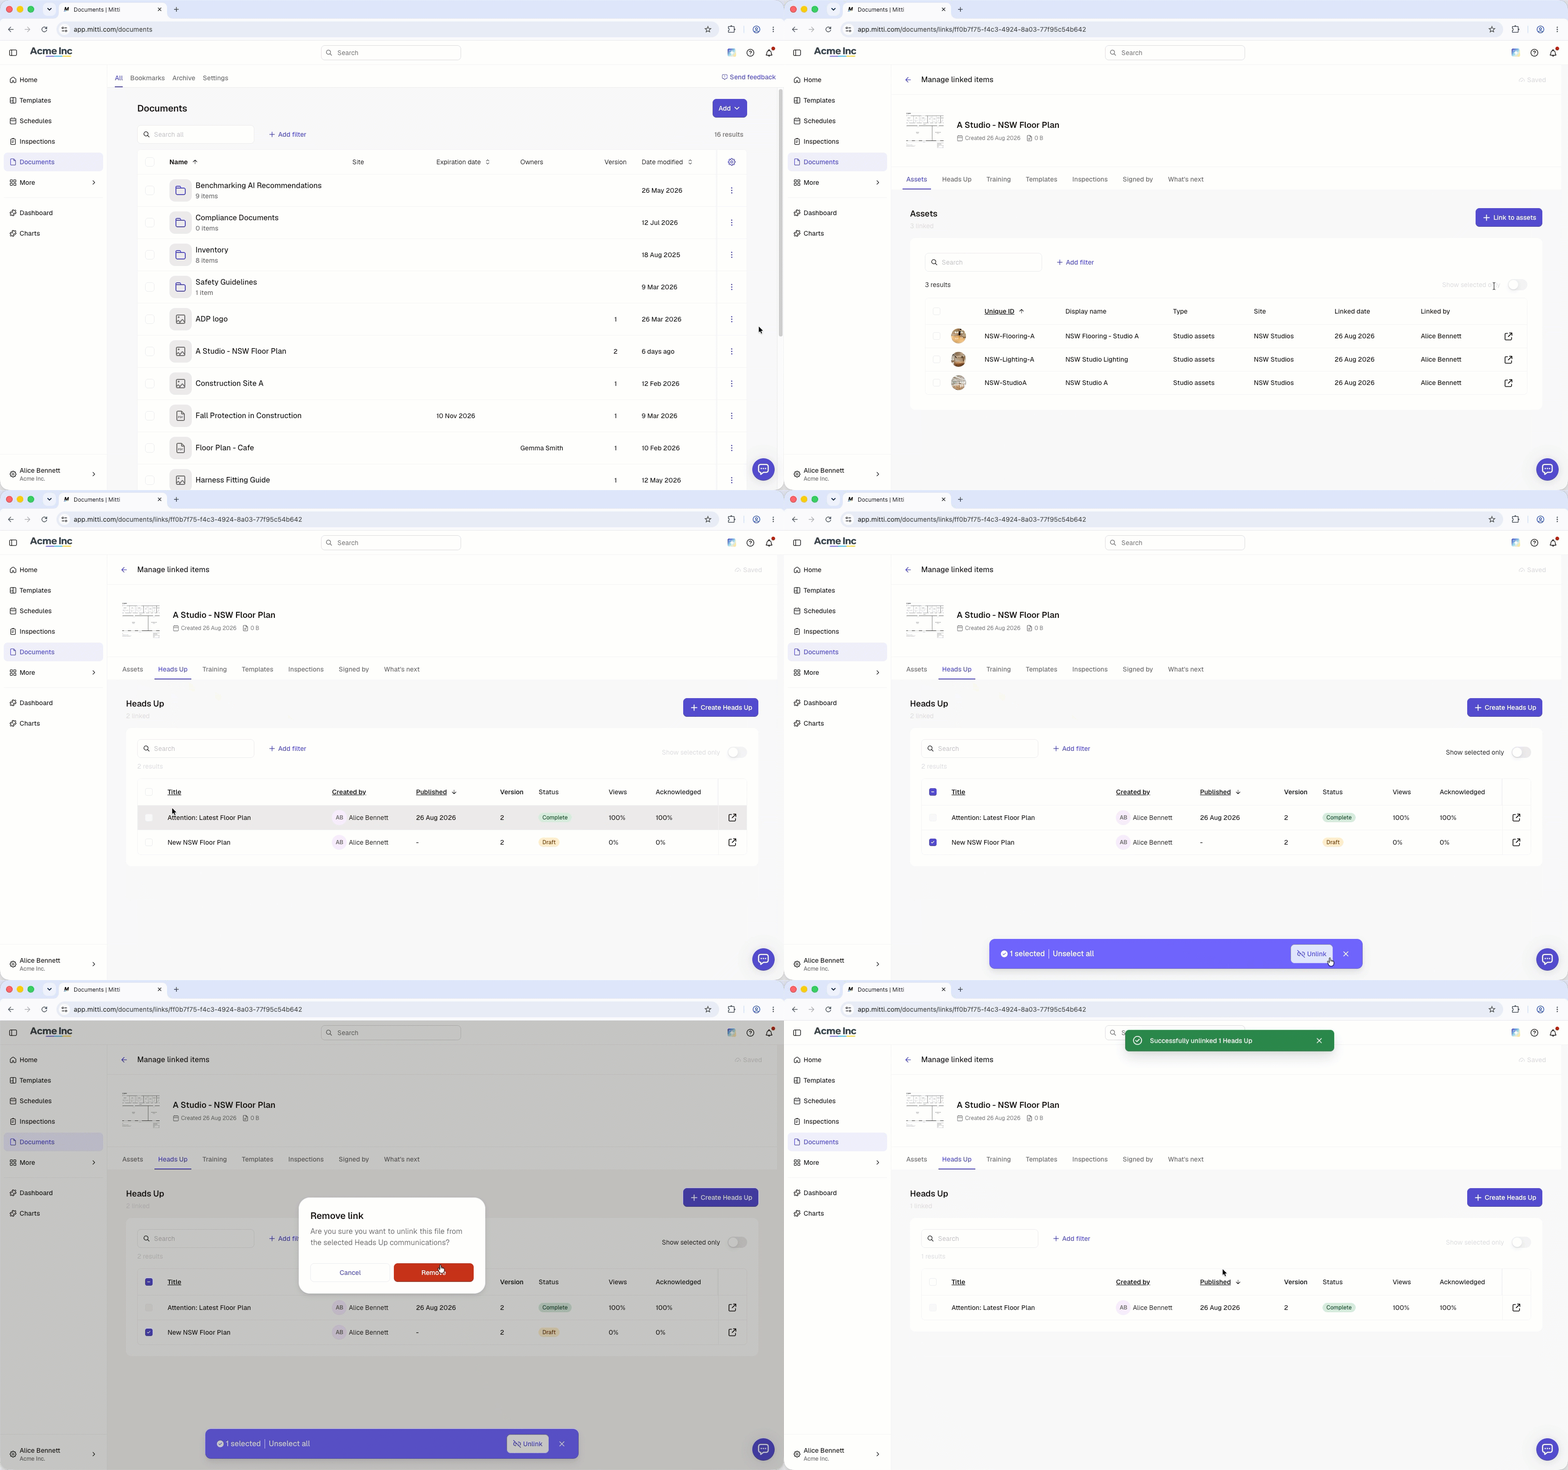
Select Documents in the sidebar or in More.
Click on the file's right-hand side and select Manage linked items.
Select Heads Up at the top of the page.
Check the box on the Heads Up's left-hand side.
Click Unlink at the bottom of the page.
In the pop-up window, click Remove.
Click What's next and select up to 2 features you want Documents to link with next. Your feedback helps shape the future of Documents.
Frequently asked questions
Need more help?
Was this page helpful?