Last updated: September 14, 2026
What are templates?
Templates are the foundation of your Mitti experience, serving as digital checklists that guide your team in collecting information and completing inspections. They play a key role in defining your team's daily workflow, shaping how reports are structured, and helping you capture the most important information.
Within Mitti, templates are built and customized using the intuitive Templates feature, where you can add questions, sections, and logic fields to match your operational needs, as well as manage access to control who can create, edit, and use them. By standardizing these processes and controlling access appropriately, templates help teams save time, reduce errors, and maintain consistent, high-quality reporting.
Available options
Describe a topic or upload a file
Enter a description of your process or topic, upload a file, or do both. The AI Assistant generates a structured template based on your input. Use this option to describe your process or convert an existing form or questionnaire into a template.
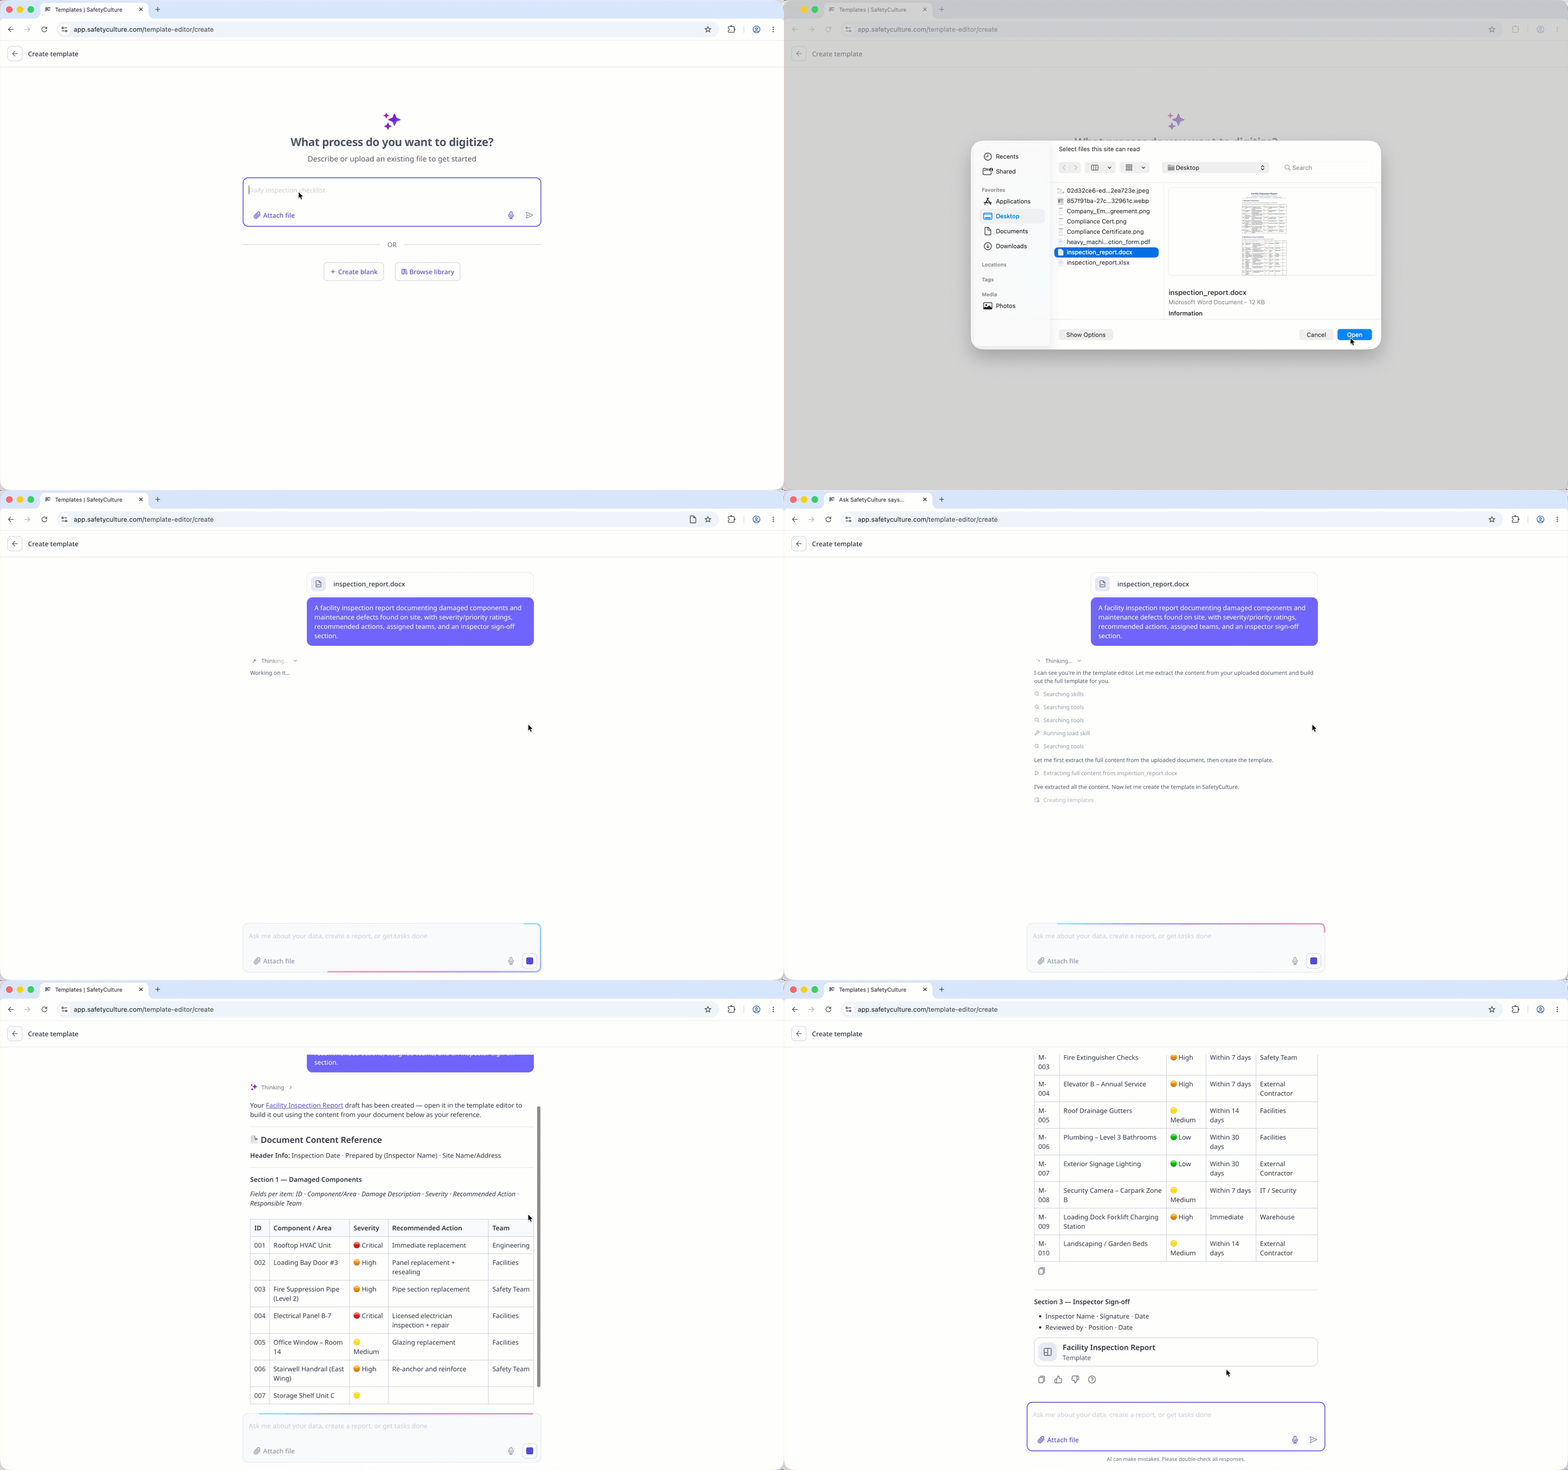
Describing a topic or uploading a file uses the AI Assistant to create a template.
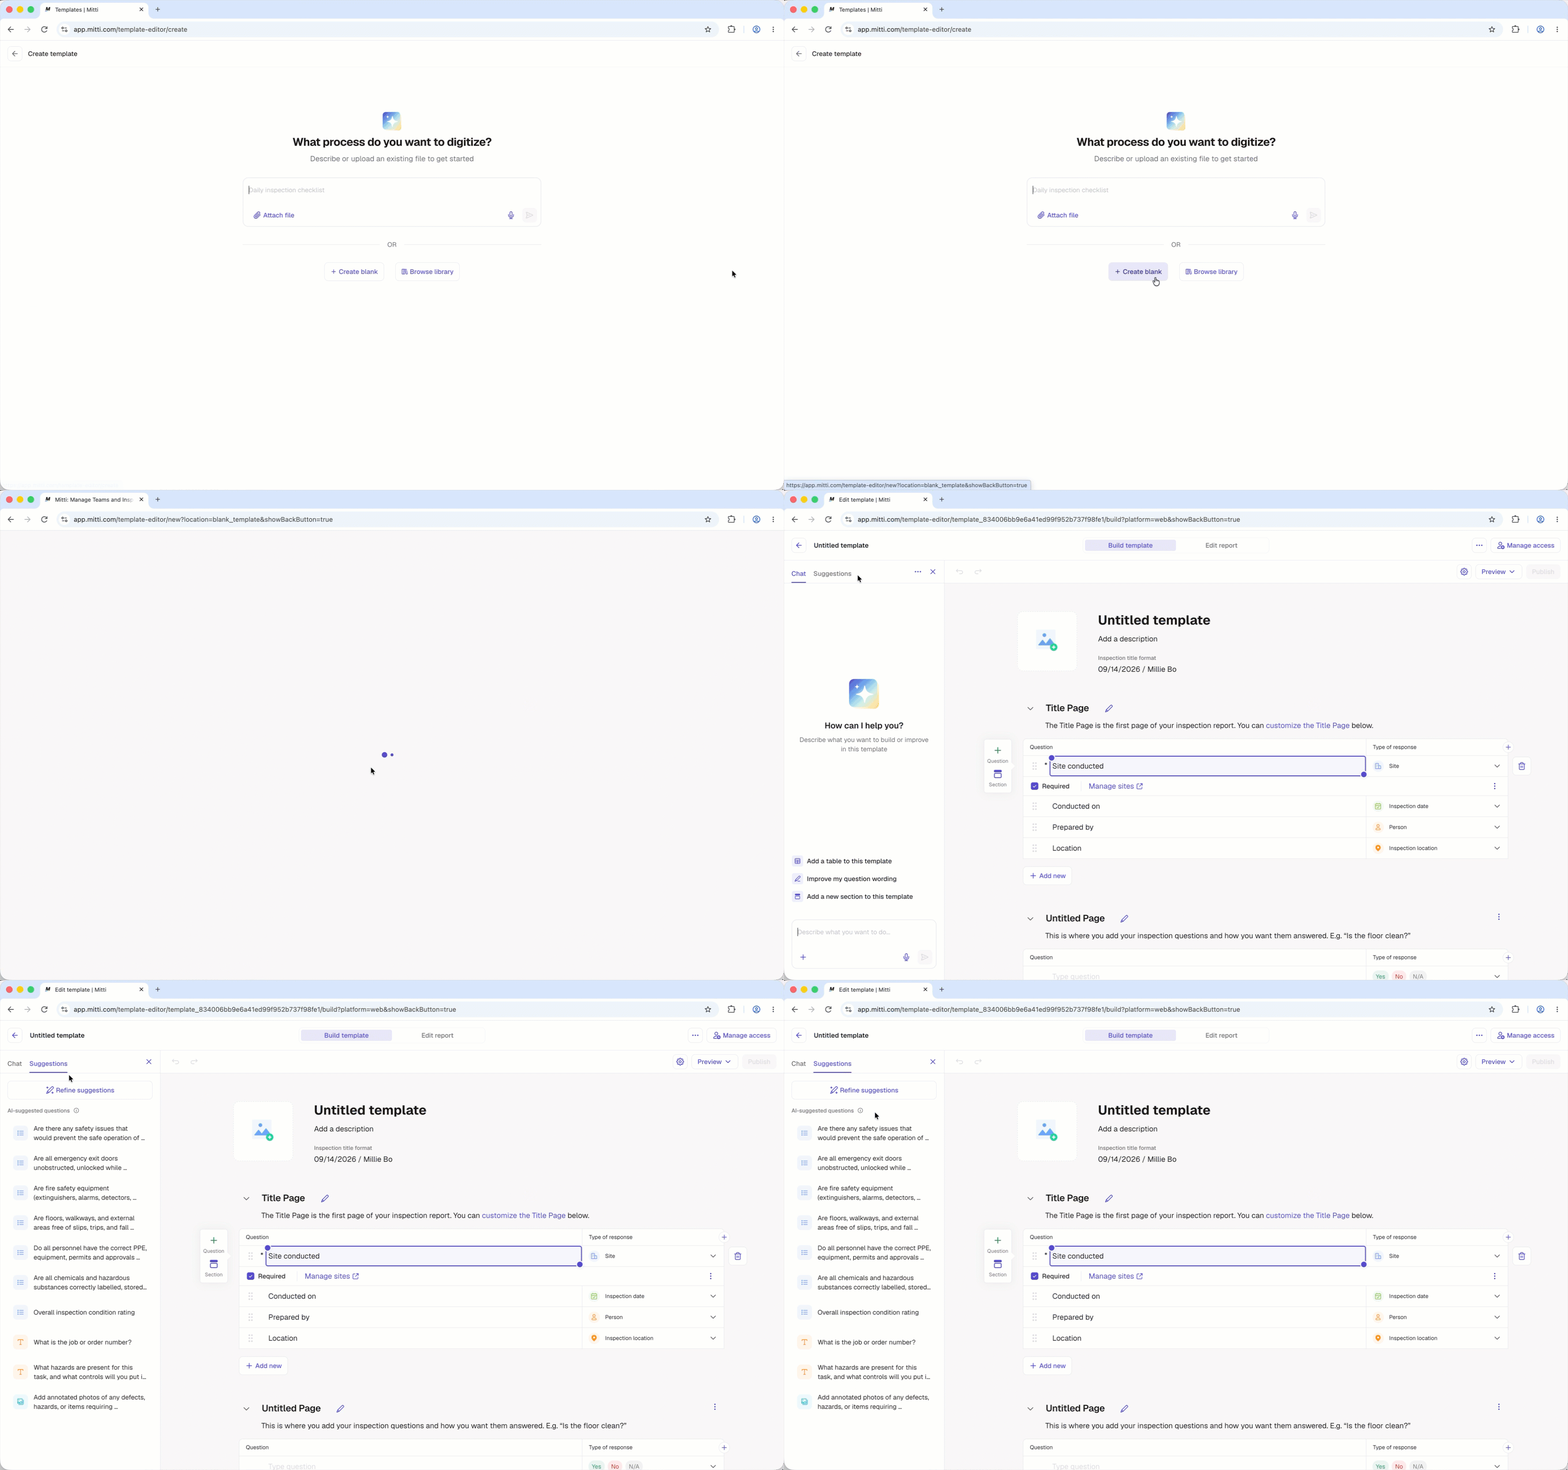
Start from scratch
Build your own template from scratch. A new template automatically includes a default title page and a blank inspection page. Create a blank template if you want full control and prefer to design your template step by step.
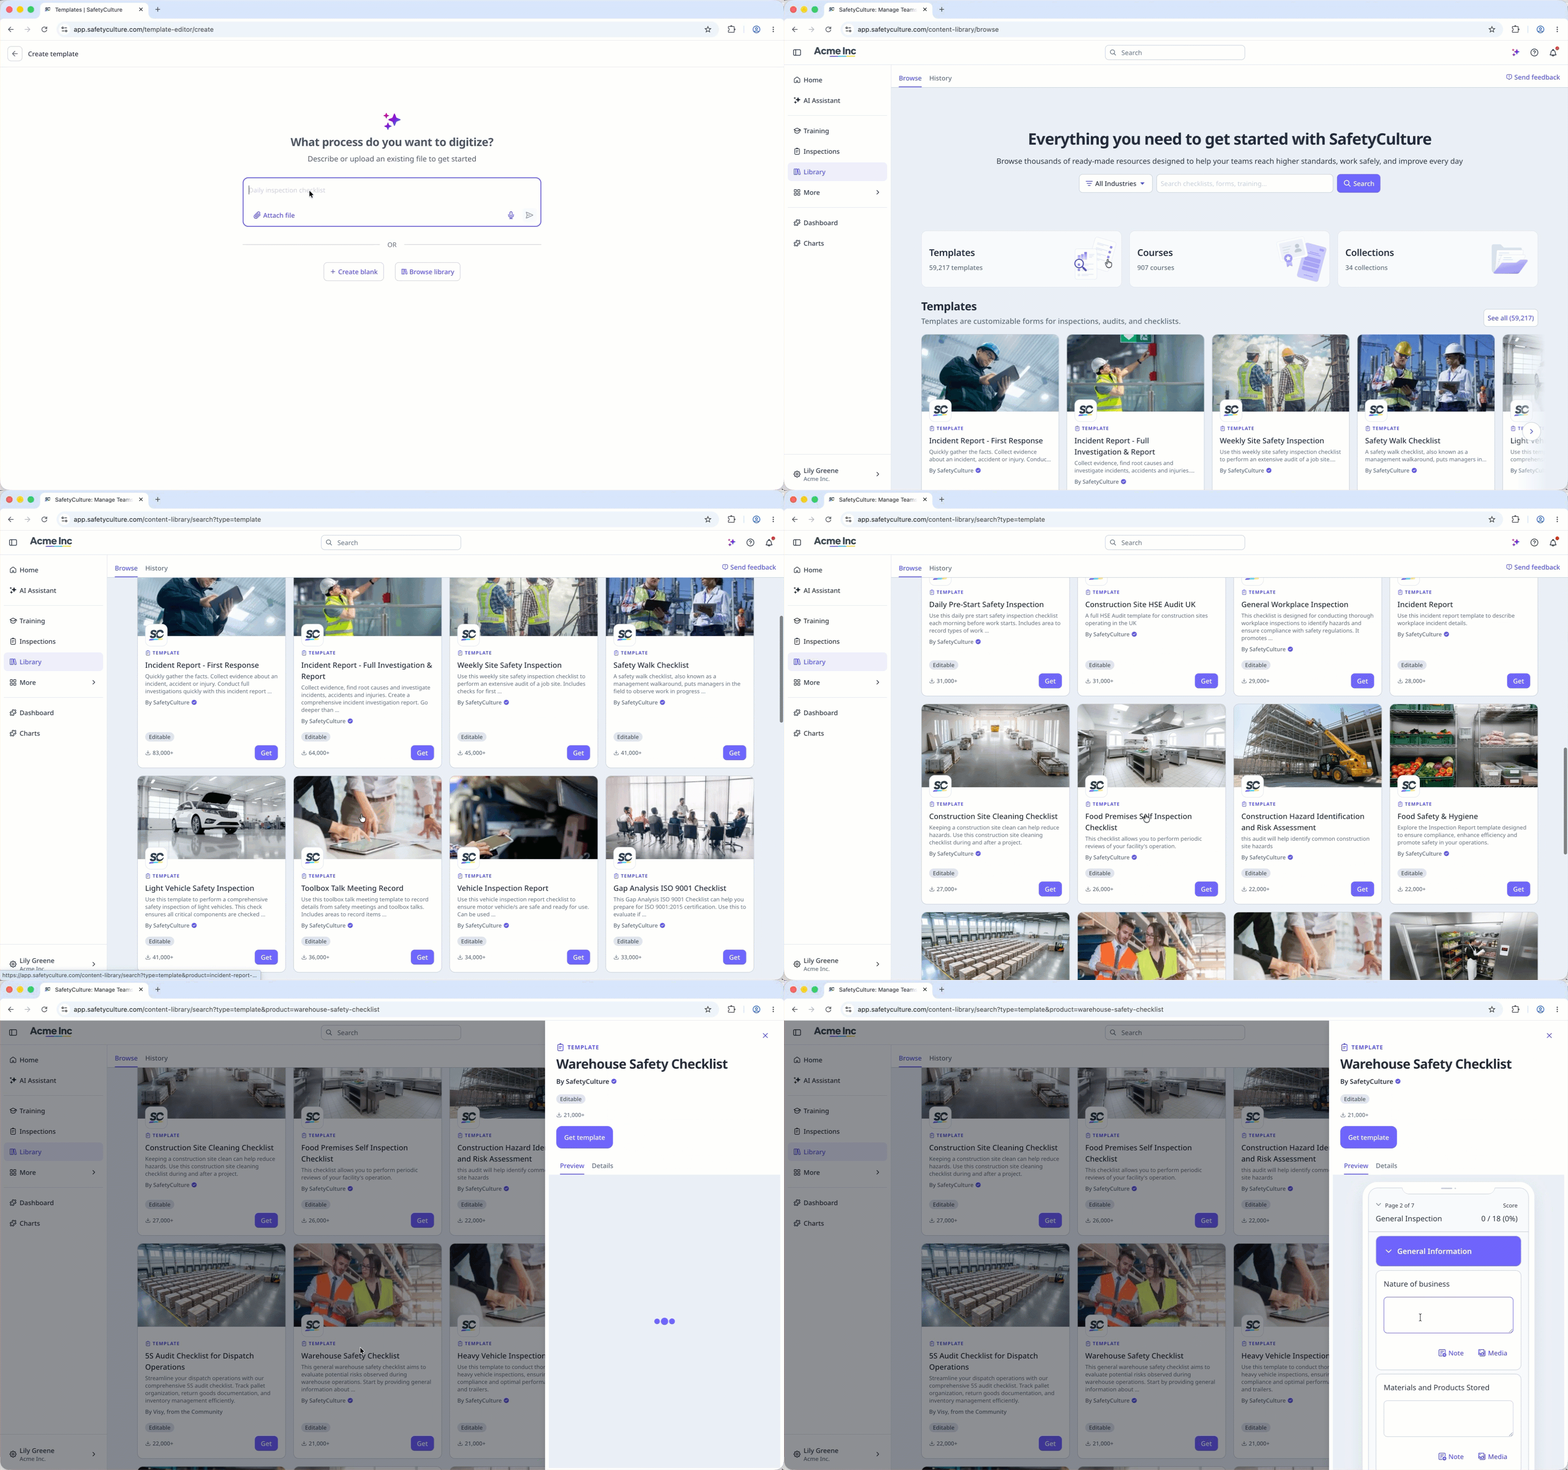
Find a template
Browse thousands of free templates in the Library (opens in new tab), created and shared by the Mitti team. Download a ready-made template that suits your needs, then customize it to match your team's workflow.
How it works
This diagram illustrates the process of creating and editing templates, customizing reports, and managing access to ensure inspections are clear, consistent, and tailored to your team's needs.
Although it's possible to create templates on the mobile app, we recommend building templates via the web app for the best experience.
1. Create a template
You can only create templates using the AI Assistant on the web app.
Click Templates from the sidebar or in More.
Click Create on the upper-right corner of the template list.
Click Create blank to create a new template.
Proceed to edit your template.
Open the mobile app.
Tap Inspections from the navigation bar or in More.
Select Templates tab at the top of your screen.
Tap at the lower-right corner of your screen.
From the pop-up menu, select Start from scratch.
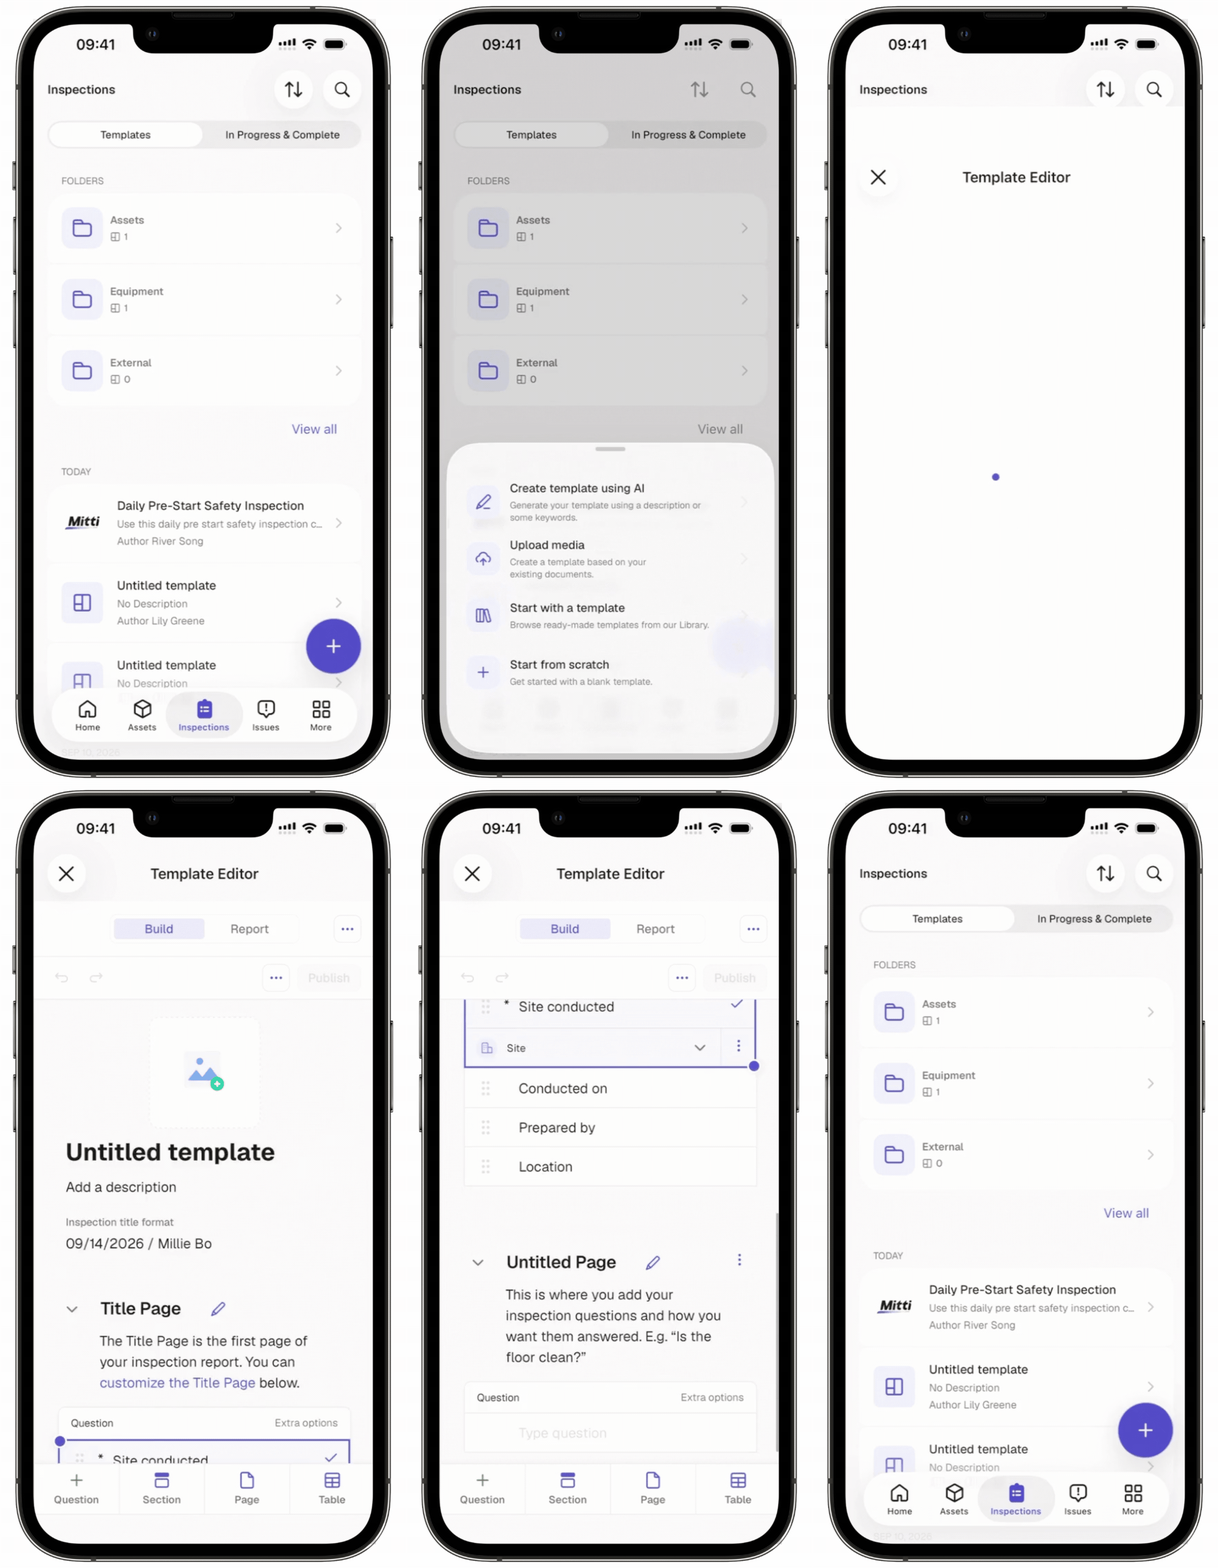
Proceed to edit your template.
2. Edit a template
Select the Suggestions tab to generate and add suggested questions to your template using the AI Assistant.
Click Untitled template at the top of the page to change the template's title.
Click Add a description below the template's title to describe the template.
Add a template logo to use as the template thumbnail and default logo on inspection reports generated from the template.
In the "Title" page, you have the option to:
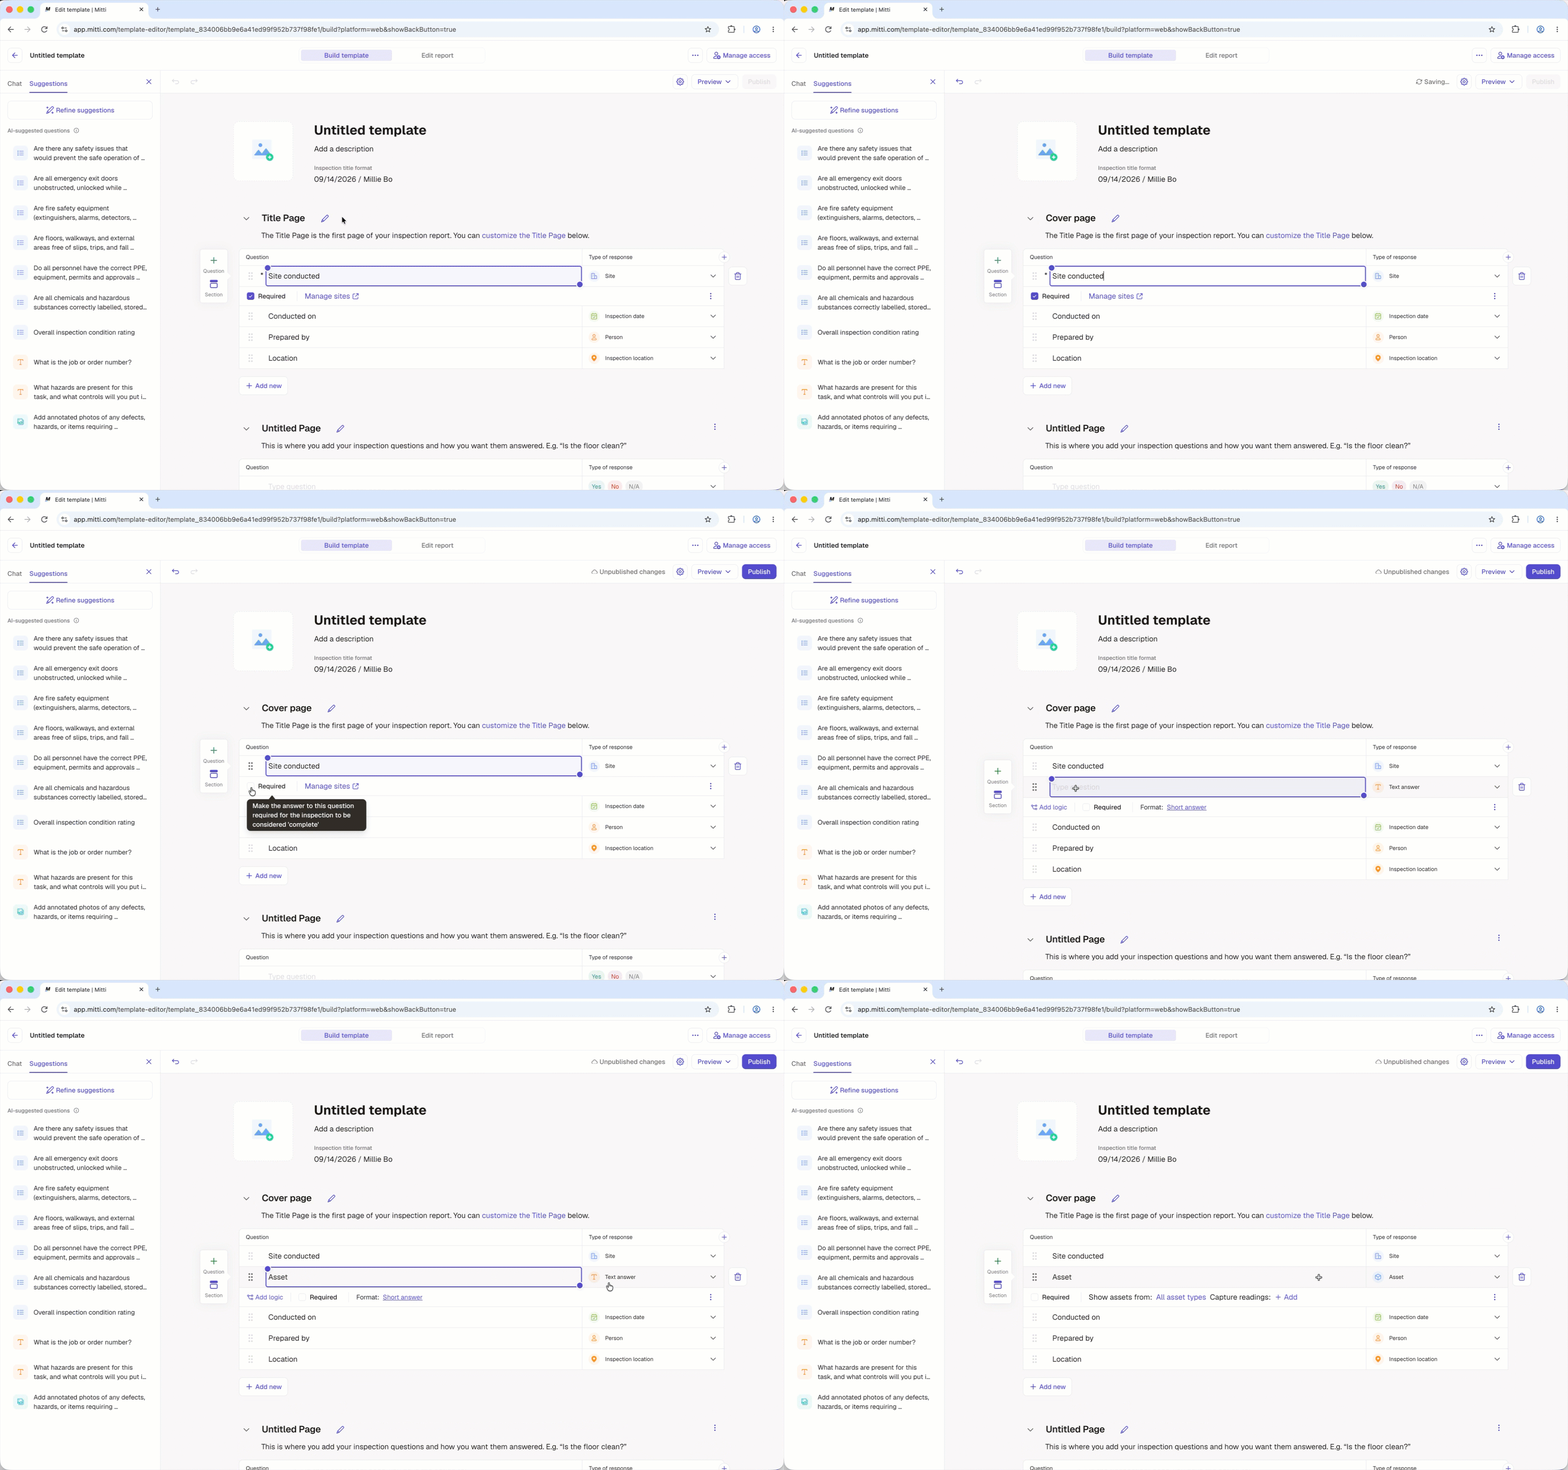
Click to rename the title page.
Select a default question to edit it.
Click Question to add more questions.
In the "Inspection" page, you have the option to:
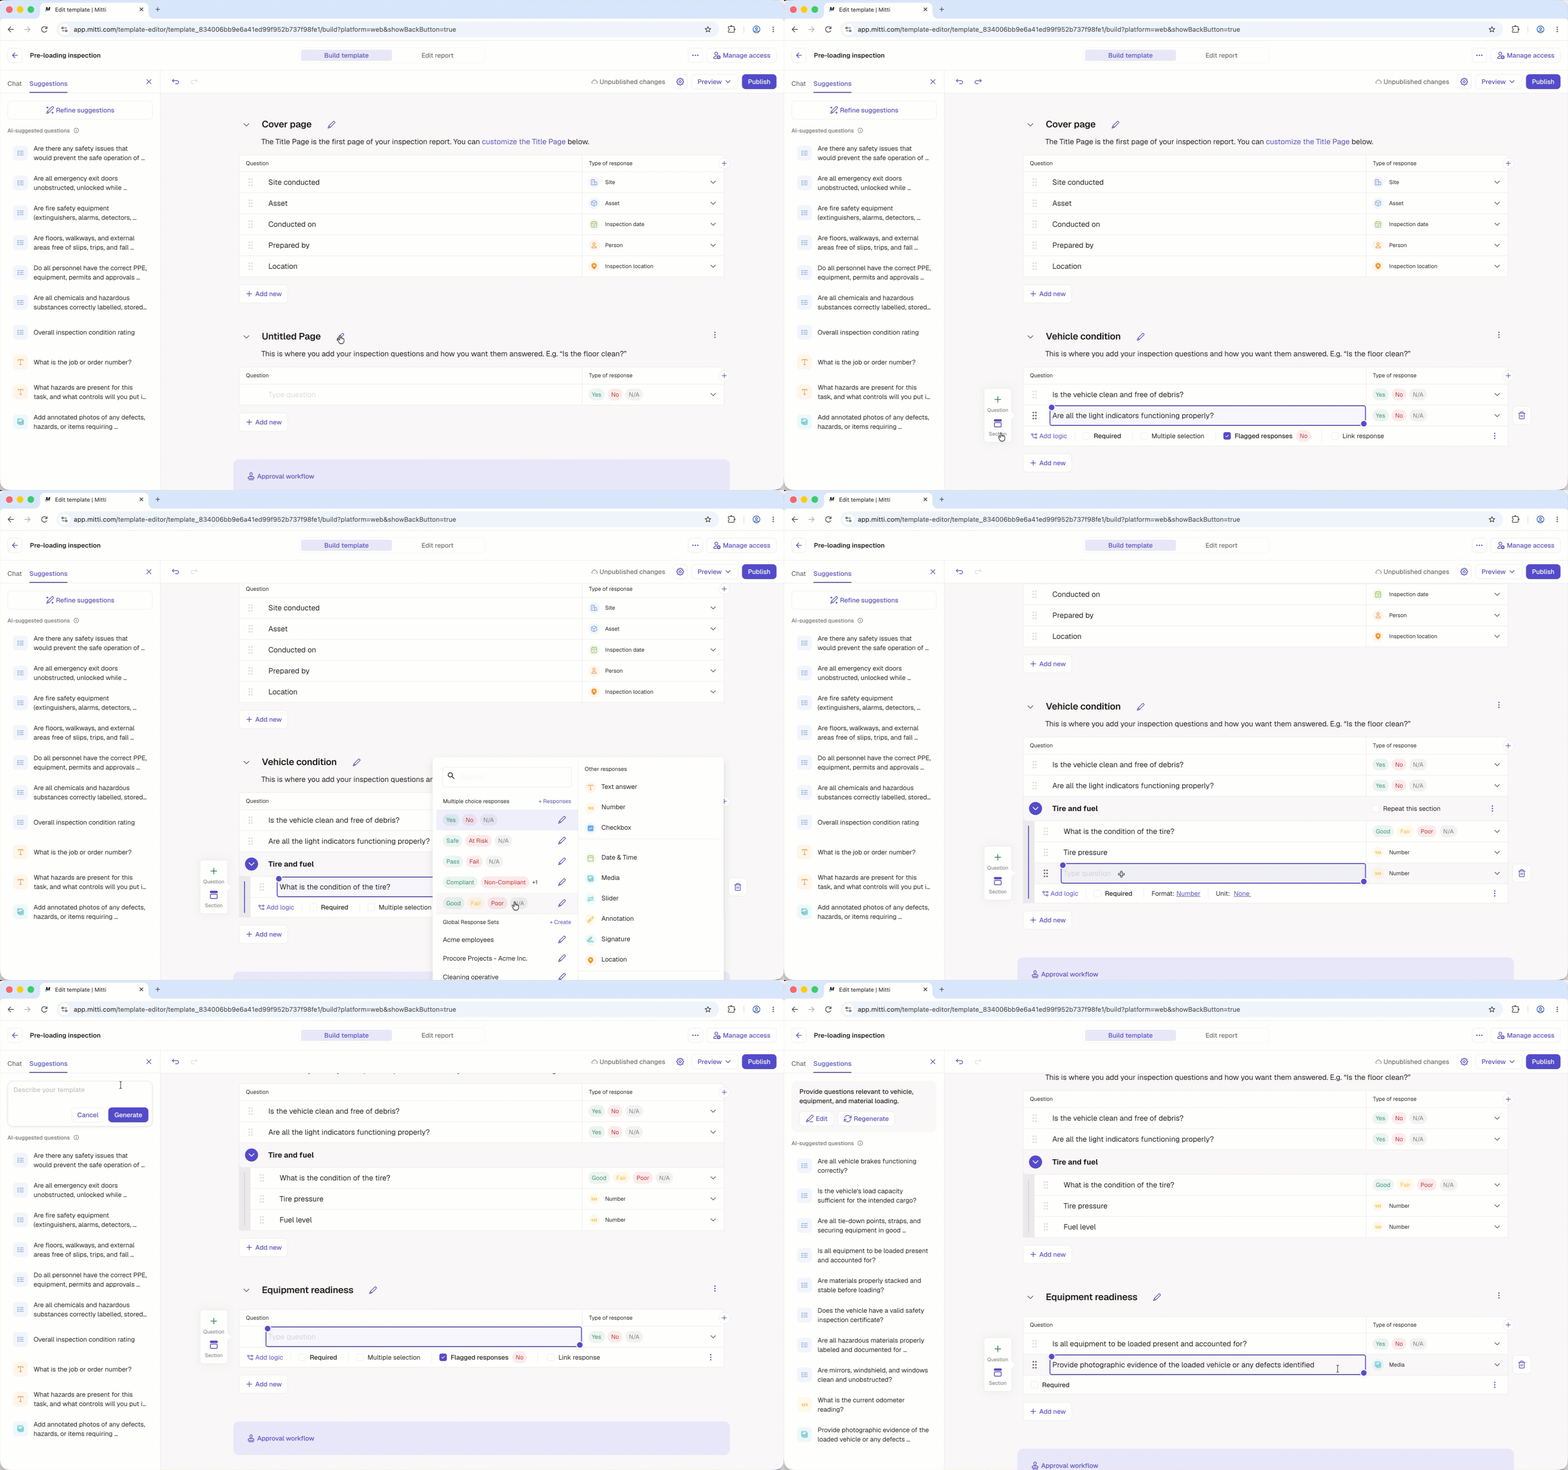
Click to rename the page.
Click Type question to add your question.
Click Add new to add more questions, sections, or pages.
Depending on your template's use case, you may add logic fields for situational questions and repeat sections for recurring ones. You can also set up scoring in the template to track your team's performance over time.
When you're done editing, proceed to customize your report.
Tap Untitled template at the top of the page to change the template's title.
Tap Add a description below the template's title to describe the template.
Add a template logo to use as the template thumbnail and default logo on inspection reports generated from the template.
In the "Title" page, you have the option to:
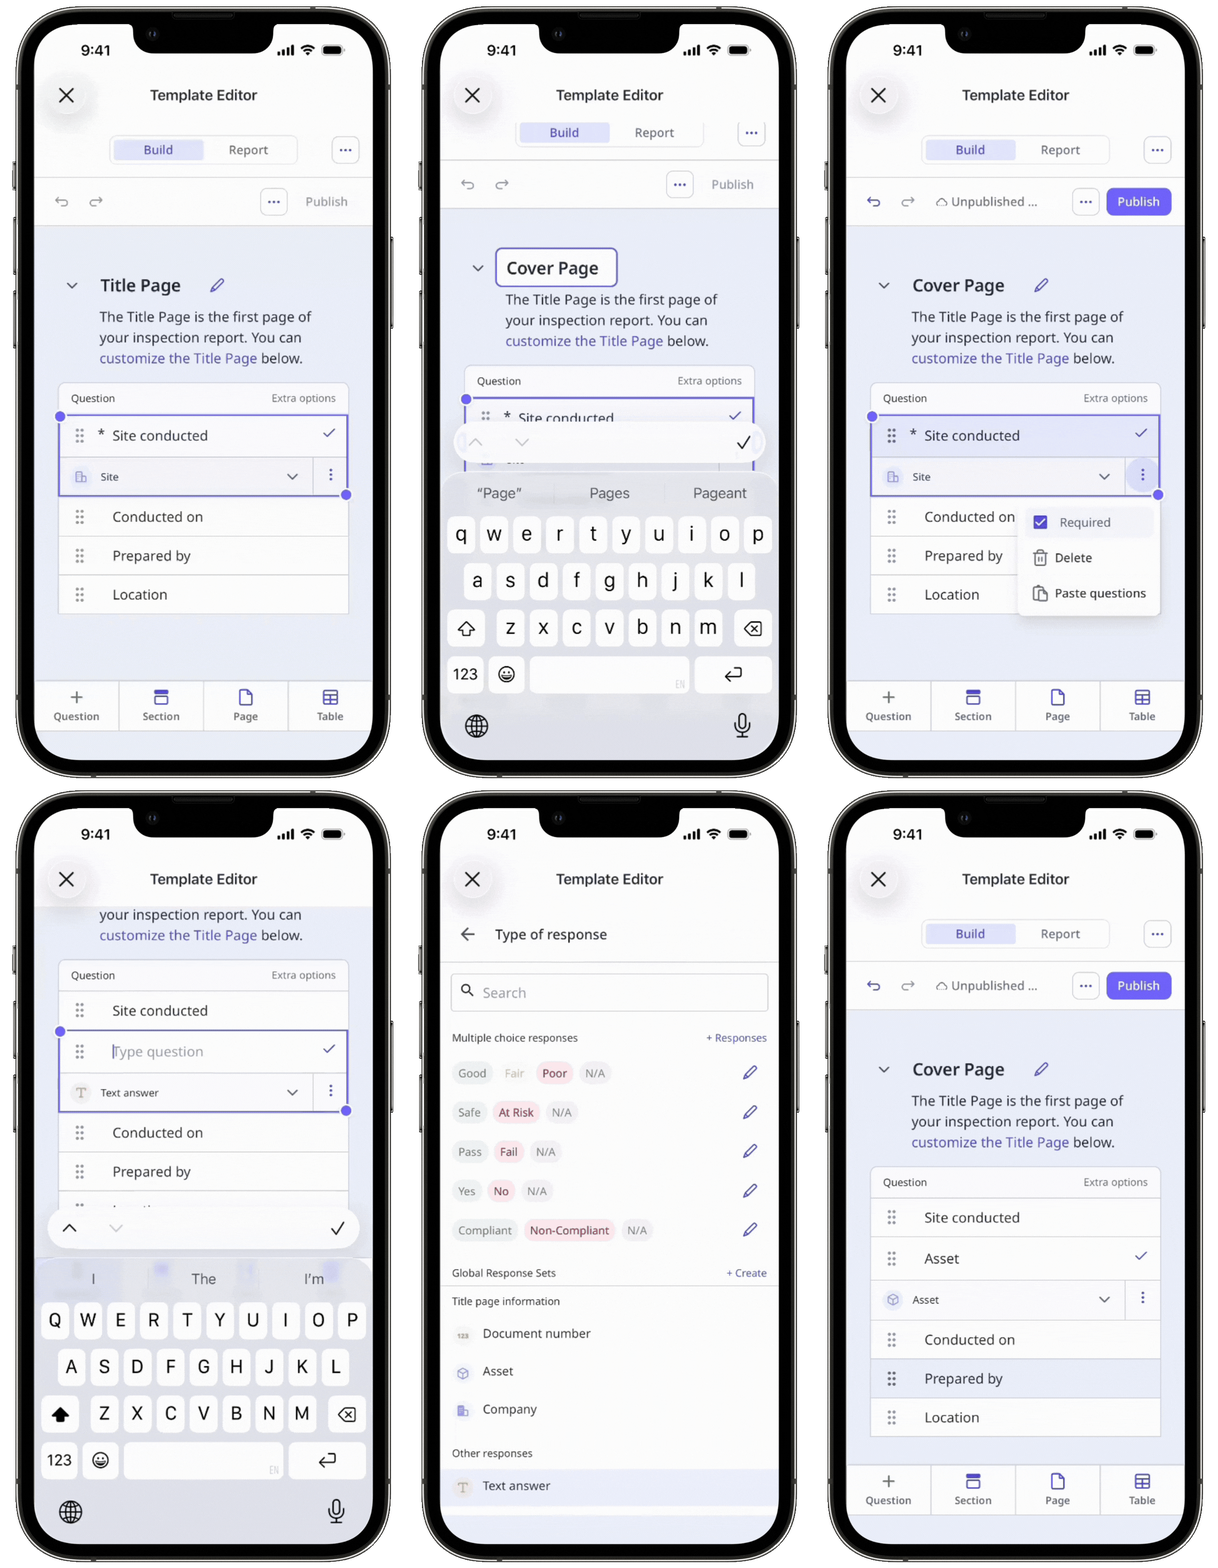
Tap to rename the title page.
Select a default question to edit it.
Tap Question to add more questions.
In the "Inspection" page, you have the option to:
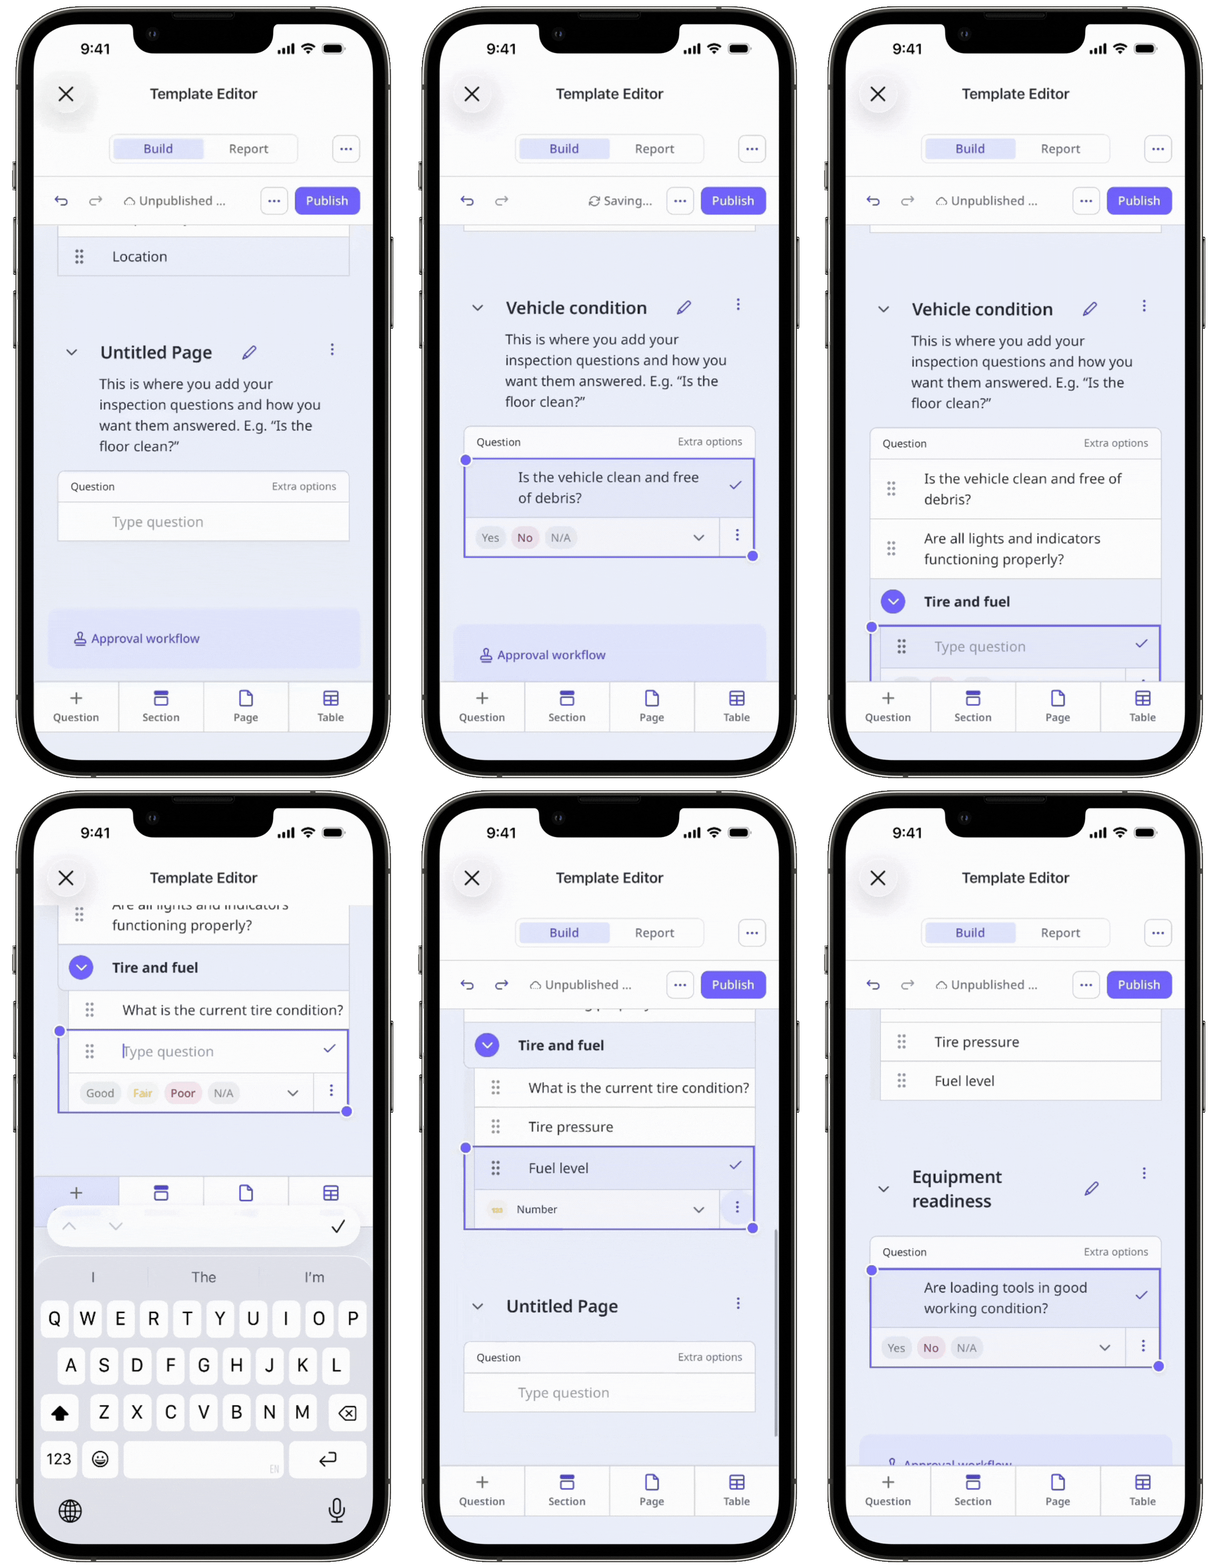
Tap to rename the page.
Tap Type question to add your question.
Tap Add new to add more questions, sections, or pages.
Depending on your template's use case, you may add logic fields for situational questions and repeat sections for recurring ones. You can also set up scoring in the template to track your team's performance over time.
When you're done editing, proceed to customize your report.
3. Customize a report layout
Click Edit report at the top of the template editor.
On this page, you can create a report layout or update an existing one. If your template or organization doesn't have a saved layout yet, you’ll be directed to create one right away.
When you're done customizing your report layout, click Save at the lower-left of the page.
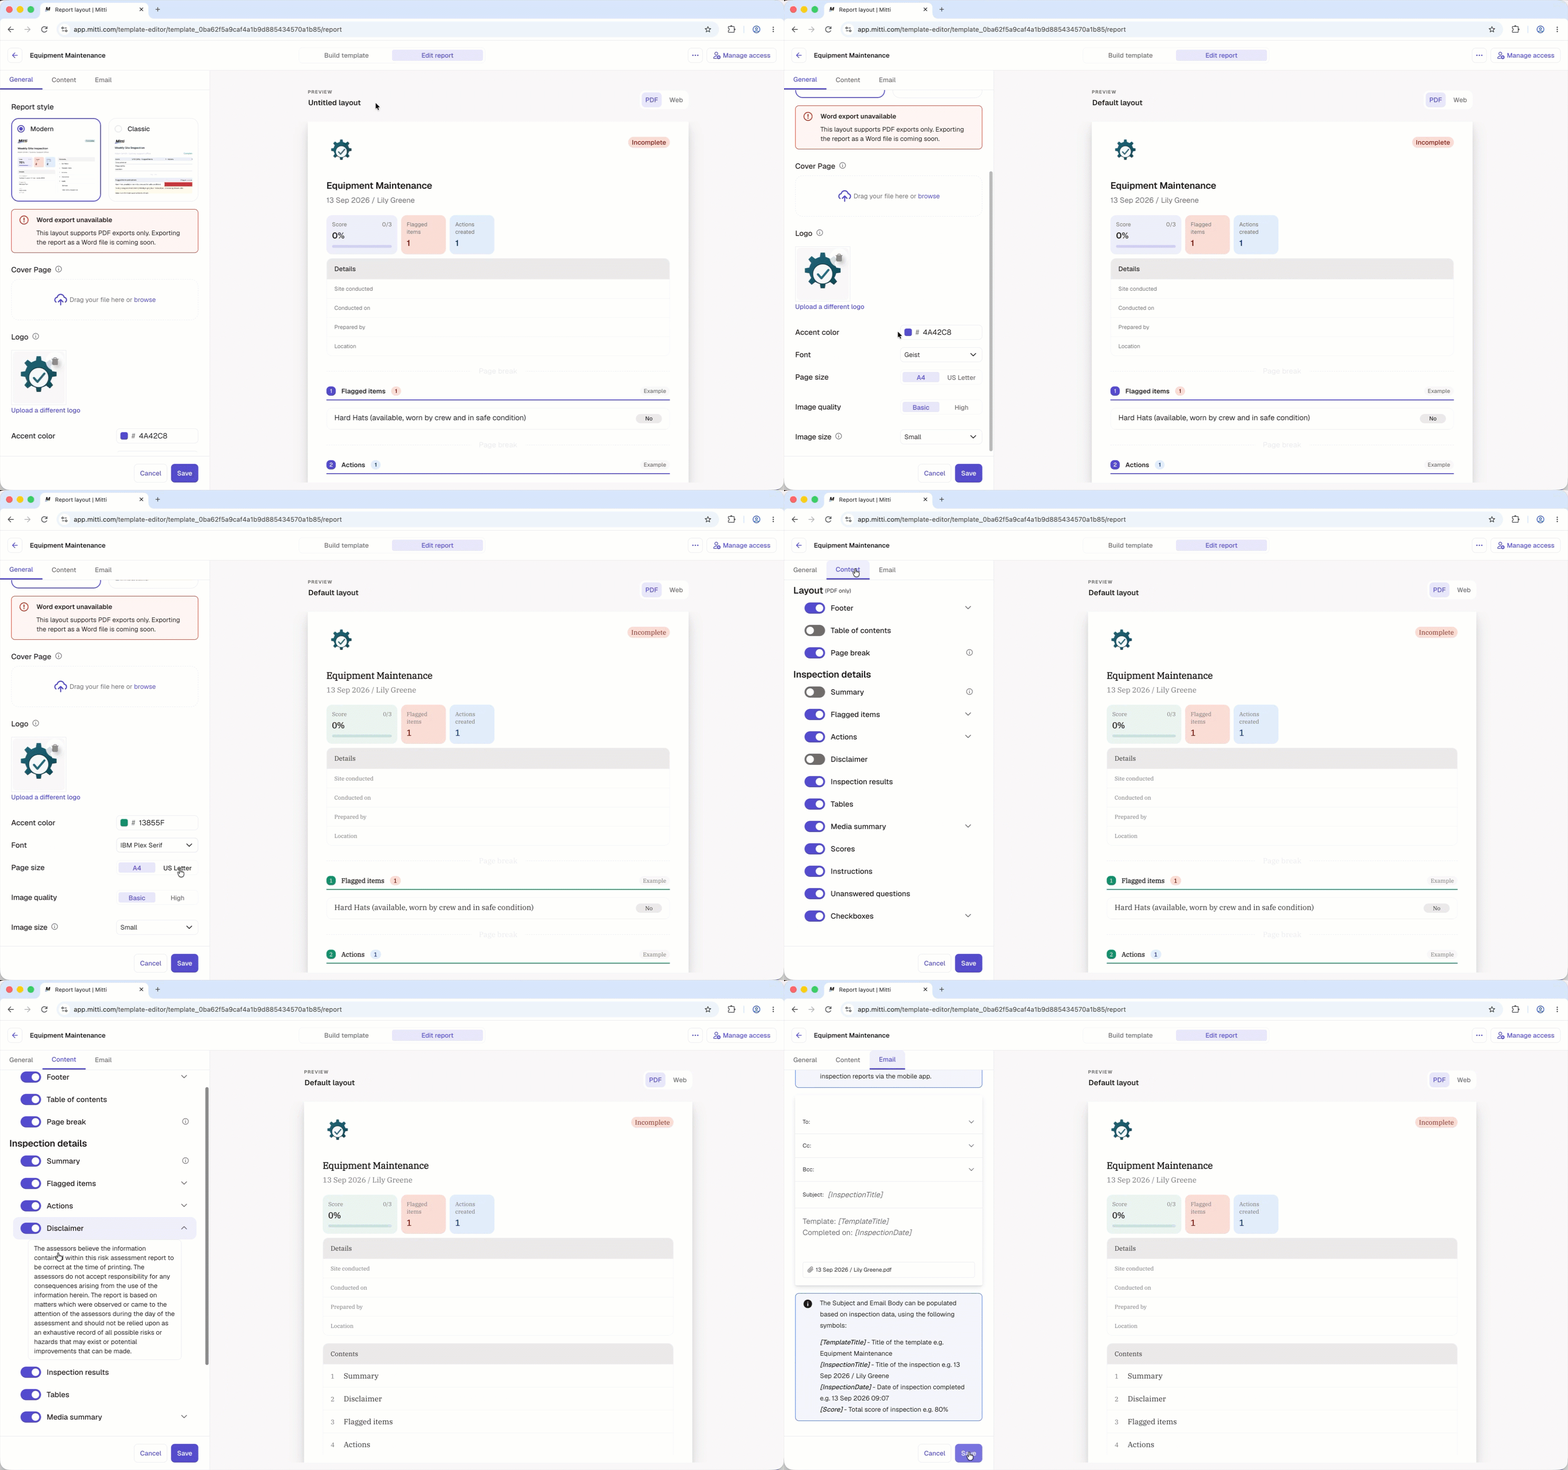
Proceed to manage access to your template.
Tap Report at the top of your screen.
Tap at the upper-right of your screen.
On this page, you can create a report layout or update an existing one. If your template or organization doesn't have a saved layout yet, you’ll be directed to create one right away.
When you're done customizing your report layout, tap Save at the bottom of your screen.
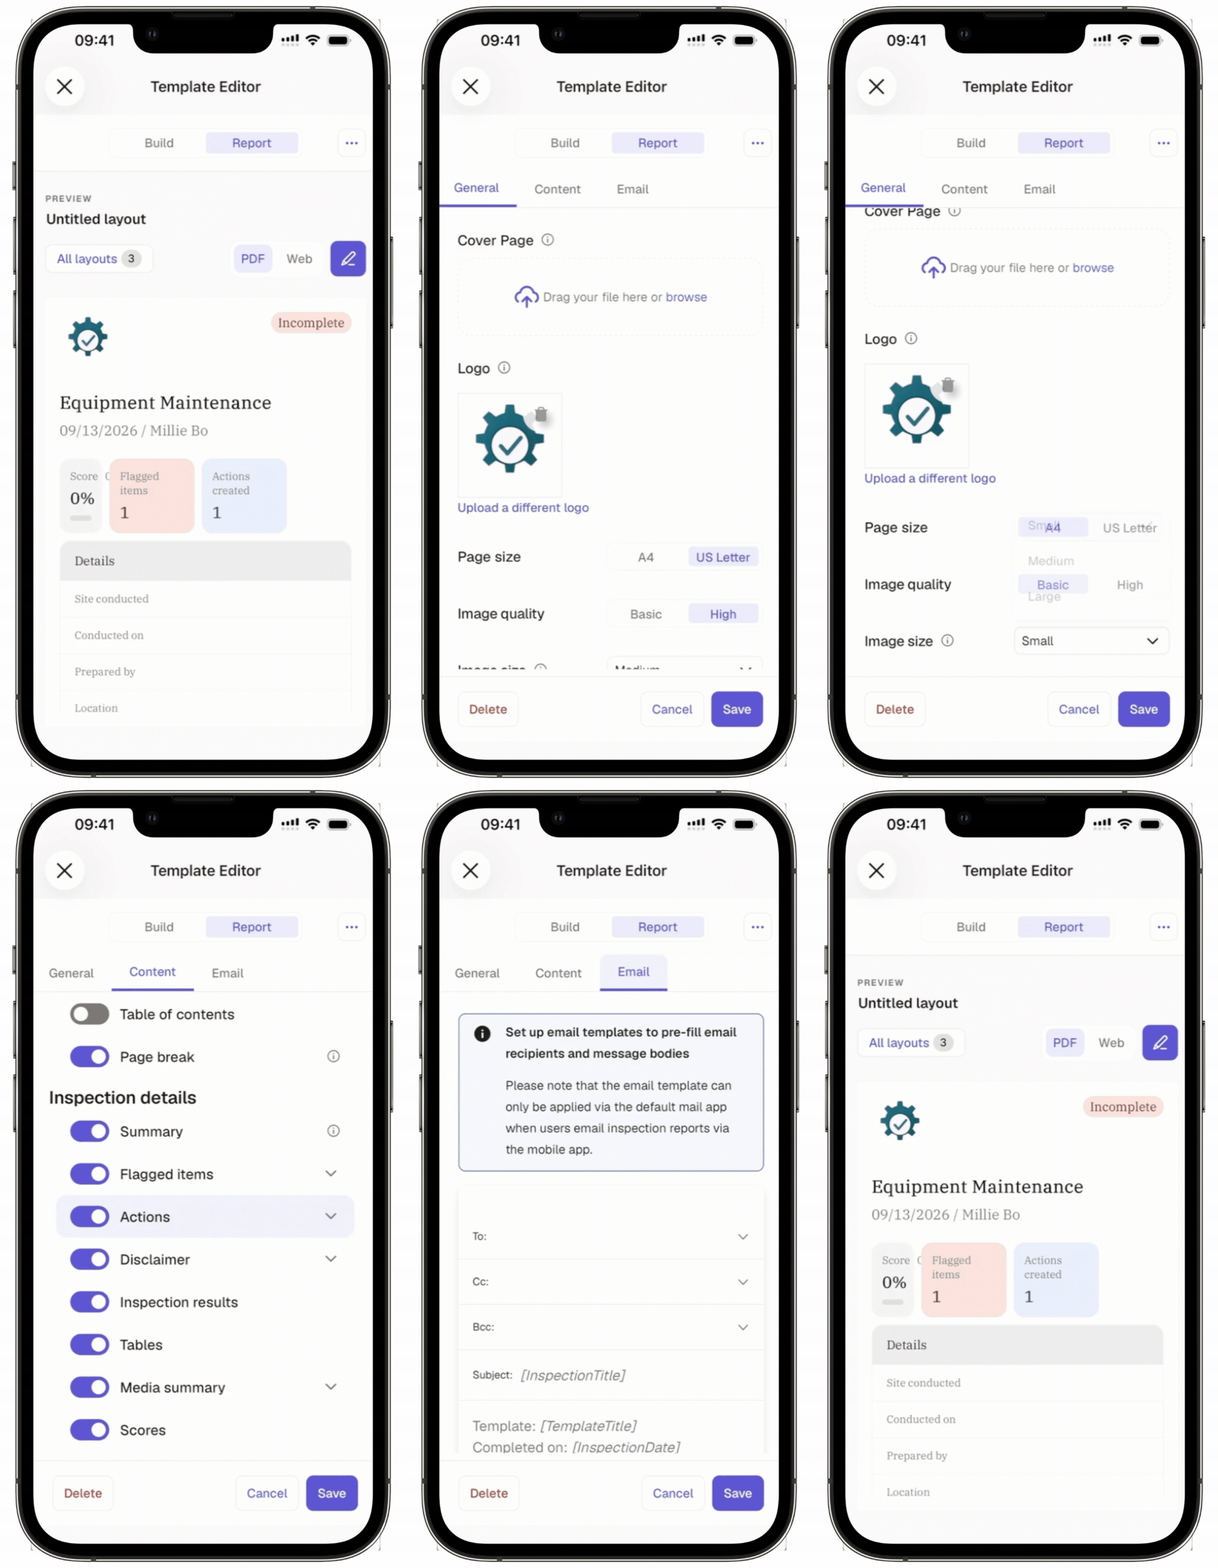
Tap at the upper-left of your screen.
Proceed to manage access to your template.

4. Manage access
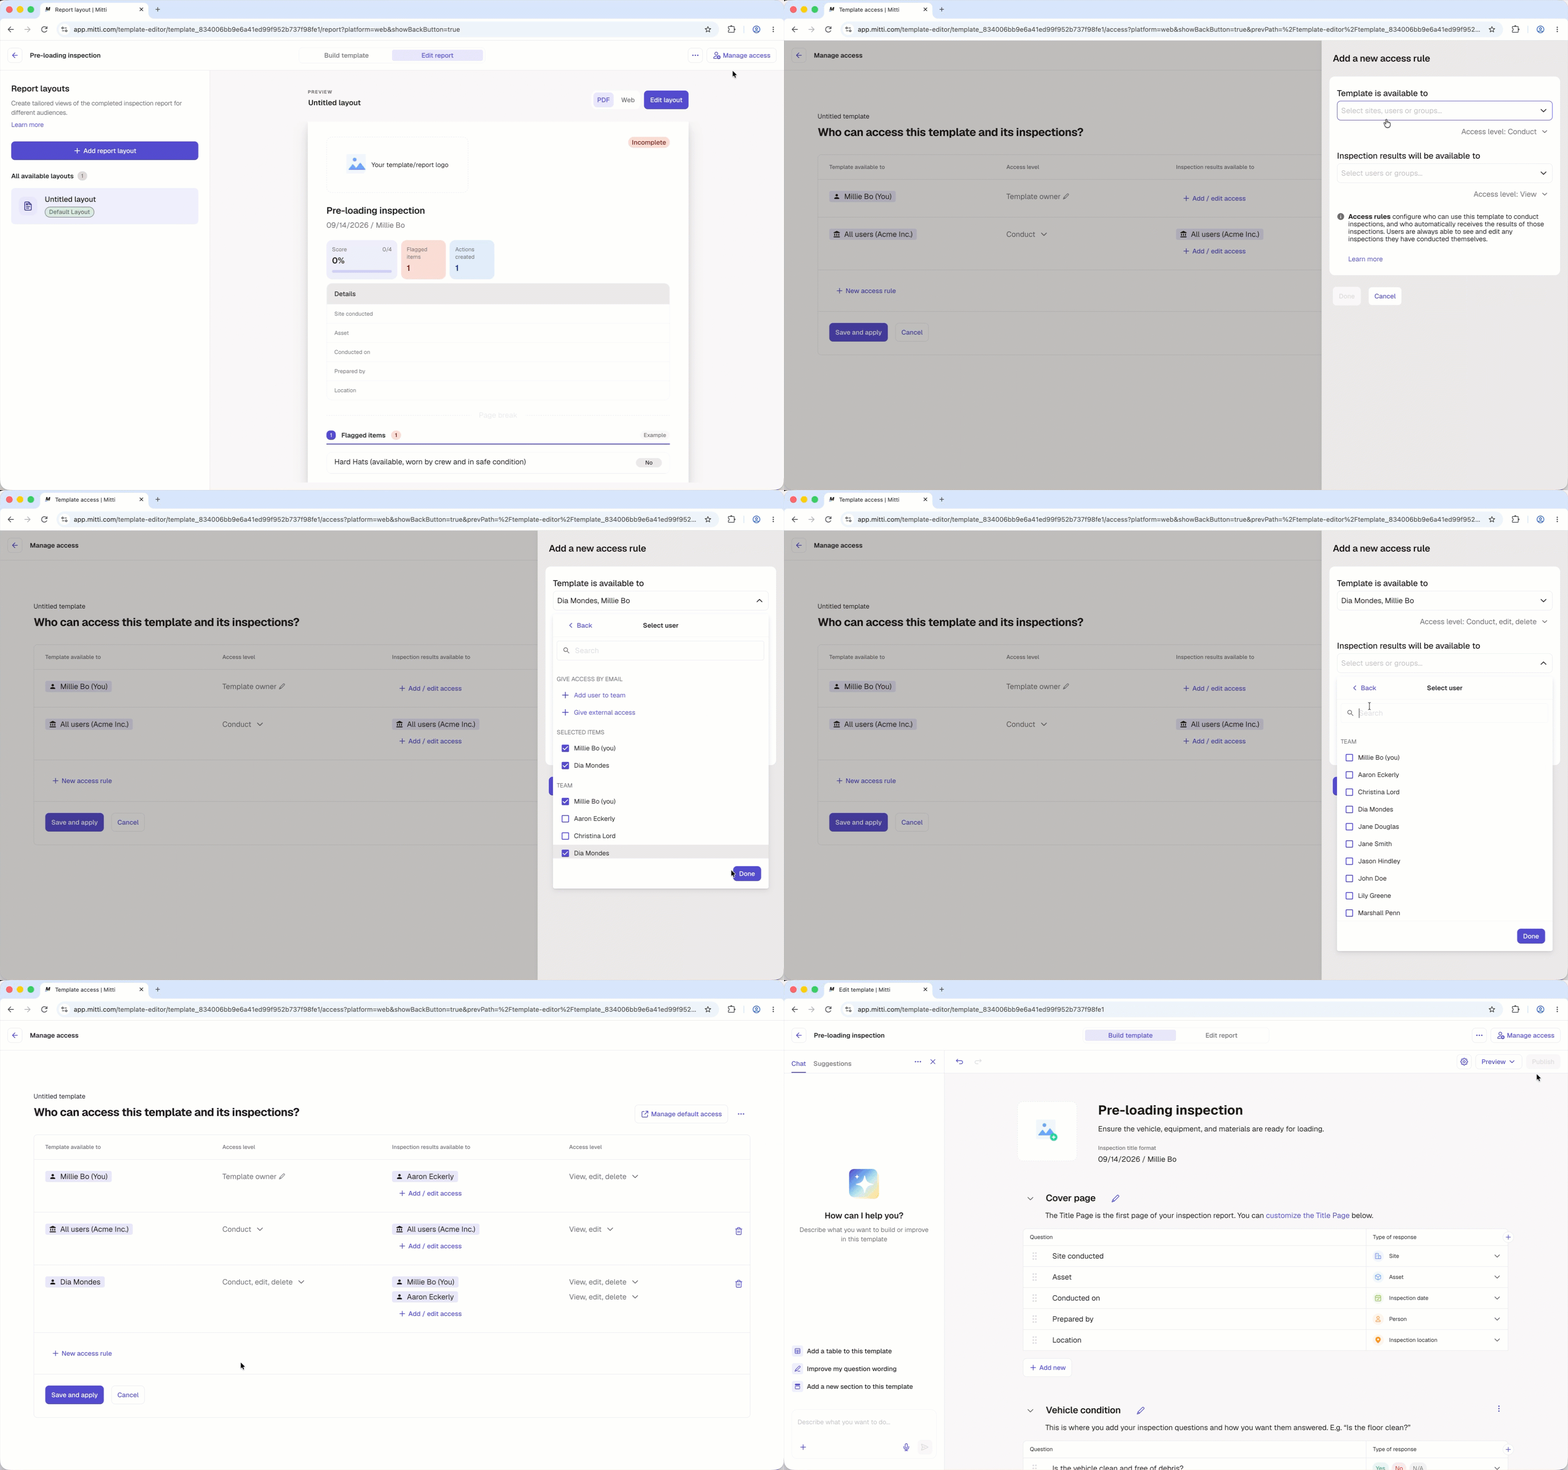
Click Manage access at the upper-right of the page.
You have the following options to manage your template's access rules:
Click Edit rules to edit an existing access rule.
Click New access rule to add a new access rule.
Click Save and apply.
In the pop-up window, select Yes, apply to all to apply the updated access settings to both existing and future inspections, or No, apply to future only to apply them to future inspections only.
Click at the upper-left of the page.
Click Build at the top of the page, then click Publish on the upper-right of the page to publish the template. If you're not ready to publish the template, you can go back to the templates list and come back when you're ready.
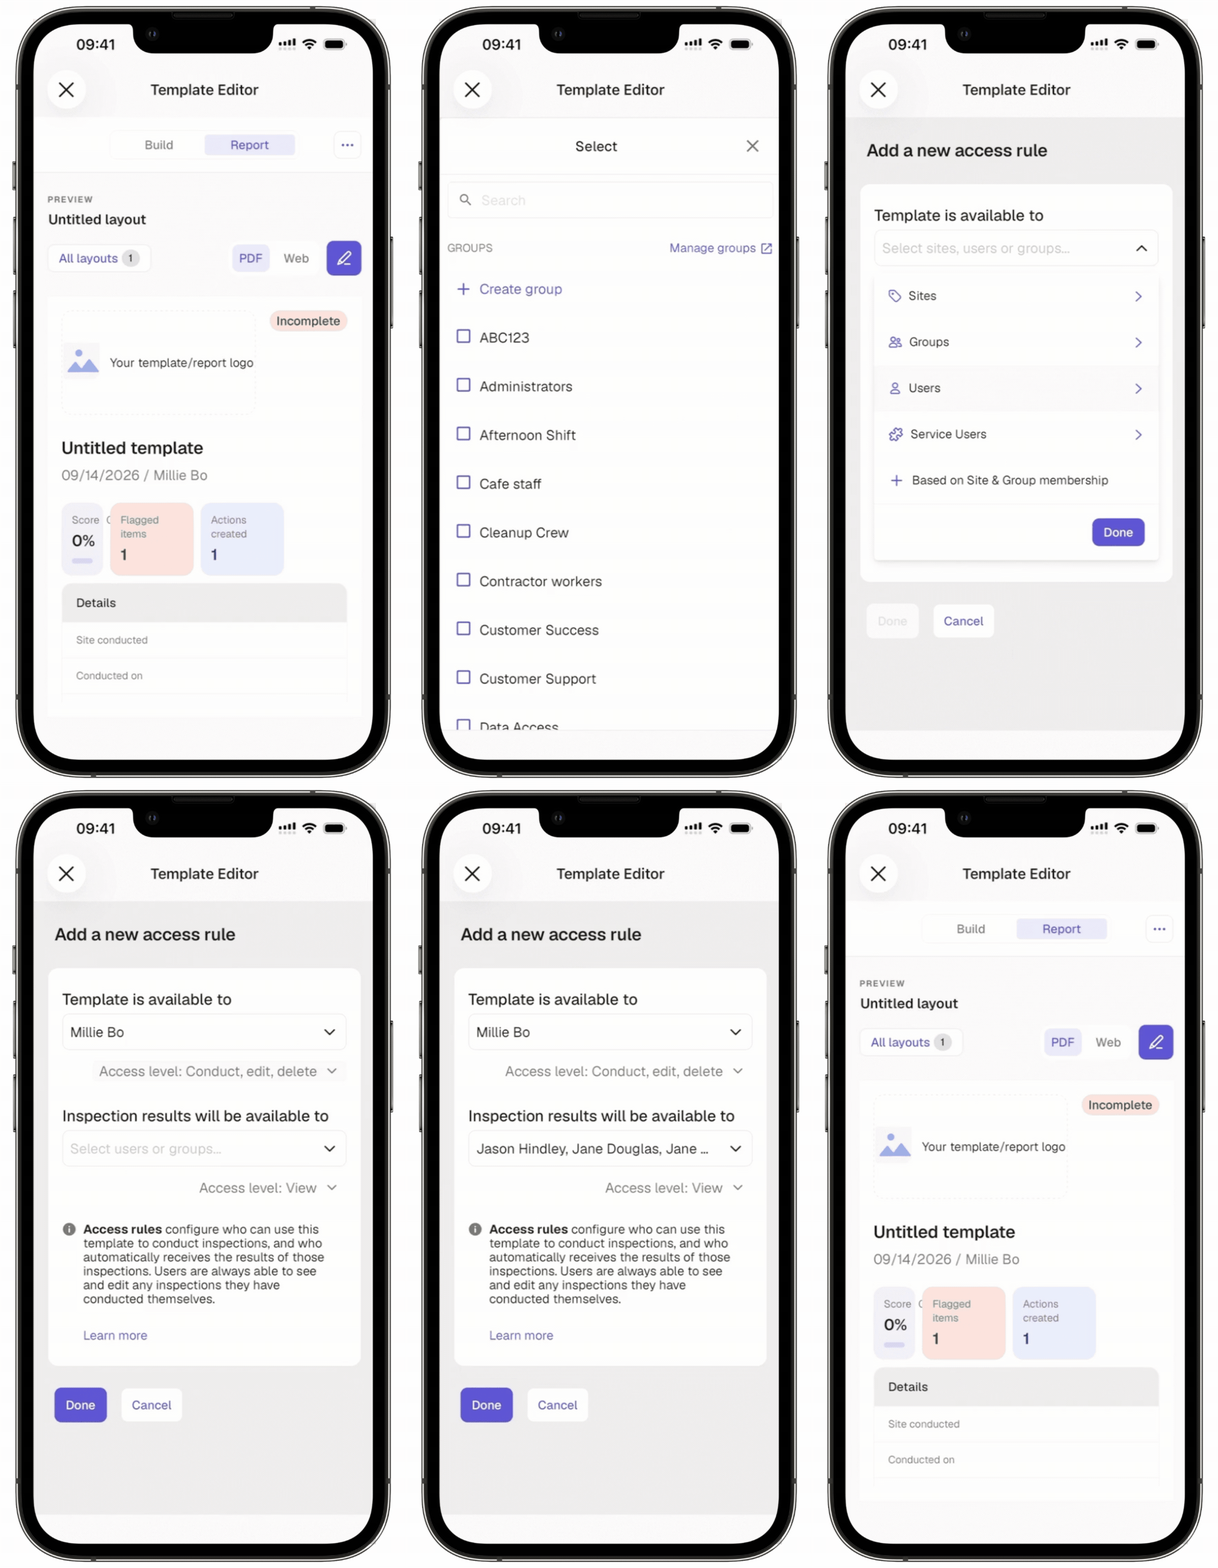
Tap at the upper-right of your screen and select Manage access.
You have the following options to manage your template's access rules:
Tap Edit rules to edit an existing access rule.
Tap New access rule to add a new access rule.
Tap Save and apply after editing an existing access rule or Done after adding a new one.
In the pop-up window, select Yes, apply to all to apply the updated access settings to both existing and future inspections, or No, apply to future only to apply them to future inspections only.
Tap at the upper-left of your screen.
Tap Build at the top of your screen, then tap Publish on the upper-right of your screen to publish the template. If you're not ready to publish the template, you can go back to the templates list and come back when you're ready.
Need more help?
Was this page helpful?