Dernière mise à jour: 3 novembre 2026
Que sont les Chemins ?
Dans Mitti, la nouvelle interface Chemins vous permet de regrouper différents types de formations et d’exigences dans un parcours d'apprentissage guidé unique. La nouvelle interface s’appuie sur les Flux de travail d'implémentation avec un outil de création repensé pour créer et gérer les formations. Utilisez la nouvelle interface « Chemins » pour implémenter les nouveaux employés, les accompagner dans l’évolution de leur rôle et dispenser des formations récurrentes de conformité.
Chaque chemin est composé de blocs, chacun représentant une étape d’apprentissage. Vous pouvez combiner différents types de blocs pour répondre aux besoins de votre équipe. Par exemple, un chemin destiné aux nouveaux employés pourrait commencer par un bloc « Texte » pour accueillir les employés, suivi d’un bloc « Document » présentant la politique de votre organisation. Un bloc « Confirmation » leur permet de confirmer qu’ils ont lu et compris le chemin. Vous choisissez si les responsables doivent terminer les blocs dans l’ordre séquentiel ou en ordre libre, puis vous suivez leur progression.
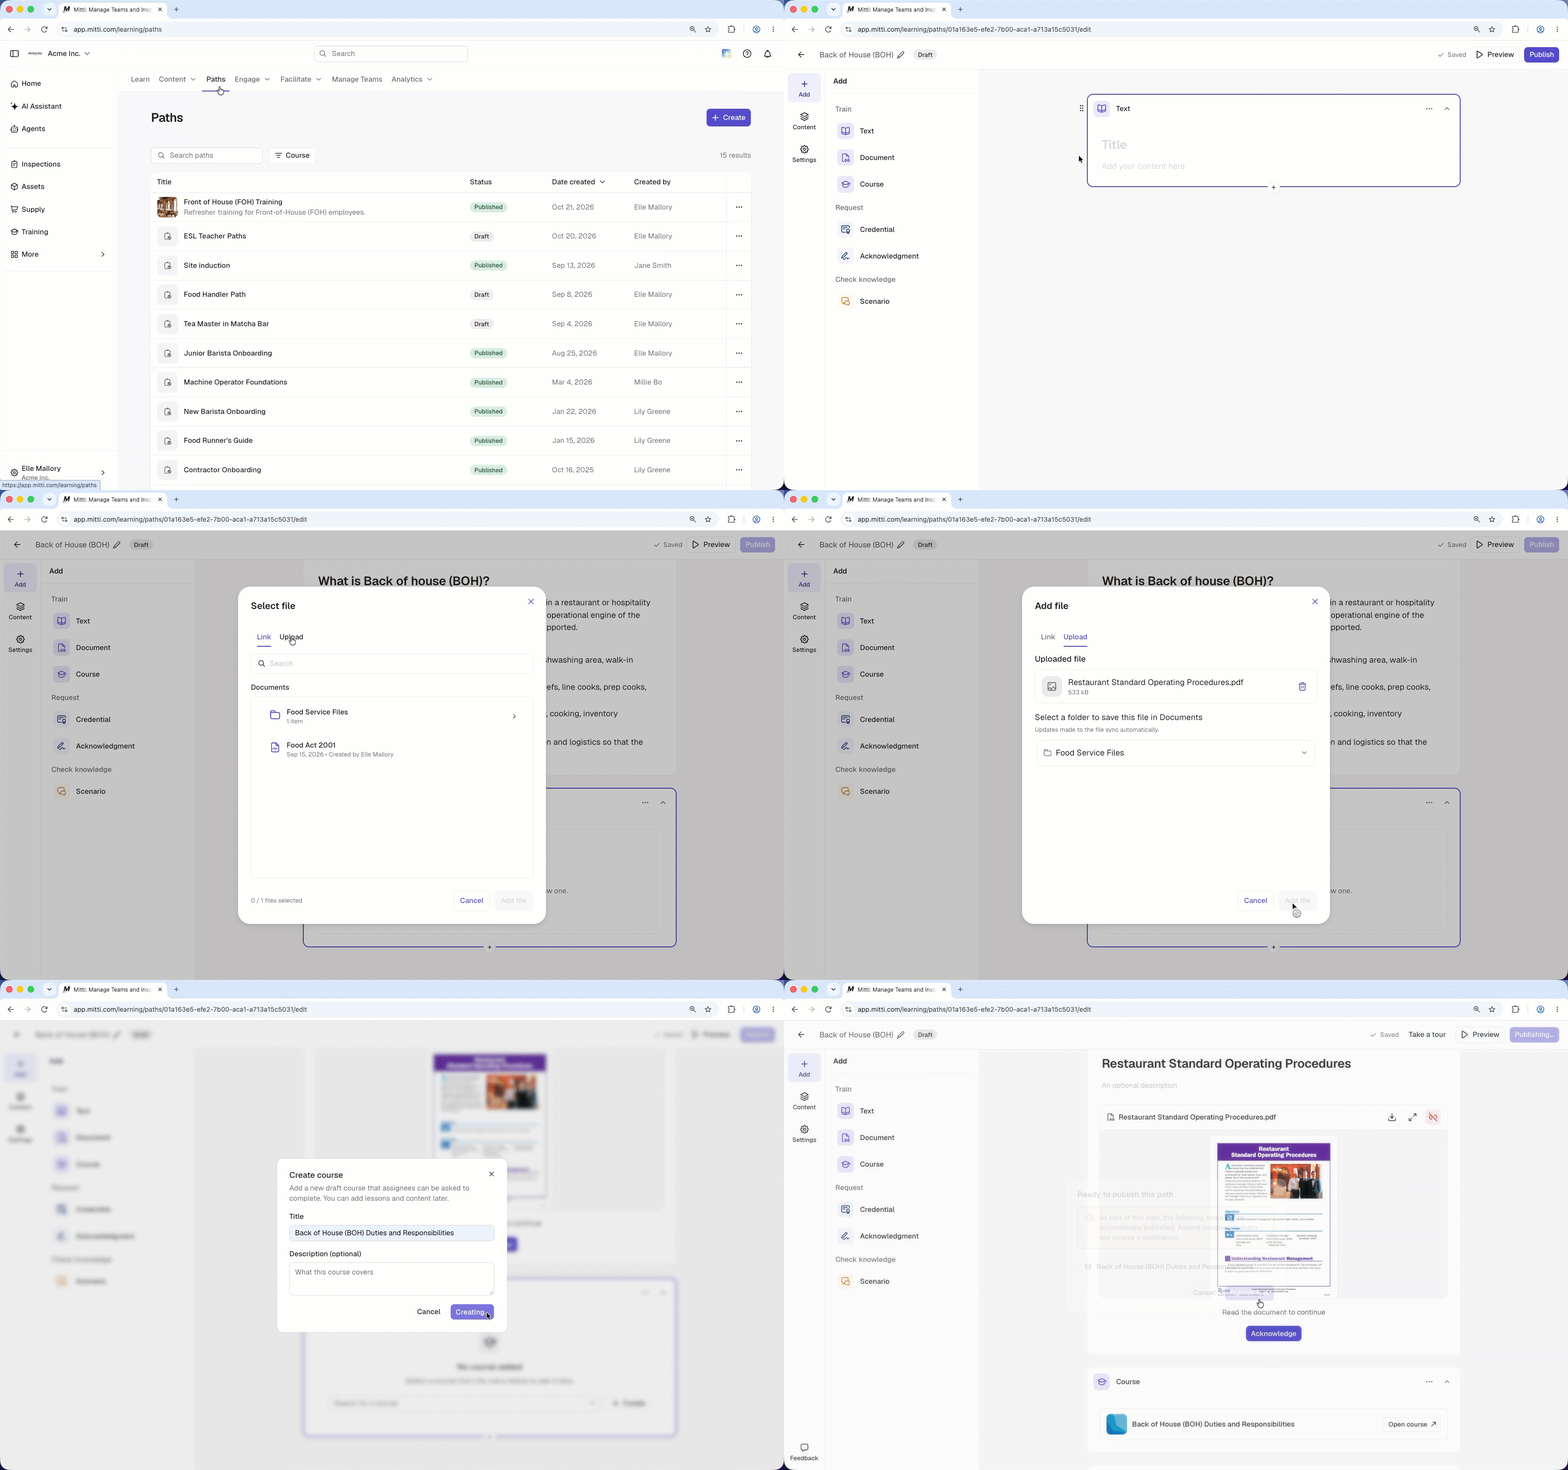
Ce dont vous aurez besoin
Assign a path
Click Formation from the sidebar or in Plus.
Click Parcours tab at the top of the page.
Select the path you want to assign.
Click Attribuer on the upper-right of the page.
In the pop-up window, click next to "Groups", "Sites", or "Users".
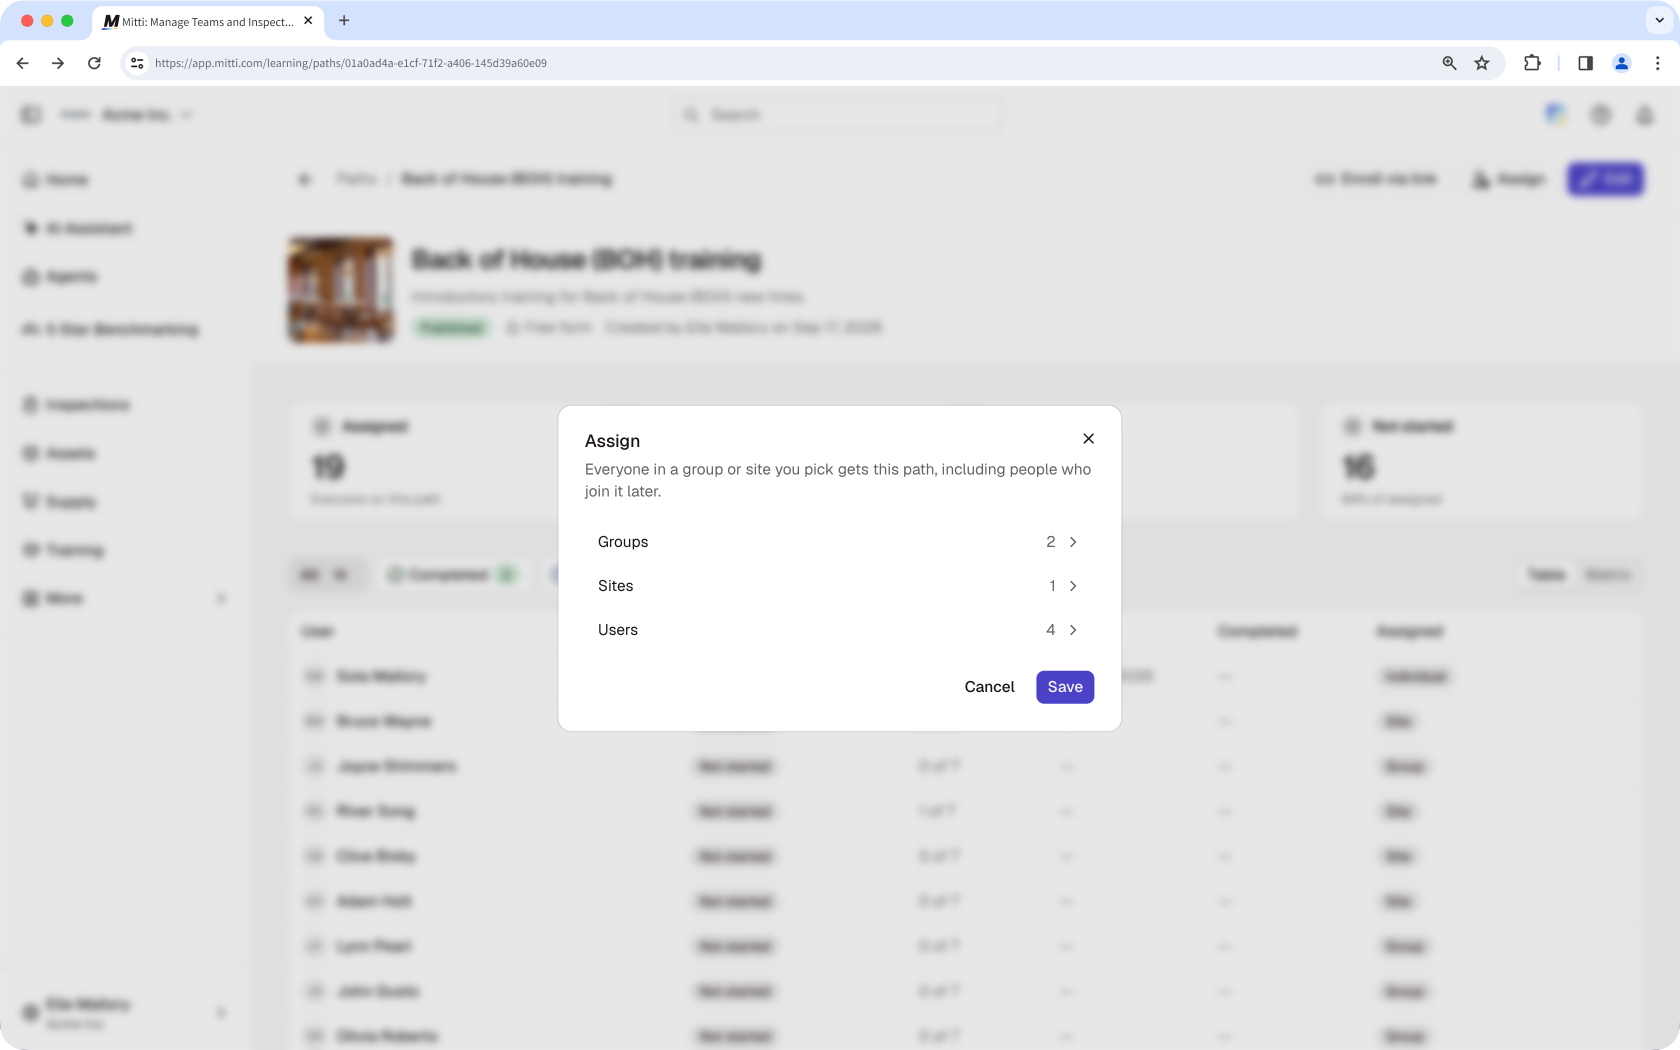
Select the groups, sites, or users you want to assign the path to.
Click Enregistrer.
Share a path
Click Formation from the sidebar or in Plus.
Click Parcours tab at the top of the page.
Select the path you want to share.
Click S'inscrire via un lien at the top of the page.
In the pop-up window, select who can access the path link. Selecting Toute personne ayant le lien requires Premium Plan or Enterprise Plan.
Uniquement les utilisateurs attribués: Only users assigned to the path can use this link.
Toute personne ayant le lien: Anyone on the internet with the link can sign up in your organization and enroll.
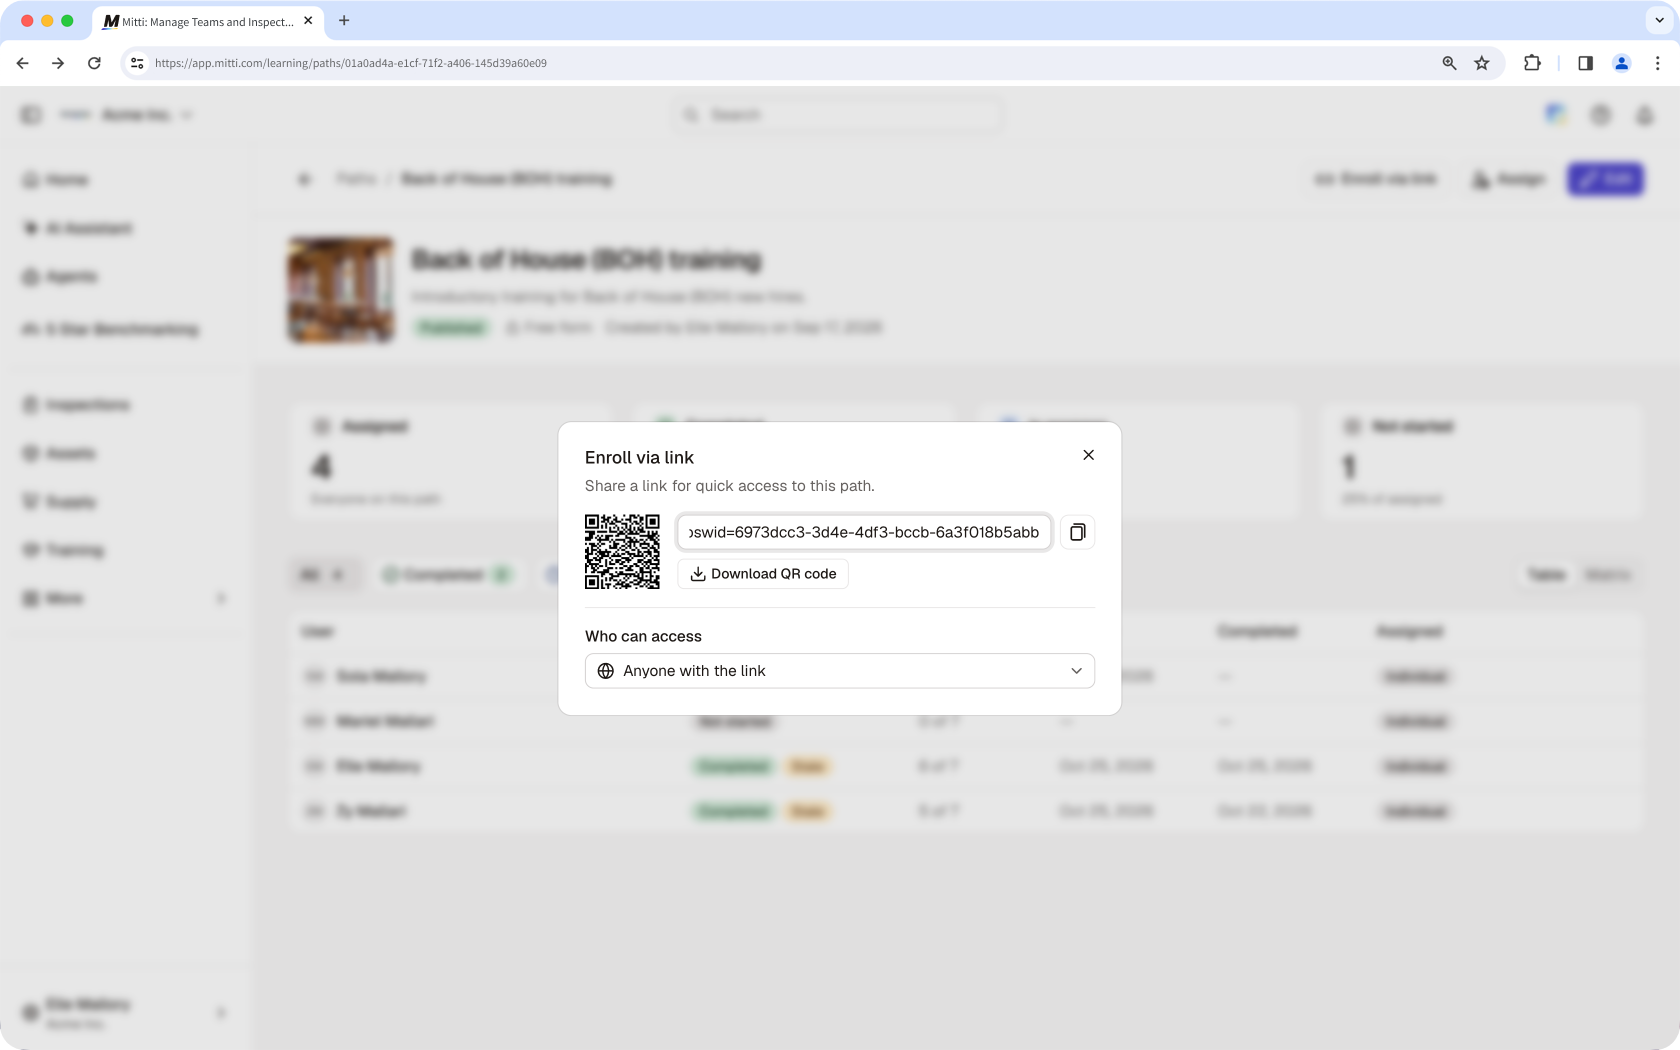
Click to copy the link or click Télécharger le code QR to download a QR code of the path.
Besoin d'aide supplémentaire?
Cette page vous a-t-elle été utile?